This post may contain affiliate links. As an Amazon Associate, I earn from qualifying purchases. Please read my full disclosure.
We plan on spending a decent amount of time in the front of the van moving from place to place, so we decided to do a full dashboard restoration to kick off the interior build. I wanted to get behind the dash to update some wiring and dust some of it out.
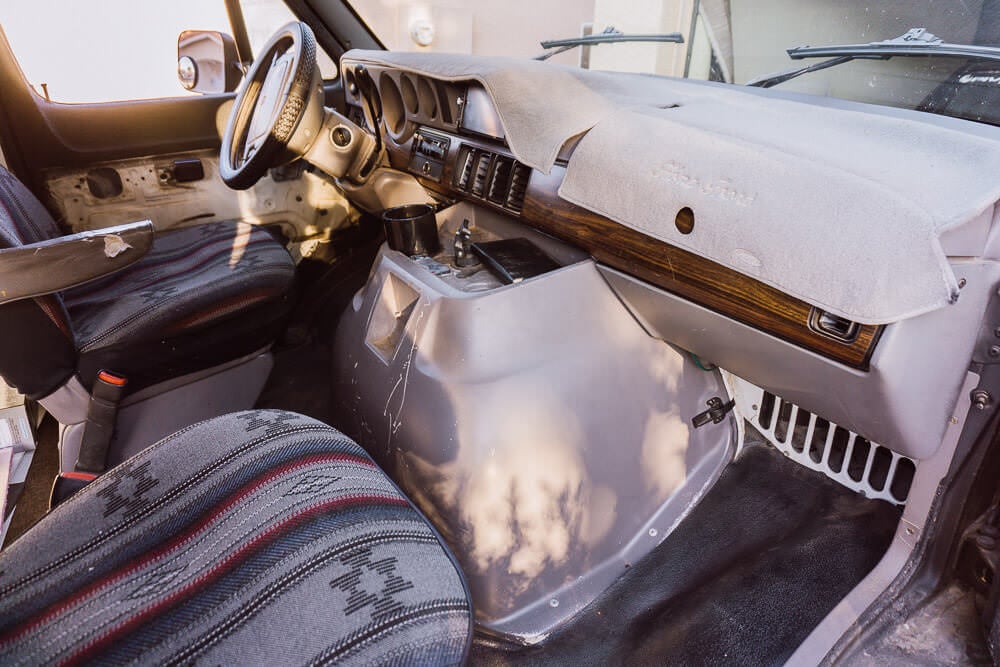
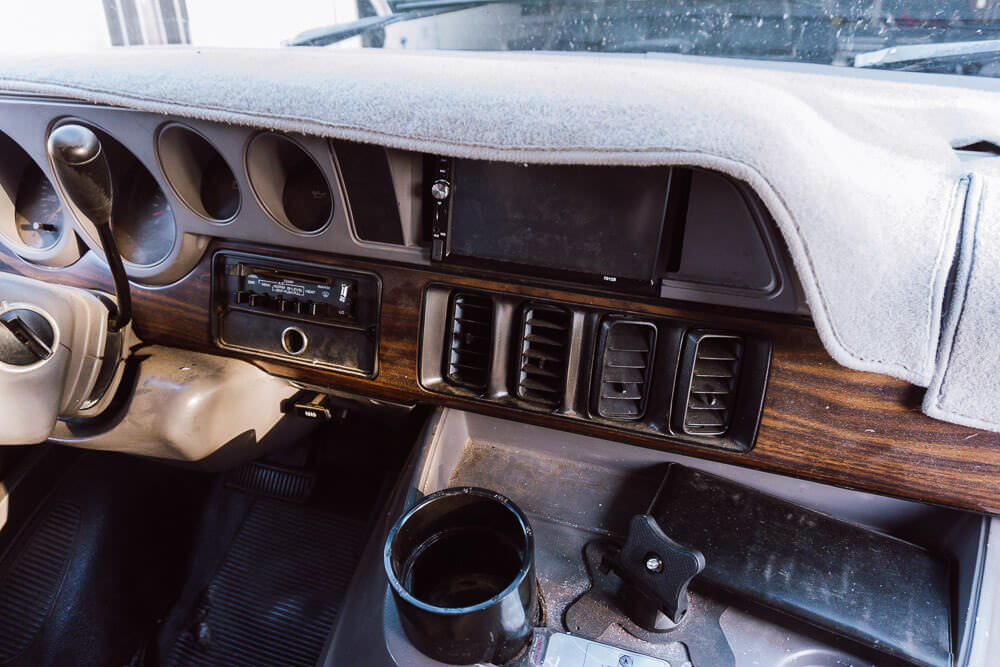
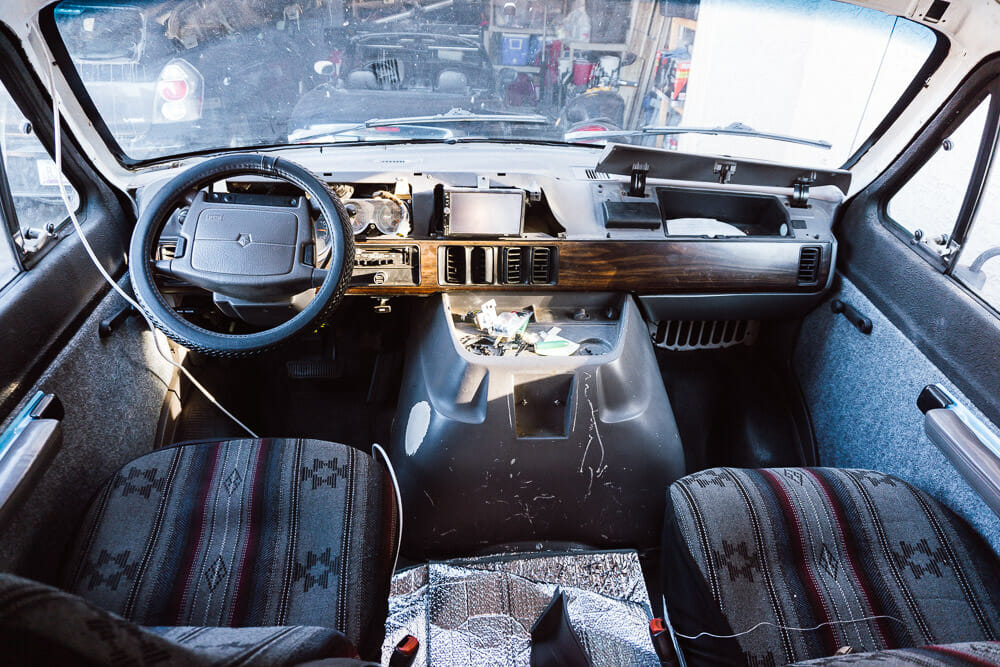
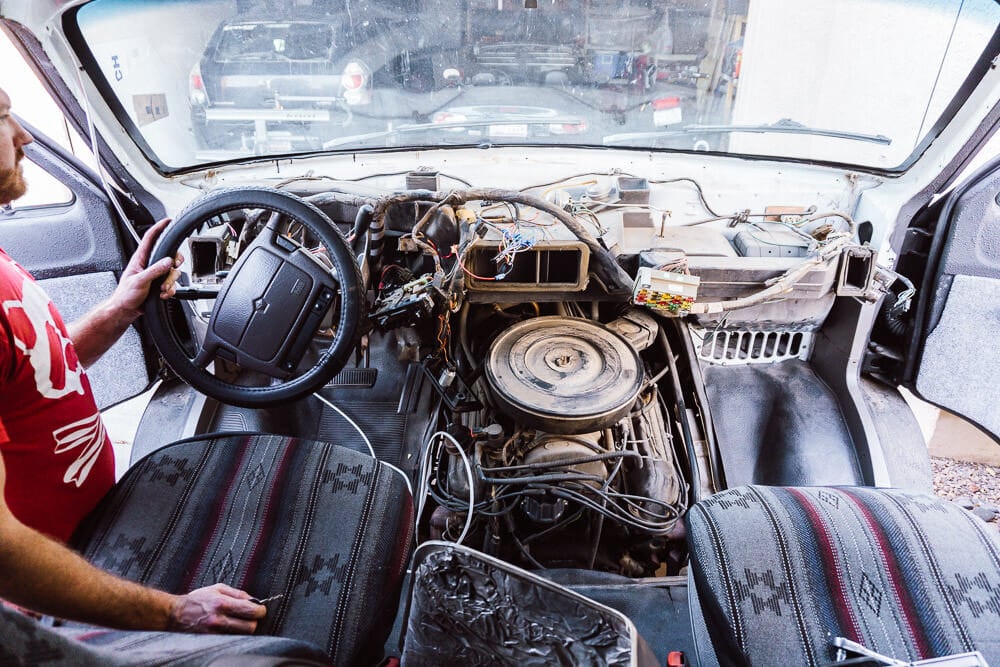
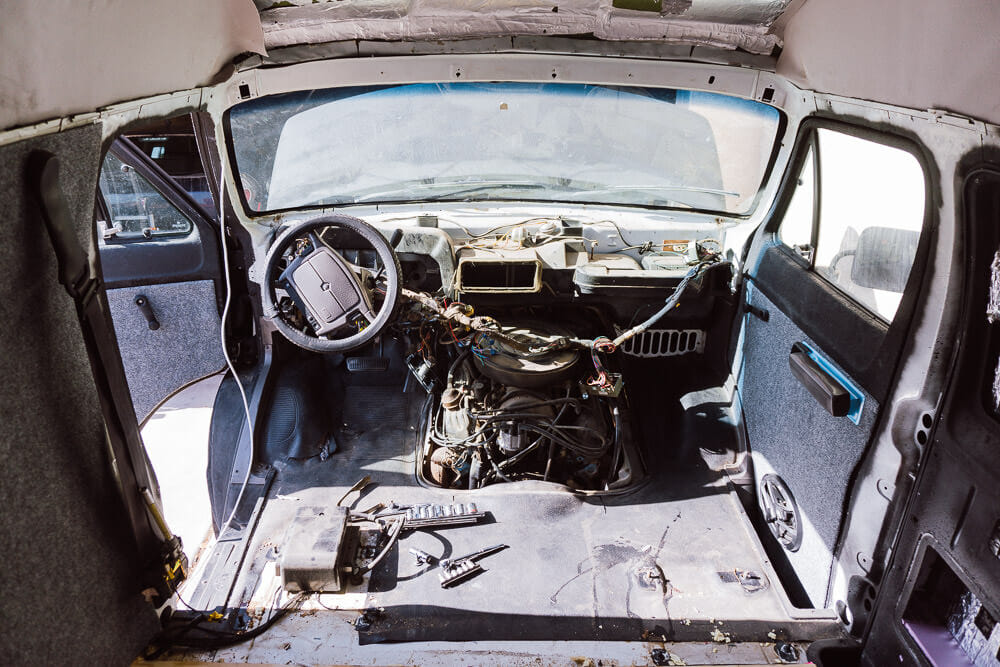
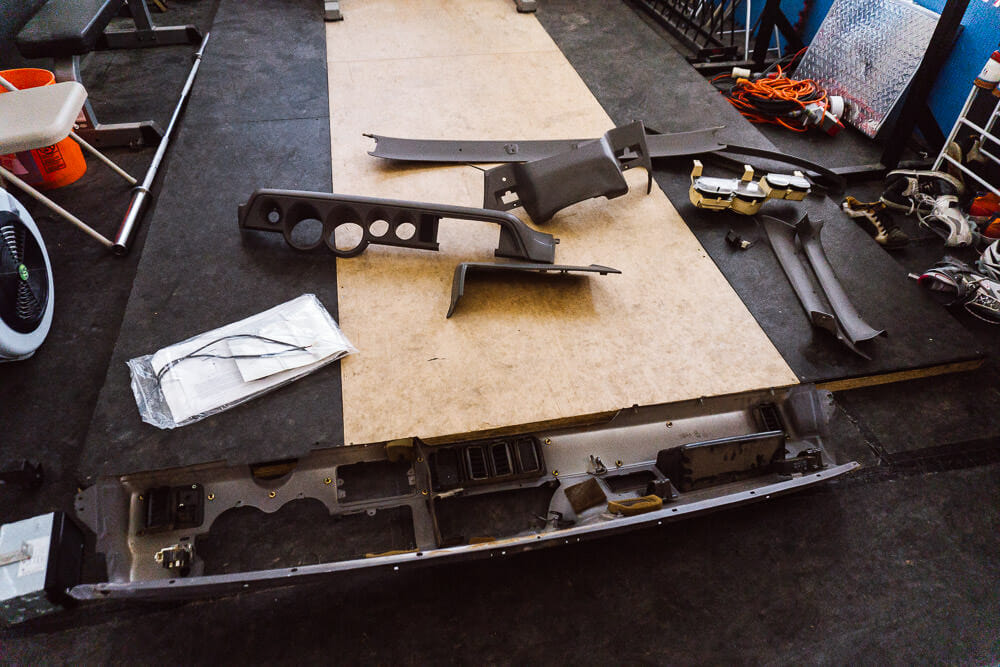
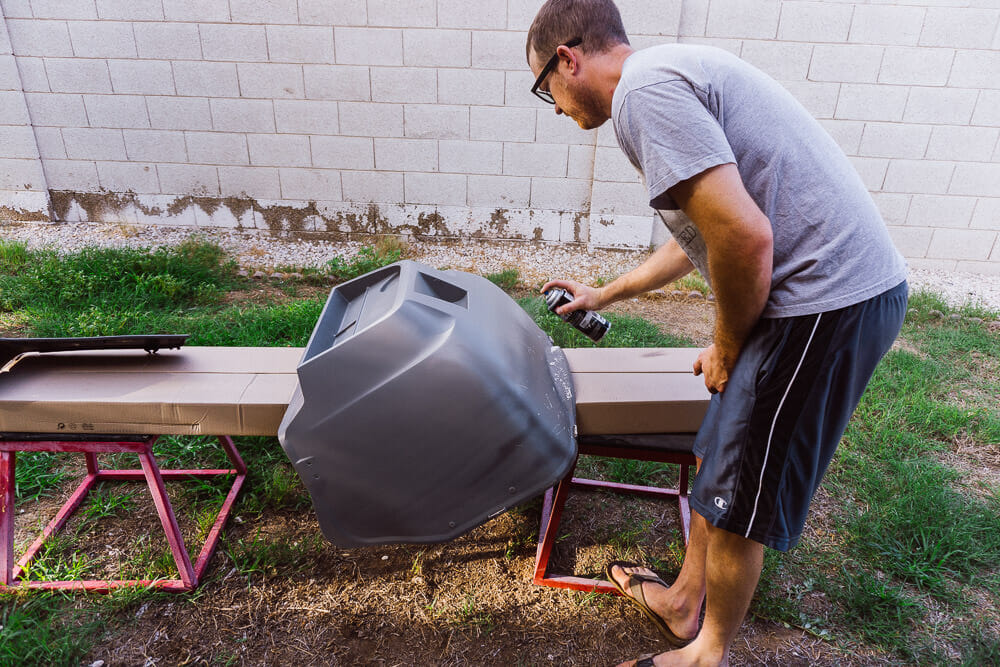
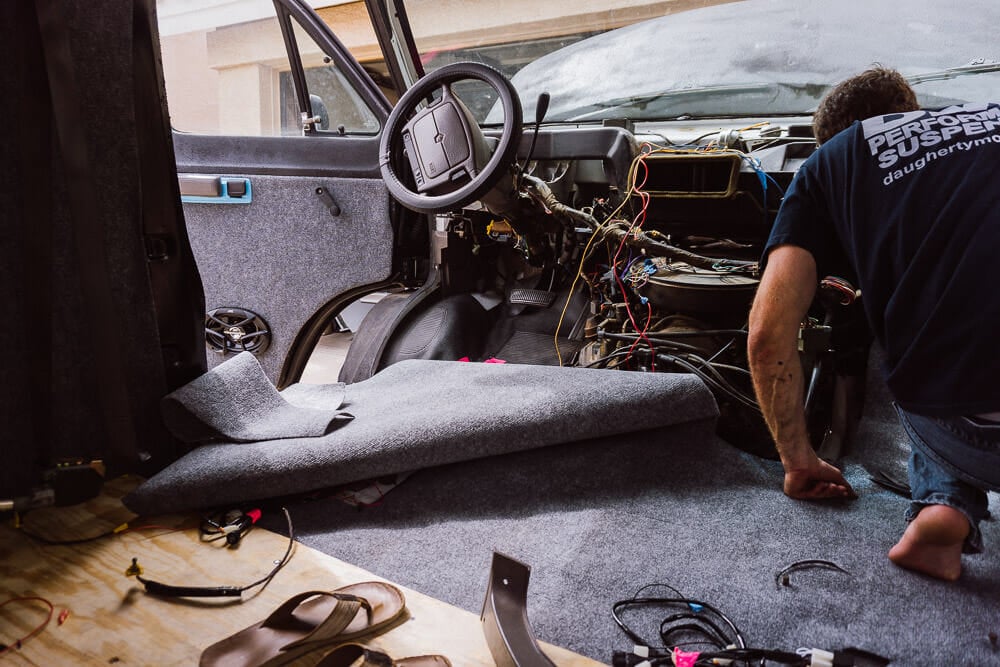
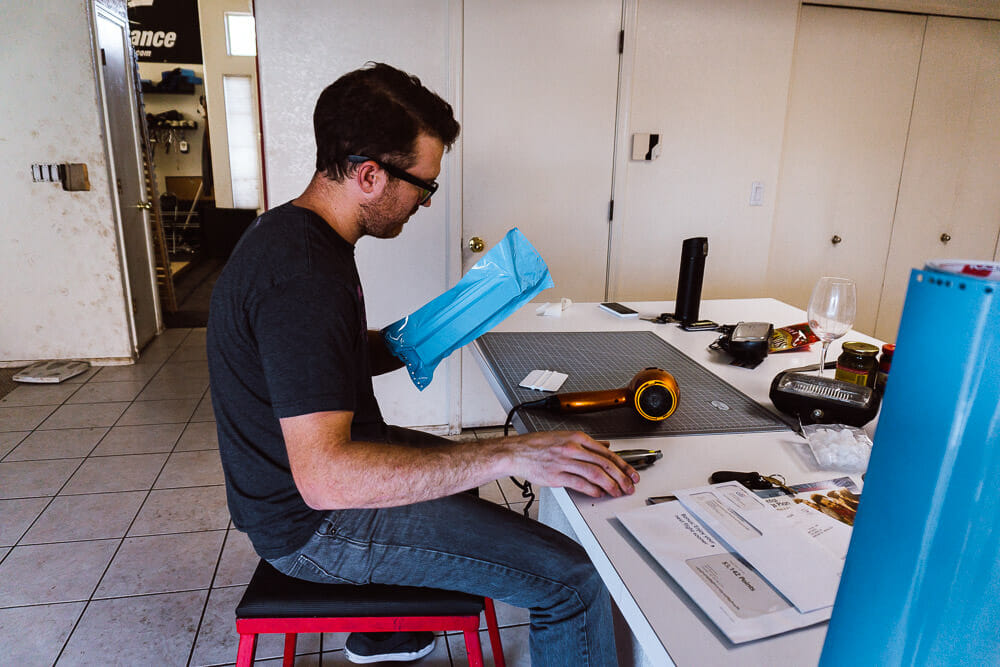
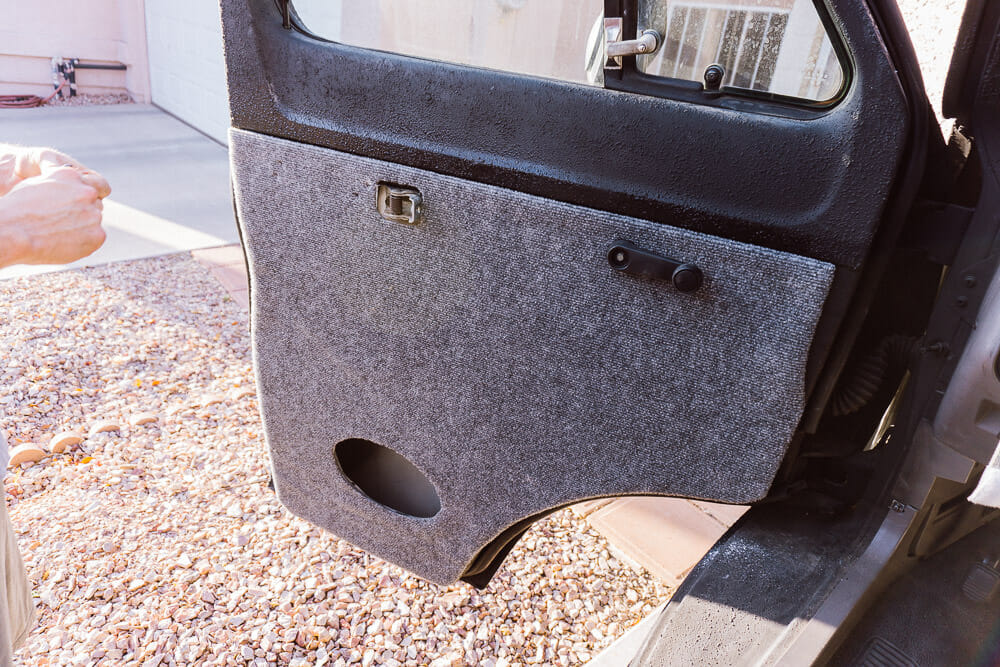
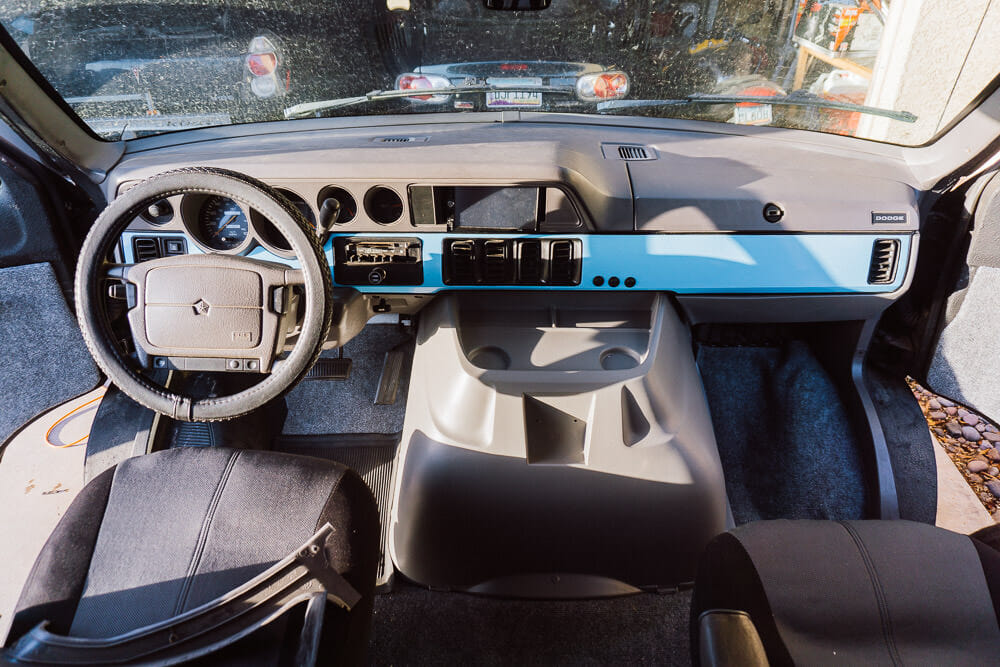
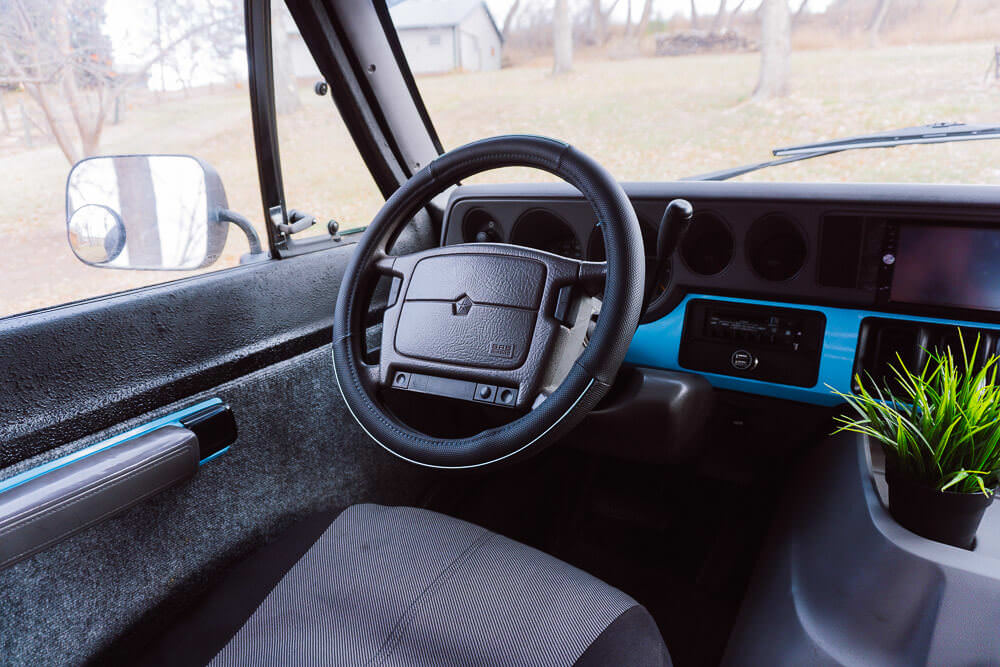
The first step was to take it all in. I’d done a few minimal rebuild projects before so I knew how much cleaner we could make this thing if we tackled the big areas. This was Kate’s first so she was less enthusiastic until it started coming together.This cupholder was my favorite part. It just seemed so unnecessarily crude; a dremeled out PVC that was cemented to the console. You can buy these perfectly functioning dash cup holders from Amazon for 7 bucks shipped, so this project seemed like misplaced effort. It’s a bit difficult to see, but the stereo deck is crooked too, which bugged me.Every dash restoration starts with a teardown. Removing the plastic covers revealed a nice solid metal frame. It also gives a good insight as to why vehicles that are two decades old don’t fare as well in crash test safety. Everything in here is hard and sharp.Most everything was now torn out so we’re past the point of no return. My favorite part is that the van still runs and drives at this point, so we are one can of silver spray paint away from driving into the desert to play Mad Max.Removing the seats gave me more room to get to all of the wiring. I had to run several new runs through the firewall and put in some relays which took an annoying amount of time in the Phoenix heat.All of the interior bits removed and cleaned up. We just wiped the dust off, but everything was in pretty good shape.This is the first time I’ve used the SEM Color Coat plastic paint and it worked incredibly well for painting the motor cover. Usually, I just grab Krylon because of its wide availability, but this paint was specifically made for car interiors and it does a great job of that OEM look. I would definitely use it again.Laying down the carpet was a major PITA. We skimped on the custom molded option because we thought we could get away with outdoor carpet and save a few bucks. Getting around the 3D wheel well just proved too much for a 2D material. It seemed to clean up OK in the end, however.We ordered a roll of Oracal 751 Ice Blue vinyl to add some consistent color throughout the van. Wrapping the plastic bits is tedious and can get frustrating to the detail oriented, but once you put them in an old van they really give a fresh new look to things.We had one piece of the old door panel cardboard and we traced it onto a new plastic sheet. We then covered the new sheet in carpet and added retainer clips where the OEM ones were so it could snap in place. This changed the feel of the cabin immediately.All of the dash panel pieces came together with a teeny tiny day of assembly and we’ve got a nice aesthetic to match the rest of the van too.
Kate is the lead content creator for ParkedInParadise.com and has spent over two years living in a camper van conversion. She has traveled through 48 US states and writes about van life, camping and RV living.

Comments (0)