
How To Soundproof Your Camper Van Conversion
Work vehicles are notoriously noisy. They are not designed for luxury, and cruising around with large panels of sheet metal is a recipe for vibration and acoustic amplification.
Depending on your sensitivity, a noisy vehicle can be wearing when you’re driving and unnerving at night when you hear footsteps two blocks away. The simple an cheap solution is to use earplugs. But if you’re doing a full van buildout, then it’s worth at least looking into noise reduction options.
Noise dampeners make the biggest difference in large cargo vans like the Mercedes Sprinter or Ford Transit. Some people choose to install soundproofing only in the engine compartment of their smaller vehicles.
If you’re planning to live in your van full-time or even just spend a lot of time on the road, it’s important to consider soundproofing. It can be difficult to find a quiet place to park for the night, and you don’t want to be constantly disturbed by outside noise.
Equally, we find our van to be a lot cozier when we know that our conversations, movies, and music are not causing a disturbance to anyone outside. In a lot of cases, we have relied on our soundproofing to prevent people on the outside from knowing that we are even inside the van at all. It definitely helps to ward off prying eyes and uncomfortable questions.
Vibration and Resonance
Usually the biggest noise contributor in a van is is large, thin sheets of metal that reverberate. If you take an empty sprinter and hit the wall with a stick, it’s going to amplify that sound as the panels vibrate, similar to a gong.
This effect can even happen just with sound waves hitting the walls. Outside noise hits the panels and because they can vibrate – sound is transferred right through.
Now, if you were to put your hand on that wall and hit it, the sound would not be as loud or last as long. Effectively, you want to deaden these walls without having to put your hand on the walls while driving around. This is where sound deadening come in.
Sound Deadening In A Campervan
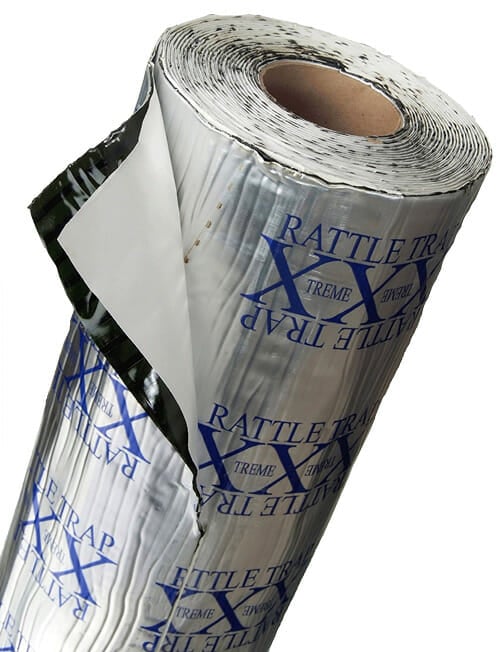
Fatmat Rattletrap and Noico are popular peel and stick products that can be applied to your vehicle to dampen the noise. The key is in the high viscoelasticity of the material.
Basically, this means that if you were to stretch them it would take the material a long time to return to its original shape. This slow deformation means that when sound wave hits one side of the material, it can’t travel to the other side of the material.
This is a potent effect, and it doesn’t take much deadening material (as little as 25% of a large surface) to really reduce vibration traveling through your van walls.
Peel and stick sound deadeners address a large portion of the noise and are easy to install at a reasonable price. This is the route that most people take if they choose to add a sound dampener.
If you want to try and tackle every noise source, you’re looking at thousands of dollars and a week of work. If that doesn’t scare you off, we recommend the sounddeadenershowdown.com site for a proper dive into fully soundproofing your campervan.
Soundproofing With Cheaper Alternatives
You may come across folks using cheaper alternatives to the automobile specific materials like Fatmat and Noico. Peel-and-seal rolls that you can buy at Home Depot are popular because they look quite similar to Fatmat at 1/2 the price.
And that’s because generally they are the same materials: aluminum and rubberized asphalt. Unfortunately, these materials are made for roofing, and aren’t made with the same requirements in mind.
The mixture of butyl and carbon in the asphalt isn’t designed with high viscoelasticity, so while in theory they can work well, there’s no guarantee of how well they will deaden sound.
In addition, these material have been reported to melt in the heat – so much that some people have had the material detach from their ceiling and bring down the headliner in their car. Not to mention the black carbon leaking out of their trunk.
In our opinion, this is one of those things where its best to use purpose-designed products or just skip sound deadener altogether. It’s not worth the potential issues of using roof sealer as a deadener to try to save a few bucks.
How Much Sound Deadening Material Do You Need?
You don’t need 100% coverage for sound dampening products to work. With proper deadeners, you can use as little as 25% to reduce the vibrations as long as the materials is cut up in sections and spread out evenly to cover the majority of the walls.
| Where To Apply: | |
|---|---|
| Walls | Doors |
| Floor | Wheel Wells |
| Ceiling | Underneath Hood |
| Cab |
50 square feet of sound dampening material should give you enough supply to do basic coverage of the large areas of a Sprinter van. To get 100% coverage on the largest vehicles, you can expect to use up to 125 square feet of material.
Materials For Installation
- 50 – 125 SQFT. Sound deadener
- Scissors
- Measuring tape
- Mini roller
- Hairdryer (optional)
How To Install Sound Deadener
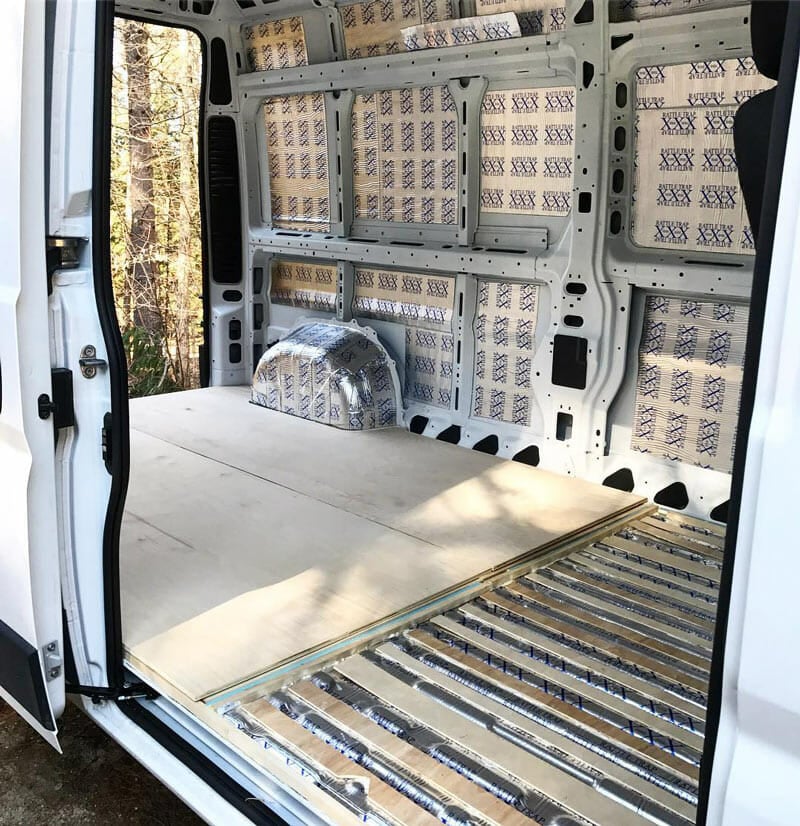
Sound deadener is relatively easy to install. If you’re going to to it, this should be one of the first steps of your build. Sound dampening materials will be attached directly to the metal of your vehicle. It goes underneath any insulation or moisture barriers that may be applied afterward. Keep in mind, you don’t need to cover the whole surface to be effective.
1. Clean your vehicle
The first step is to clean the surface you intend to apply the sound deadener. Remove any body panels, dirt or grease. Make sure to completely dry off the area before installation. Moisture can inhibit the sticky material from bonding. The last thing you want is for your sound deadener to start falling off because then it won’t work!
2. Measure out your surface area and cut
If you’re aiming for full coverage, take accurate measurements of each section of your vehicle. A cardboard template can be really helpful here. Use a sharpie marker and draw out your cut lines. Sound deadener can be easily cut to size with a pair of scissors or a box cutter.
When it comes to oddly shaped surfaces like a wheel well or cab floor, cutting strips of 5-6 inch sections is a good way to piece everything together.
3. Peel and stick
Applying the sound dampener is as simple as peeling off the adhesive backing and sticking it to the metal surface. Try not to touch the sticky side with your hands for the best results.
4. Wheel Wells
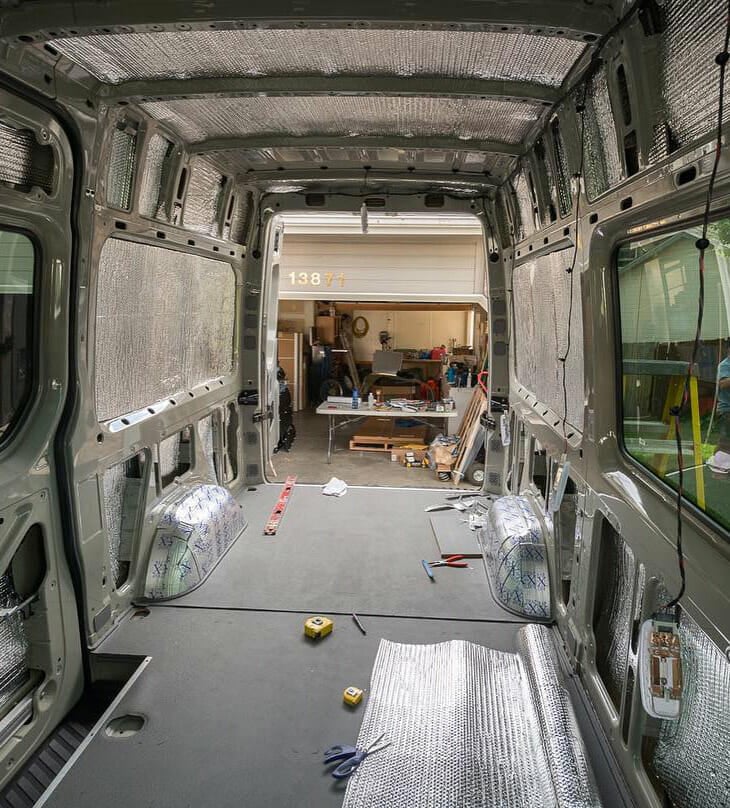
While partial coverage is effective on the walls and ceiling, you may consider fully covering the wheel wells. A huge amount of tire, road, and exhaust noise comes in through this spot.
By covering the wheel wells you’re not only reducing vibration, but also trying to completely block the noise with the mass of the material. Deadeners aren’t really designed for this, but they do help a little bit so it doesn’t hurt unless you plan on doing it properly with a heavy material.
Pro-tip: heating up the material will make it more malleable for curved surfaces.
5. Use a roller to make sure the panels are flat
The last step is important. Deadeners need to be firmly applied to work correctly. It is highly recommended that you use a roller press, bottle or equivalent during the installation process. Pressing with your fingers is unsafe because the edges of the foil are sharp!
Noico material comes in pre-cut strips and has an embossed foil which indicates when it is installed correctly. In this case, you can visually see that each section of the sound dampener is laid flat. Fatmat Rattletrap comes with a roller included for installation.
Soundproofing For Comfort
Soundproofing your campervan is not necessary, but for less than $150 you can greatly improve the comfort of your vehicle. Sound deadening material will reduce road noise and sounds coming from the outside world as you’re trying to sleep. If you have the funds, there really isn’t a downside to planning this step.
This article covers the basics and what we feel is the cost effective technique for most van builds. If you want to get into some more advanced theory and have time do dive down an audio rabbit hole, head over to sounddeadenershowdown.com and the forums at diymobileaudio.com.
Do you think an applied rubber product such as FlexSeal would work for this?
probably not. The spray would leave a film that is too thin and has little mass to make a difference. You would spend$200 on 20 cans.
I might have missed it. If I am insulating the van is the soundproofing material going to make a big difference?
Jason- it depends on which insulation you use. Spray-foam will be the best combination of dampener and insulation because it is adhered directly to the van walls, dampening the reverberation from the large metal panels. It will also absorb the sound. Most other insulation will only absorb sound as it is sitting in front of the walls, meaning that the large panels can still reverberate. Insulation will all have some sound absorbing properties so it will definitely help.
In our opinion the difference is minimal and sound dampening is best to be considered if you have a fairly lucrative budget for your build or have some kind of situation where you need a very quiet van.
Yes. Thermal and audio insulating operate on very different principles. The thermal insulation would do very little, if anything. You should use both if sound and thermal protecting are important to you.
I’d suggest applying sound deadening materials in the summer months. It becomes much easier to apply when its warmer.
You said 50 Sq Ft is enough to do a Sprinter van. Is that for the 144″, 170″ or the 170″ EXT.?
Thanks!
Great information we are a customizing company in India and would like to manufacturer Camper vans
Please suggest us the best ways to do so.
The best advice is to live it or in it . I personally have changed my floor plans 6 times including bathroom and sleep areas and purchased a additional R.V. motor home and now in process of completely redesigned to the bear walls and steel frames or hire me as lead designer i
When insulating the floor did you do 100% coverage or partial. in the photos I can’t tell if you’ve put pieces of wood as a filler in the dips or if you’ve only applied sound deadener to the indents in the bed of the van?
This information is so helpful! I am building out a pro master Cargo van and will need to cut out windows for the back doors and kitchen area. Should I do this first, or install the sound deadening material first?
Thanks!
@Jamie — cut out your window first for sure. Have fun!
Or maybe he should have done entire inside and by his second or third cut out maybe withdraw that question , maybe ????
quote ” This slow deformation means that when sound wave hits one side of the material, it can’t travel to the other side of the material. This is a potent effect, and it doesn’t take much deadening material (as little as 25% of a large surface) to really reduce vibration traveling through your van walls.”
Do you know if that is noico and Fatmat Rattletrap specific or works with all bitumen based material? I actually am about to buy a very similar bitumen based product but different/local brand.
Regards Alexander
I bought a ford transit and it has soundproofing its black came from ford not sure if i need anything else it has plugs i can take off havent tried yet
In have spray foam already but still would like the ride alittle more quiet, can I apply the Fatmat directly over the spray foam and then insulation.
Hey this is great information,I think cardboard is a great sound barrier to try . especially when you want to use your van for different things
On the topic of insulation and / or soundproofing , I personally have been living in my cargo box 6 months and I am a musician and live in the south so heat was first but noise is a keeper of staying awoke and irritated so applying peel and stick is not option so I doubled my foam sheets of insulation originally 1/2 styrofoam with foil back using epoxy adhesive now 3″ yellow foam insulation sheets but still noise is in barreable to myself and others outside what’s next if anything
Very useful guide. I think it will made the trip easy. Thanks for share!
try professionally applied sprayed bed liner, much thicker, bonds well to rid of vibration and seals
I used Frost King brand 1/8″ thick closed cell foam, adhesive backed, foil faced HVAC duct insulation on the floor, transmission tunnel, interior firewall, aft wall. and door panels behind the panels for thermal and sound transmission in my mini-truck. It is semi-rigid and you need to press it down to stick. This is not that roof asphalt material.
It made a huge difference in reducing sound that even the last mechanic to work on it couldn’t stop talking how quiet the truck was.
Does this sound like the same material as Rattle Trap? I think they might have a thicker top layer.