
Installing DIY Van Insulation
It can be difficult and even dangerous trying to live out of a vehicle in cold climates. However, with proper van insulation and heat management you can be comfortable in sub-freezing temperatures. Insulation keeps heat in your vehicle and is complimented by our tips on how to heat your van in winter.
The Three Types Of Heat Transfer
If you want to keep your DIY camper as warm as possible throughout the winter, you will want to address all three types of heat transfer: radiation, conduction and convection.
If you are unfamiliar with these terms, read our post on the three types of heat transfer.
When building out your van, you want to resist heat conduction by insulating the ceiling, walls and floor with materials that have a high R-value.
R-value, Space, and Expenses
Living in a vehicle is a unique situation. In a perfect world, you can take the highest R-value materials, stack them a foot thick and hibernate in your van throughout the entire winter. Unfortunately, space constraints are a huge issue in the van world.
Every extra inch of insulation on the walls is going to make your living area that much smaller.
Not only this, but we don’t all have unlimited funds to insulate our vehicles to the highest degree. Therefore, proper van insulation becomes a delicate balance between R-value, space, and expenses.
R-value is measured per inch. This means if you stack a material to 2 inches thick, you get double the R-value! Checkout the chart below for the R-values of some common materials:
| Material | R-value per inch | Thickness for R-6 | Absorbs Water? |
|---|---|---|---|
| Polyisocynurate (Polyiso) | 6.4 | 0.92 in | No |
| Extruded polystyrene (XPS) | 5 | 1.2 in | No |
| Expanded polystyrene (EPS) | 3.85 | 1.6 in | Yes |
| Yellow Spray Foam | 6.5 | 0.92 in | No |
| Thinsulate | 3.3 | 1.8 in | No |
| Fiberglass (rolls) | 3.3 | 1.8 in | Yes |
| Fiberglass (batts) | 3 | 2 in | Yes |
| Reflectix (no air-gap) | 1 | 6 in | No |
Many insulation values referenced here came from BuildAGreenRV.com
Dealing With Condensation
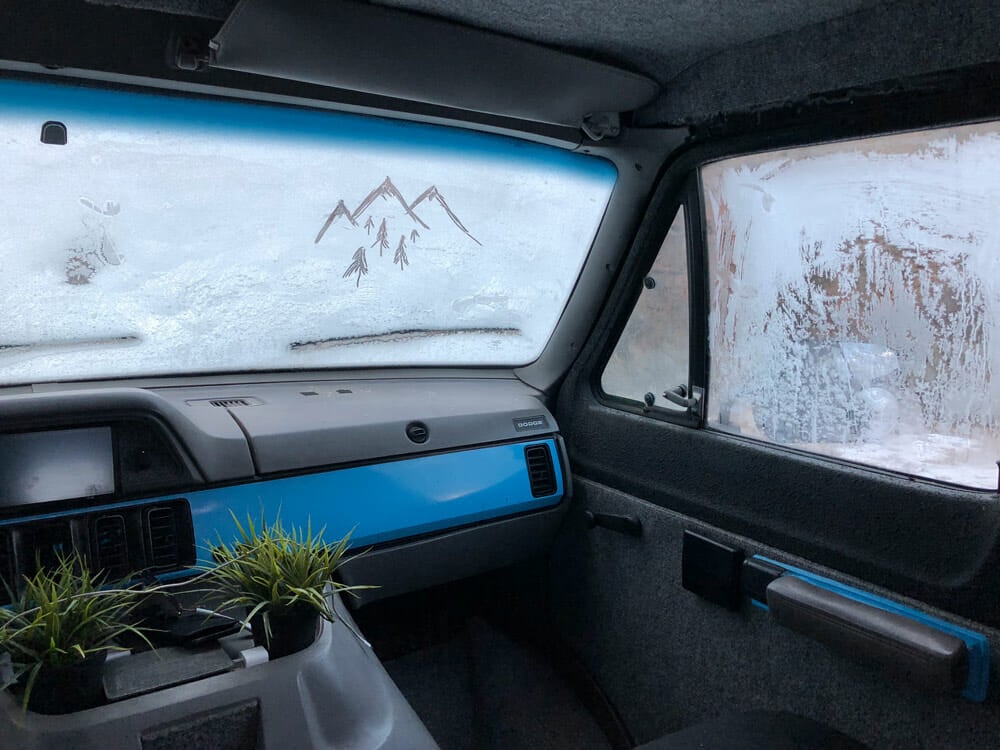
Condensation is a big factor for vandwelling. Any case where the warm interior air touches a surface that is colder, moisture from the air will become a liquid.
A prime example of this is moisture that builds up on the inside of windows when sitting in cold weather.
There is an ongoing debate among vandwellers on whether it makes sense to seal off walls with a watertight material before adding insulation. If moisture is allowed to build up within the walls of a van you may end up with mold or rust.
Adding A Vapor Barrier
The idea of a vapor barrier is to seal off the interior of the van and protect the walls and insulation from being exposed to any of the moisture that develops inside the van. In a perfect world, no moisture would reach these spots and they’d be a dry desert free from mold and rust.
The problem with adding a vapor-barrier in a vehicle is that it’s difficult to install practically. If there are any slits or gaps in the material, moisture can get behind the barrier and build up between the watertight surface and the wall.
And in a vehicle, there are a lot of little areas and spots that can rub where moisture can enter. The entire body is full of holes for things like lights, trim pieces, wires, and manufacturing seams.
The whole vehicle flexes around, you will be driving through the rain where your wheels can spray water from the underside. Vans have to serve more purposes than houses, so trying to add barriers can catch up with you.
If this happens, there’s nothing you can do. You won’t know there’s moisture until it begins to rust, and good luck trying to get all the way back there in the future to see it or treat it.
With this in mind, the alternative to trying to seal off with a moisture barrier to insulate with materials that don’t retain water and make sure you have good airflow to make sure there are no stagnant spots for sitting water.
Proper ventilation is key to reducing condensation.
Its still beneficial to seal off as much moisture coming in from the outside as possible, but it’s best to go in with the mindset that the interior will be exposed to moisture in some form or another.
- Read our post on avoiding condensation and moisture buildup in your van
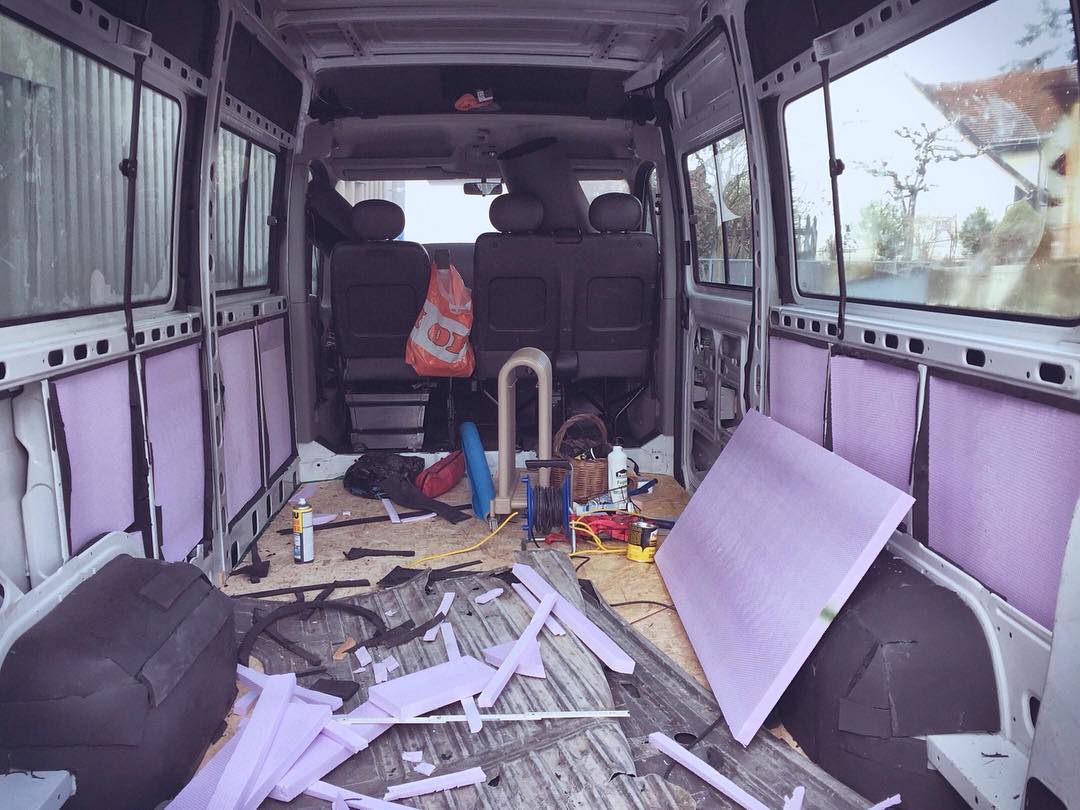
Before You Insulate Your Campervan Conversion
Before beginning the van insulation process, we’ll assume your van has already been fully deconstructed.
This includes removing any seating, or unwanted material from the walls and floor. All old rust spots should be removed and any gaping holes in the walls or floor repaired and sealed.
Have a plan for anything that might have to go behind the walls such as wiring or lighting. Ideally, you would have some of your wiring pre-planned and even installed.
It will be much more difficult to try and hide wires or move things around if you wall everything up first.
- If you’re going to add soundproofing, do that first! Read our guide on soundproofing your campervan
Getting Started With Van Insulation
Now that we’ve got the technicalities out of the way here comes the good stuff. What material should you use to insulate your van? The five main areas of focus are:
- Floor
- Walls
- Ceiling
- Windows
- Sealing everything up
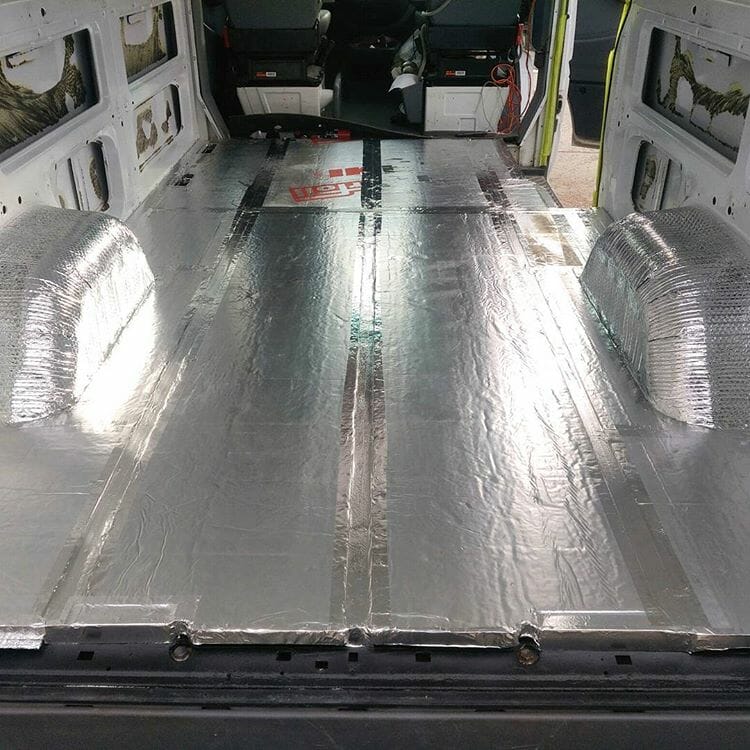
Insulating The Floor
Because heat rises, the floor is the least important part of the vehicle to insulate. Many people choose not to insulate their floor at all. Covering any holes in the subfloor will be of greater importance than laying insulation.
Pick a material that has a high R-value in the thinnest amount of space. We recommend Extruded polystyrene (XPS) for the floor. Or just go with straight plywood and skip insulating this area entirely.
XPS has an R-value of R-5. It is a dense material that would take a lot of weight to compress. Because of this, it makes the perfect material to build on top of. ½ inch of material is about all you need to insulate the floor.
Once the material has been picked, it should be fairly easy to lay down the floor. When you get to sections that do not have perfect edges, lay down some cardboard and cut out the shape you need.
Once a cardboard template has been made, trace the design onto the XPS or chosen material. This will allow you to accurately cut the necessary shape and it should fit almost perfectly.
After the floor insulation has been laid down, seal up all of the seams with gorilla tape or equivalent.
Insulating The Wheel Wells Of A Campervan Conversion
There are many different methods to insulate the wheel wells. Peel and Seal aluminum rolls, or the sound deadening material Fatmat Rattletap can be a cost-effective way to cover the area.
If you want to go this route, cargovanconversion.com has a great step-by-step video. Other van dwellers have used bubble-foil materials such as Reflectix or InfraStop.
None of those methods are going to have a great R-value but they will most certainly be better than bare metal. If you plan to insulate your walls with yellow spray foam this would also be the perfect material to use on the wheel wells.
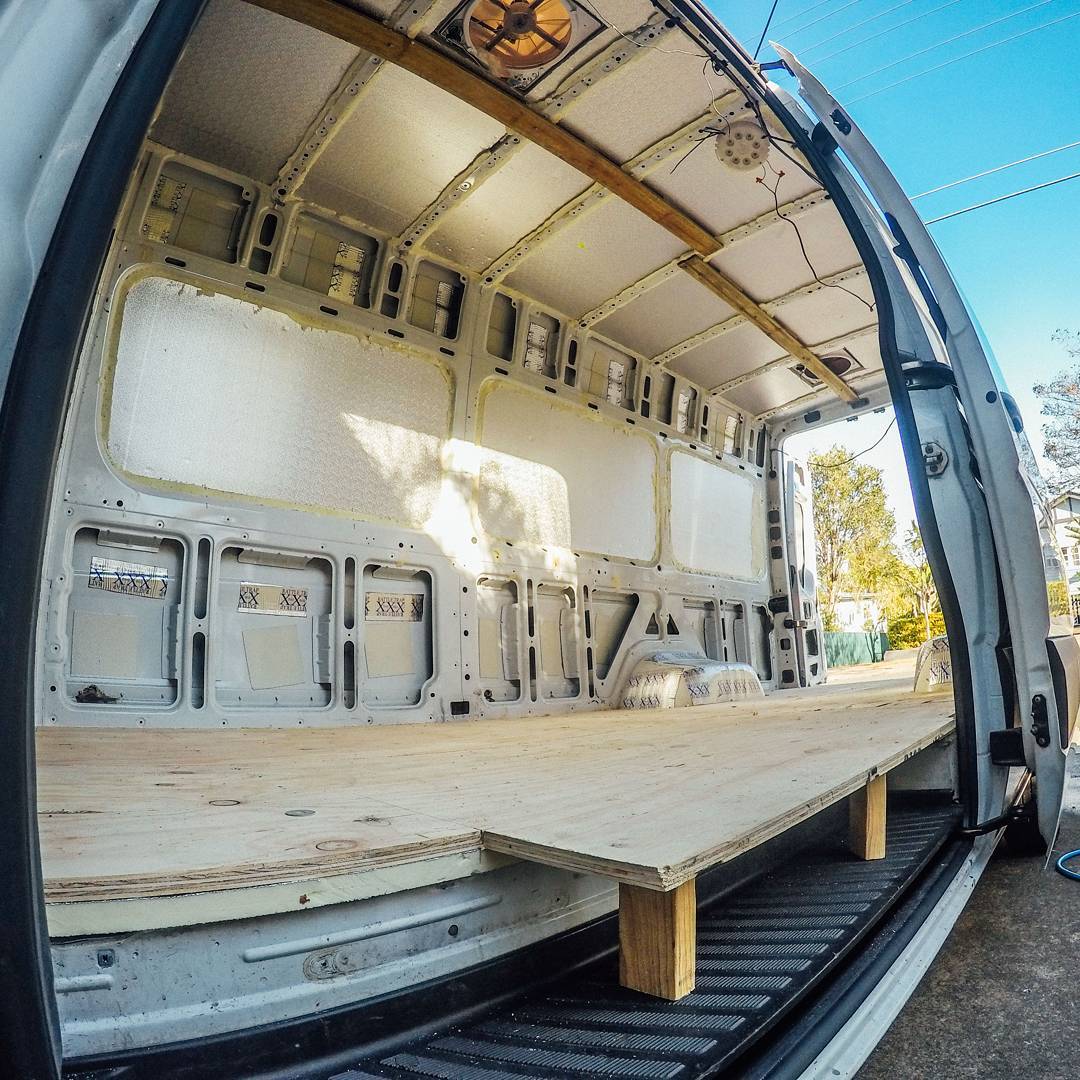
Insulating Walls
You will get a lot of return on investment by insulating the walls of a campervan build. Material choice is going to depend a lot on personal preference.
Some vans are more square, so a ridged material without much bend to it will not be an issue. A van designed with more of a curve may require a more flexible material.
A Note On Reflectix
Reflectix is a popular material you hear about when researching van insulation. This material reflects radiant heat transfer meaning it needs an air gap in order to work as designed. Without an air gap, the R-value of Reflectix is a 1. With an air gap, Reflectix has an R-value of about R-3.
What this means is Reflectix is a good material to use anywhere there is an air gap (like a window); it is a poor material to choose anywhere there isn’t an air gap. In short, do not insulate your walls with Reflectix unless you plan on placing a sizable air gap in there. We talk more about Reflectix in our post about insulating for hot weather.
Ridged Foam Panel Insulation
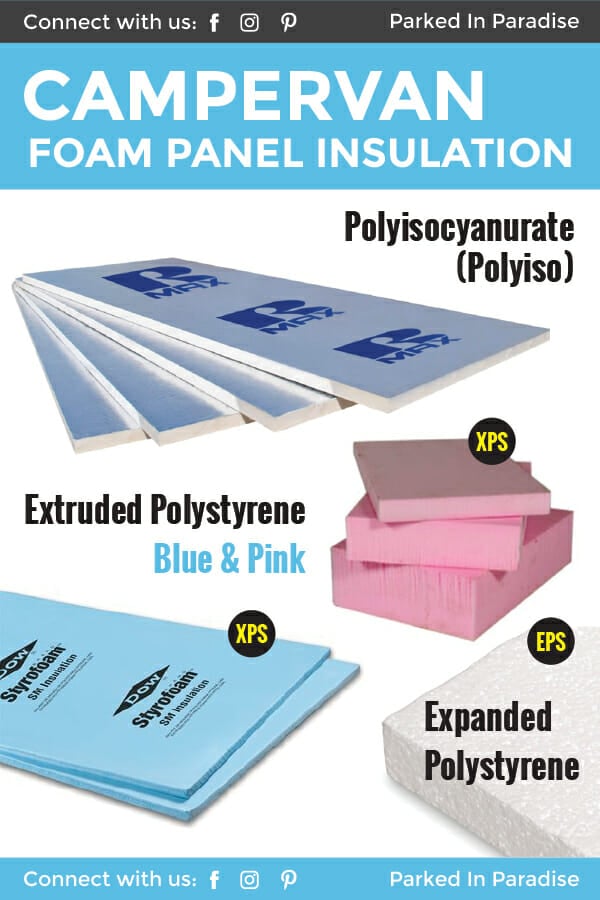
Polyisocyanurate (Polyiso) – White Foam with Foil
Polyiso is an excellent material choice for insulation. It is water resistant, and slightly flexible so it can bend around curves. Polyiso is rated at an R-6.
Many, but not all polyiso sheets come with foil on one side to reflect heat like Reflectix.
If you are placing an air gap in your walls, this will give you a double dose of insulation bringing the value up to R-7. As far as rigid foam panels go, this is the best material in terms of conduction resistance per inch.
Polyiso can be slightly difficult to find in stores and more expensive than some of the other foam materials. If you can afford it however, this is the one of the best ways to go.
Extruded polystyrene (XPS) – Blue and Pink Foam
Extruded polystyrene is the ridged pink or blue foam board you find in hardware stores. It has an R-value of R-5. With its high value, this is another great (and less expensive) choice for insulation. XPS is slightly cheaper than polyiso and is also much easier to find.
Like polyiso, it does not retain water so you shouldn’t have to worry about mold issues if the walls are sealed correctly. Many van dwellers successfully insulate with XPS and it is one of the most popular options for insulation.
Expanded polystyrene (EPS) – White Foam
Expanded polystyrene is an open-cell foam board. It has an R-value of R-4. It is the cheapest material of the foam boards.
However because of the open cells, moisture can build up within the spaces. For this reason expanded polystyrene is not recommended for insulating your van.
How To Attach Foam Panel Insulation To The Walls
Foam board is lightweight and can be easily attached to the walls. Just like the flooring, foam board can be cut to size using a box cutter. Cardboard templates are a great way to estimate sizing. Then just press it into place.
¾ – 1 inch of insulation is a common wall thickness to use.
High strength adhesives such as 3M high strength 90 or gorilla tape are great ways to hold the foam in place. However, if you want to make sure the walls are really sealed for moisture, you’ll want to use a spray foam to adhere the boards to the wall.
Great Stuff gaps and cracks spray foam can be used to glue the foam board to the walls (or ceiling). This is an excellent way to seal off gaps as you install. Great stuff spray foam can also be used to cover any small oddly shaped areas of your vehicle.
If you want to see a step-by-step guide with pictures of how to apply foam board, this article by the ProMaster Forum is a great resource to use (insulation starts at post #8).
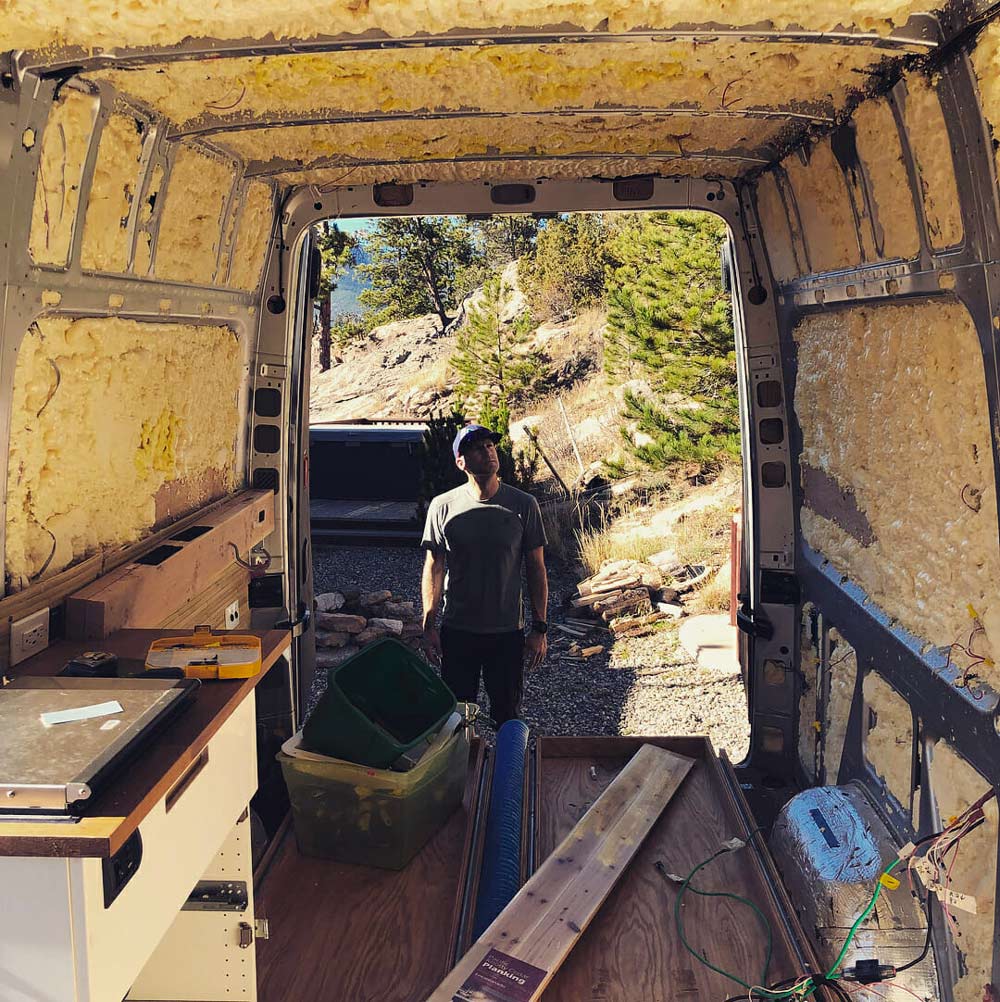
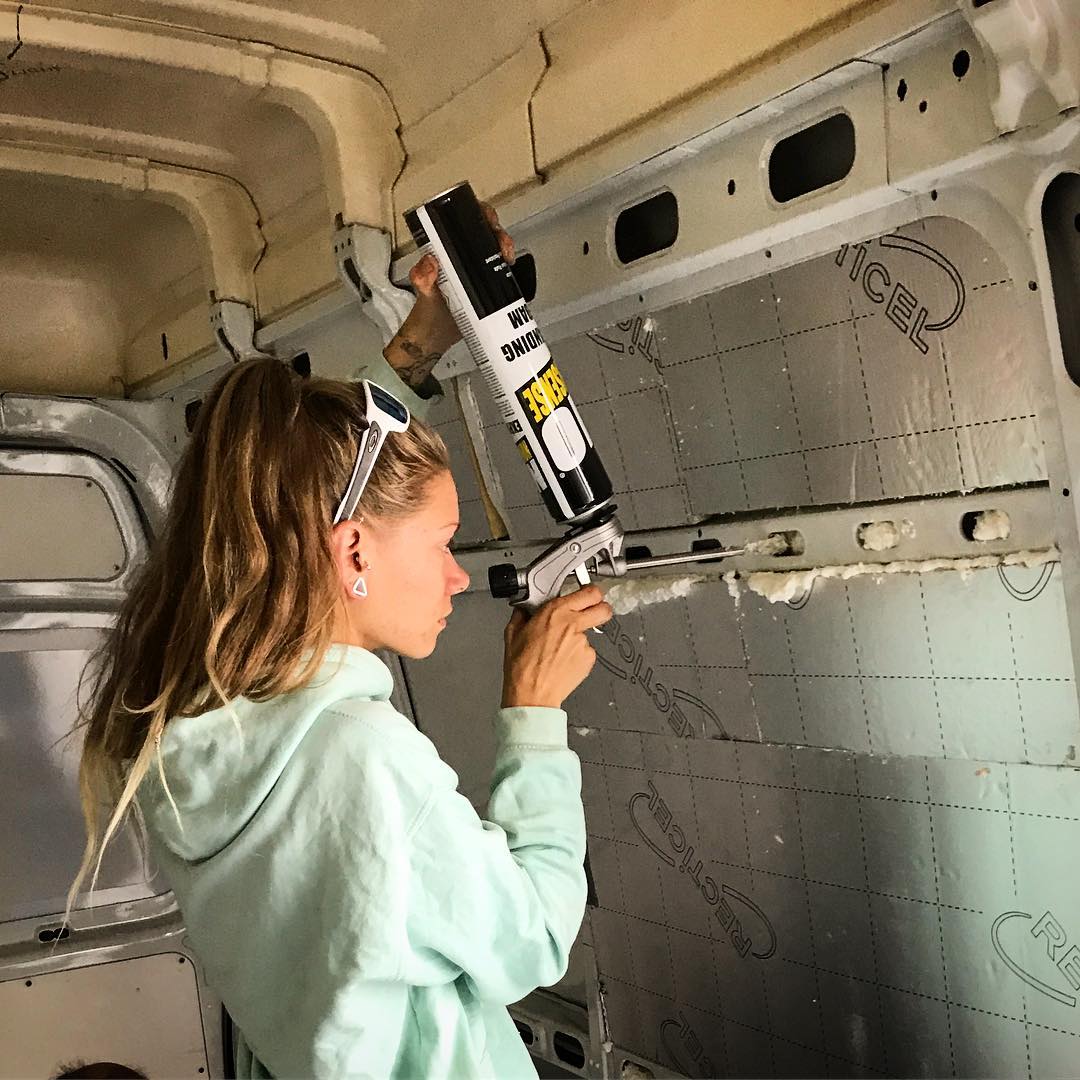
Spray Foam Insulation In A Campervan Conversion
Yellow Spray Foam
Yellow spray foam has an excellent R-value of 6.5. It is resistant to water so you will have no moisture buildup and it will not mold. Yellow spray foam can be expensive.
You’ll be looking at several hundred dollars if you choose this method. Yellow spray foam comes in cans and can be complex to install yourself.
If the process is done incorrectly, your walls will not be flush. It can also be difficult to mask many areas of the vehicle so you have to be careful about how and where you spray.
Also note that it is a much more permanent solution. Once installed, it’s an extensive and messy process to scrape it all off if you need to address problems behind it.
Many people choose to have yellow spray foam professionally installed. If this is something you want to do on your own, this article by the ProMaster forum has an extensive description on how to do so.
Yellow spray foam can be one of the best ways to insulate your van if you have the patience and money.
Fiberglass Insulation
Fiberglass insulation is popular when insulating homes, and many van dwellers use this type of insulation as well. Its benefits include being easy to install, easy to find, and cheap to use.
On the other hand, fiberglass insulation does absorb moisture. If you choose to install fiberglass, it will be extremely important to seal up the walls afterward so you can be assured no moisture or molding will occur inside. Fiberglass has an R-value between 3-4 depending on the type installed.
The fiberglass material can be a skin and lung irritant during the installation process and beyond. Because of this, it is especially important to take proper precautions during the install and seal everything correctly. Overtime, the fiberglass insulation may become droopy or distorted due to vibrations of the vehicle.
Due to the pros and cons of fiberglass insulation, this material would not be at the top of everyone’s list for install. That being said, when installed professionally and sealed correctly it will do a good job of insulating.
This material may be perfect for filling in any nooks or cranny’s in the doors or framing. Fiberglass does lose some of its insulation value when compressed so be careful to not pack it too tightly.
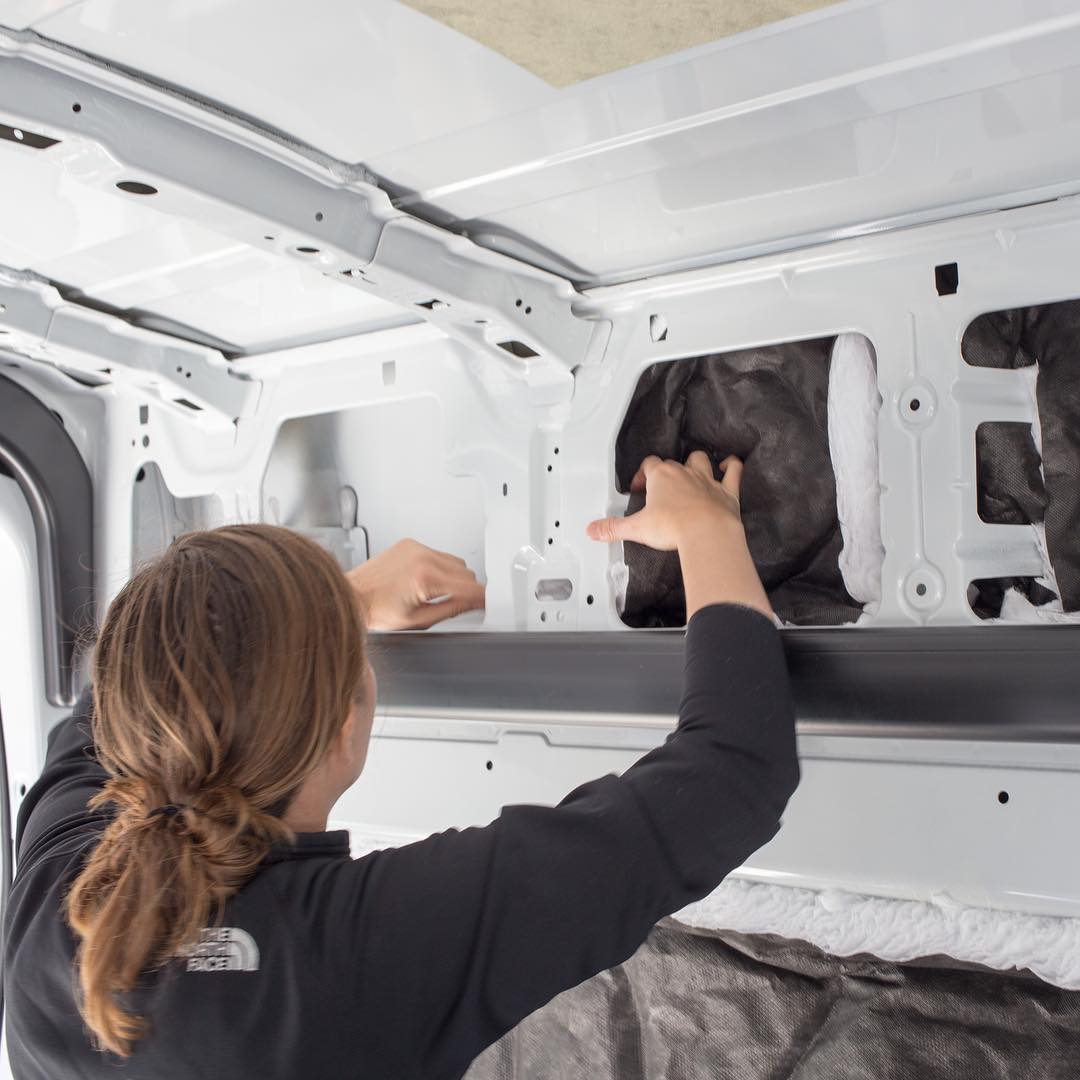
Thinsulate Insulation
Thinsulate is a product developed by 3M and is similar to fiberglass insulation. It is made up of polyester and olefin. Unlike fiberglass insulation, these materials are non-toxic; so it is fine to install without protective clothing.
Thinsulate works as both a thermal barrier to block conductive heat and sound barrier. Although the material itself does not absorb moisture, it is not a water-barrier; meaning moisture can still get inside of it. It requires ventilation to dry out, similar to a jacket or sleeping bag (which, coincidentally, Thinsulate is used in as well).
Thinsulate has an R-value of approximately R-3. This material is difficult to find in stores, so you will probably have to purchase it from the 3M website. If you choose to install with Thinsulate you’ll be paying on the higher end of the scale when it comes to insulation.
However, this will come with the benefits of easy removal, non-toxic particles and a sound-resistant barrier. If you’d like to see a full install of Thinsulate, check out this step-by-step guide on how to do so.
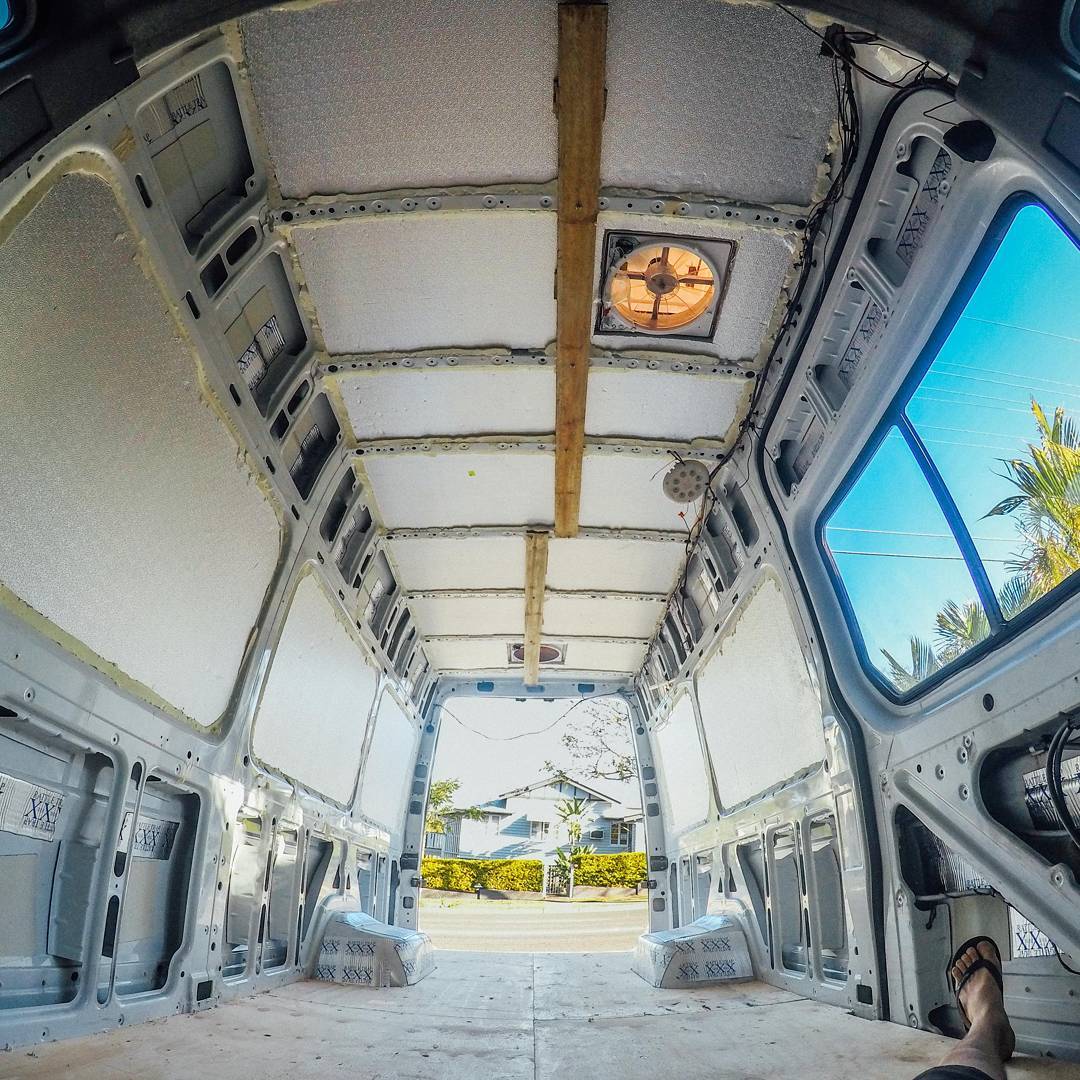
Insulating the Ceiling
The ceiling can be insulated in the same way as the walls. Ridged foam panels and yellow spray foam are both great choices. Because hot air rises, convective heat loss is going to be one of the biggest problems to mitigate against.
This means you will want the thickest insulation on your ceiling (assuming you are willing to give up a little headspace). Anywhere from 1-2½ inches of insulation is a good number to shoot for.
The ceiling can get a bit tricky if you want to wire 12V lights or install a vent fan for heat escape. Make sure to plan all of the wiring and accessories out before you attempt to tackle the roof.
Some van lifers like to hang decorative wood panels overhead. Keep in mind, those will not attach well to foam so you will need to add in studs or leave extra space for building off of if this is the case.
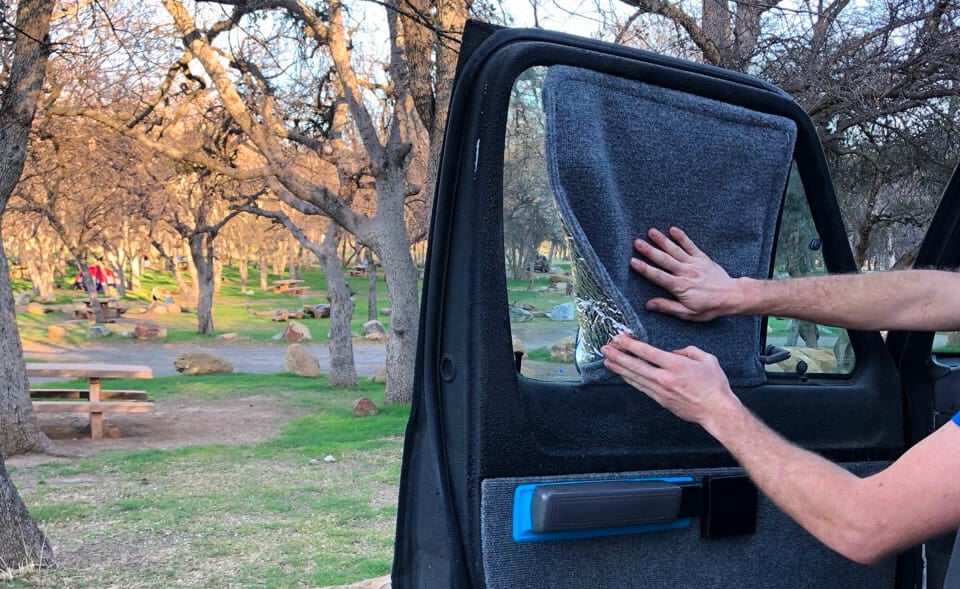
Insulating Windows
The final step is insulating the windows. Windows are a major source of radiant heat transfer. When placing a reflective surface on a window facing out, heat from the sun will hit it, and bounce back out keeping the van cooler.
If you place a reflective surface on the windows facing in, you get the opposite effect.
When running a heater like a portable propane furnace, that heat generated will hit the reflective surface and bounce back into the van rather than going straight out of the window. This keeps the inside temperature more constant.
InfraStop
Infrastop is a double-bubble reflective foil much like Reflectix. This can be bought in rolls and easily cut with scissors. It has an R-value of up to R-6.
Infrastop can be taped to the windows and is reflective on both sides. It is also a vapor barrier so you won’t have to worry about it holding in moisture.
Reflectix
Reflectix is a popular and effective insulator for windows. When used correctly, rates an R-3. On windows, Reflectix is a light and easy material to work with. It can be cut with a regular pair of scissors and stuck on with tape.
When sticking Reflectix to windows, the air gap will be the inside of your van! There is a lot of space here for reflection to occur.
Insulated window curtains
There are a number of different reflective curtains available online. Insul-shine is reversible and can be flipped to either trap heat inside or bounce sunlight back outside. This fabric can be bought in rolls and stitched to the shape of your window.
Finding a way to hang these curtains may become a challenge. Depending on the material of your door frame, you may be able to use clips, hooks or Velcro.
Windshield cover
The windshield is probably the largest window in your vehicle. Possibly, the easiest way to deal with such a large area is to purchase a reflective sunshade. Most of the sunshades online are going to be relatively similar.
One important thing to keep in mind is the two best materials to block radiant heat are: gold and aluminum. Because of this, you will want to make sure you are purchasing a sunshade with an aluminum coating like this one.
Thick, aluminum-coated sunshades are also going to be the best choice available for the warmer months when you want to keep you car cool.
Filling in Odd Shapes in the Van
Every van has little nooks, crannies or cracks that don’t quite fit in with the standard insulation instructions. Great Stuff gaps and cracks spray foam is an easy way to fill the gaps. Door panels or framing might have large open spaces.
Do your best to stuff these areas with any scrap foam you have laying around. These spots might be a good place to add in fiber insulation, just remember not to compress it to tightly.
Seal everything up with spray foam or tape so moisture will not get inside. At this point you’re almost done!
Closing everything up
Chances are, you probably aren’t going to sit around in a foam box. The next step will be figuring out what material you want to use to cover the walls. We’re going to save this topic for a different article.
The Bottom Line
Foam insulation is one of the most popular types of insulation. It’s easy to install, relatively inexpensive, and provides a good level of insulation. However, foam insulation can be flammable, so it’s important to use a fireproofing spray if you’re going to use this type of insulation.
Another popular option is fiberglass insulation. Fiberglass insulation is non-flammable, but it can be more difficult to install than foam insulation. It’s also more expensive than foam insulation, but it provides better thermal protection.
If you’re looking for an environmentally friendly option, there are also several types of natural insulation available. Sheep’s wool and cork are two popular choices. Both of these materials provide good thermal protection and are environmentally friendly. However, they can be more expensive than some of the other main types.
Whichever type of insulation you choose, be sure to add a vapor barrier to prevent moisture from condensing inside your van. For even more comfort and energy efficiency, consider also installing insulated blinds or curtains for the windows.
Things To Bear In Mind
Things to Bear in Mind
When it comes to insulating a campervan, there are a few key things you need to take into consideration in order to ensure a comfortable and energy-efficient space. First, consider the climate you’ll be spending most of your time in.
If you’re planning on spending extended periods of time in cold weather, don’t underestimate the importance of completing this step to a very high standard. If your van is not properly insulated, you could end up freezing at night, and it could turn an otherwise great journey into a perilous one.
On the other hand, if you’re mostly going to be camping in warmer climates, insulation will still be important but not as crucial.
The quality of the installation is also key when it comes to insulation. You really need to make sure everything is properly sealed and installed so that heat doesn’t escape and cold air doesn’t seep in. This will help you keep your van comfortable no matter what the temperature is outside.
We learned the importance of this point the hard way by enduring quite a few nights that were a lot colder than we had expected. If installing your insulation is not something you’re that confident with, it could be a very wise investment to have a trusted professional carry out the work. It will probably save you money in the long run by helping to avoid the need to replace or redo any of the work.
It’s also important to remember that when you’re living in a van, every ounce counts. So you should definitely consider the weight of your insulation when you’re planning your build. The heavier the insulation, the more weight your van will have to carry. This can impact your gas mileage and make your van harder to handle on the road.
Fiberglass insulation is lightweight and easy to work with, but it doesn’t have the best R-value (the measure of an insulation’s ability to resist heat flow). Spray foam is much heavier than fiberglass, but it has a much higher R-value, so it’s a good choice if you’re looking for maximum insulation.
Rigid foam is somewhere in between fiberglass and spray foam in terms of weight, and it also has a good R-value.
Final thoughts on Van Insulation
Insulating your vehicle is less exciting of a process, but worth the energy in your build. You really get to exercise your research and construction skills here. Proper insulation is a delicate balance between R-value, price and space constraints.
It is rewarding and you’ll be happy you took the time to do so when winter rolls around. Combine this information with our post on how to heat your van, and you’ll be well on your way to a warm and cozy winter.
Resources
Insulation is a complex topic and there are many great resources on the web to learn from. These are some of our favorites:
Great article, it’s nice to get a breakdown of the different insulating material people are talking about.
One small slip-up though, where you said to “see chart below” for insulating values you posted a chart on electrical usage. But what the heck, we all screw up.
Hey Jerry, thanks for the heads up! I was just working on the electrical posts and that got swapped out. I’ve got the insulation values back now ?
Answered a lot of questions. I will have to find the English equivalent to the odd item. I will definitely be keeping this article for when I tackle my van conversion next year, I hope!. A lot of useful information clearly explained.
Great to hear! Let us know if you have any additional questions, good luck on your future conversion!
I’m going to use polyiso for the insulation for my van. So the silver part faces away from the wall, right? It should face inward toward me?
Did you ever get an answer for your question whether the silver on the insulation goes to the outside walls of the van or to the inside living area?
Whats up with all the Reflectix disputes?
I’m a student ski mountaineer in the canadian rockies. Just bought a 2000 toyota sienna to camp in at base of ski lines. Was thinking of just putting Reflectix over the windows. Is this going to make the van much warmer or is it just a fashion thing (i.e. placebo affect)? Seems like the plastic and cloth paneling in the van should count for some insulation.
Girlfriend and I stayed in the van this weekend in only -5c and we were real cold. Looking for quick cheap ways to make it warmer…
Reflectix in the windows is about the only good place to put it. Keep in mind, it needs something to reflect, so if you’re just using body heat it won’t do too much (but it might help slightly). If you had a heater (which would be hard in in a Sienna) then it would definitely help a bit.
The shiny surface is the important part of Reflectix. The bubble wrap part is just something to hold it. It’s not much different functionally than covering your windows in aluminum foil other than being easier to work with. If you cover that shiny surface as most people do in custom converted vans with wood walls and such, it’s pretty useless. Not really an issue for you.
Windows are a really poor insulator, so a shiny surface in combo with more of an insulation will work a lot better. If you’re not worried about stealth then grab some Polyiso from Home depot and cut it to fit your windows.
If you don’t have good wool socks and a cap, those are the most effective pieces of gear. Also, some kind of mattress pad to keep you off the cold floor goes a long way. Laying on cold ground will take a lot of heat out of you!.
That is what I have is a 99 sienna. Just looking to insulate the walls and ceilings with spray foam by spraying it into cracks and crevices in the plastic sides. I would think it would be self leveling and self seeking. What’s your thoughts?
I’ve broken 3 handles on my sienna. Spray foaming inside the cracks could make it difficult to repair/replace these. Taking the trim off the inside of your sienna should be really easy (it is on my 2000) so you could insulate with something less permanent.
Excellent breakdown of all the products available.
We will be converting our new V.W crafter over the next few months and will keep you informed of how we are getting on.
It’s going to be in stages as we need to think about everything before we get on with it.
Regards
Steve
Excellent breakdown of all the products available.
We will be converting our new V.W crafter over the next few months and will keep you informed of how we are getting on.
It’s going to be in stages as we need to think about everything before we get on with it.
Regards
Steve
I was thinking of using the yellow spray foam in a can and just insert the straw into cracks all around the van as this foam is self seeking/self leveling. Should it not find it’s own empty places if you pump enough in? If too much is injected it will push and find its way out…. don’t you think?
Thanks.
John
Thanks for all this great info. The link to ProMaster Forum on how to attach foam insulation to the walls is about installation of a roof vent.
Roy-
That thread is a long form build process. The “how to” for the walls starts at post #8. We’ll see if we can figure out a way to make that more intuitive. Thanks for the heads up!
when insulating the floor with 1/2 XPS as you suggest, do you need to fill the ridge gaps with something to bring the floor one level? or do you simply lay the xps over the the gaps?
On ours we just laid foam over the ridges. It doesn’t hurt anything to do it this way and it’s easier. Some people put spray foam in the ridges to seal them up.
For cold weather it is better to insulate van as it will keep warm in cold weather as there are too many options are available under insulation. Before you begin the work of insulation in van you just keep few things in mind always start with floor because heat rise with the floor only.
Im about to start my Sprinter conversion and i had few questions…
1- what about using 2 layers of reflextive with a airgap
Is this way will reduced the thermic condensation between the cold and hot layer then reduce the water effect?
Because i wonder even if i use a water resistant product like the Polysio it will produce a thermic contrast who will produce water since its right on the metal, then what happen with that water? Im kind of worry about starting a nest for rust!
Thanks
Great post btw !
Dominic-
From the builds we see, the thermic condensation issues are often less critical than having a way to ventilate areas that can gather moisture. Two layers of reflectix is creating a lot of partial vapor barriers, which tend to trap moisture which is where most of the problems arise. This is bad for rust as well as potential mold.
I would try to clean and seal (paint) all of the walls to make them as rust-resistant as possible and then design a system that doesn’t trap moisture in. Condensation from your breath creates enough moisture to cause problems in the right circumstances, but that can be mitigated with good ventilation.
Hope this helps, we are always keen on learning from other people’s theories and experiences!
Just a very expensive thought!
But the greatest insulation material around, it’s used on the (International Space Station) & was used on all the Shuttle’s.
It is 《AEROGEL》
But like I said it’s expensive & hard to work with: https://www.aerogel.com/
Aspen Areogels. Check it out, also YouTube has a cornacoupia of info.
Awesome and informative! I’m pretty sold on doing polyiso on the walls of my van, XPS on the floor, and reflectix for the wheel wells. What do you guys recommend for insulating a fiberglass high roof with lots of curves/style lines? I’m concerned that polyiso may be too rigid to work with. Someone mentioned a brand called Ensolite for the high roof (http://www.raamaudio.com/ensolite-iuo-peel-and-stick-14-sq-ft-per-running-yard-3-per-pack-of-bxt-ii-recommended-absolutely-the-best-foam-on-the-market/)
Hey guys great post a lot of great information here. I recently have started living in a van (3ish months now) it’s a 2003 dodge ram 2500 van (extended) it was previously used by my grandfather for carpet and lino installs and because of the glue’s that he used he had already carpeted it and insulated and put wood paneling on the walls and roof…. I bought it from him built a bed into it and have been living in it already, I realize noe that I should have paid more attention and possibly should have pulled more down and redone it. For him it worked great as he wasn’t living in it and only needed it not to freeze his glues however after 3 months I have noticed that I have serious condensation issues in the van. I also moved to Tofino, BC, Canada (located on Vancouver island) which is a very humid and rainy environment. As such I have noticed that I am dealing with a lot of condensation which has led to mold so now I’m trying to deal with that issue to try and get me through the winter rainy season here do you have any suggestions to help reduce the amount condensation I have to deal with in the van, it appears from what i read my best solution is going to be to open the front windows slighlty and place a small fan to circulate the air more as i dont have a roof vent yet at this time, am I correct in that assumption? As well any suggestions as to the best way to kill the mold that is growing aside from just wiping it away? The problem is alot of it is on the base of the walls (both walls and back door) and it’s mostly below the bedline meaning I have to move my mattress to clean it up which is an annoying process and because I’m already living in it and don’t have a proper place to work on my van out of the rain it’s been a frustrating and time consuming process. Any suggestions and help would be greatly appreciated!
Finding you site really made my day, and thank you for all your information. I have been retrofitting a 2014 trillium trailer to be our winter ski camper. The walls have an existing open cell foam with material (similar to a car interior) but do not provide enough insulation. Along with wrapping the windows with PE film, I was hoping to do more to help retain internal heat. I have installed a propex heater which runs all day keeping the internal cabin warmer, but am losing much heat through the walls.
I was thinking of laminating infrastop or reflectex to an open cell foam sheet, covering both sides with fabric and sewing it all together to create large panels to push up against the wall. I was hoping this would create the aigret needed for the reflective material to work. Essentially I would be making a large padded “cooler bag” for my cabin.
Along with this I was wondering if aesthetically covering the reflective material on the inside of that cabin would minimize the r-value performance of this idea. I really appreciate any input you can provide and thanks for your knowledge!
My best,
Steve
Do you have to insulate:
The back doors?
The side door?
Make a wall behind the seats, and insulate it?
the facts have been discussed is really important. keep doing that.
So regarding Poly-sio, which seems like the more environmental insulation compared to XPS, I have read that although it has good insulation properties, when the temp drops below 50 something degrees, the R-value can greatly decrease. Furthermore, if it goes below 15 degrees, the R-value can decrease to 2.0 from 6.0 (http://www.owenscorning.com/NetworkShare/EIS/10019950-FOAMULAR-XPS-vs-Poly-FAQ.pdf). I know most of us don’t go down to 15 degrees, but if you do it may be something to consider. Any other insight from this group?
Thanks for this info!!!
Somewhat related. I have a pick-up truck with a Softopper camper and I sleep in the bed of the truck, but it gets REALLY hot in there in the summer. Would using a few panels of Reflectix between the frame and the canvas of the topper help keep the heat out?
I’m a bit surprised there is no discussion regarding wool, it’s an awesome insulator. My top picks would be Thinsulate and Havelock Wool
I agree 100%
Thanks for sharing all of your experiences!
I would like to send you guys a sample of our pure wool insulation for vans. Much better than all the environmentally damaging and toxic materials reviewed here. Please get in touch!
Best Regards
Will
It is interesting that spray foam is water-resistant. My wife and I are considering converting a van to travel around the states. We may reach out to a professional to ensure it is installed correctly.
If I use polyiso panels and fill the rest with yellow spray foam, is it fairly easy to later route wiring/conduit through the wall cavities (I.e. punch it out with a hole saw)?
Oh and one more thing: the spray foam cans say “apply in 55F or higher”. It’s dry here in UT but our highs are in the mid 30s. Should I wait for warmer days. Maybe just install the polyiso now?
Thanks for your post – very informative! Almost ready to kickoff my project!
Beautiful read, very useful. It also very needful to know about the installation of DIY van insulation. Great blog. Thank you. I have also found this resource Insultech.co.nz useful and its related to what you are mentioning.
Great article on insulating my van. I’m going to use pink Extruded polystyrene (XPS) and want to double check with you that using 3M High Strength 90 adhesive spray won’t melt the foam! Other recommendations call for 3M 77 adhesive but I like the idea of using the higher strength 90, especially for the ceiling, because I may not get to paneling for a while after installation of the XPS.
Thanks, bobbyd
What are your thoughts on wool insulation? I am considering it for my build in Promaster 159.
After doing some research myself, it appears that Polyiso loses its R values at low temperatures –
“At a mean temperature of 75°F, the polyiso sample also exhibits a level of thermal conductivity which correlates to its published R-value of R6.0/inch. However, as the mean temperature drops to 15°F, the R-value decreases to approximately R2.0, representing a significant
66% loss in R-value.”
Apparently XPS doesn’t suffer from the same effects.
Published R values are at 75F. Polyiso R about 6 and XPS of 5. This reference says as temperature decreases from 59F to 15F the R value of polyiso decreases significantly and that of XPS increases slightly. At 50F their R values are equal. Effect is due to blowing agent insulating gas in polyiso condensing.
http://www.owenscorning.com/NetworkShare/EIS/10019950-FOAMULAR-XPS-vs-Poly-FAQ.pdf
Question on filling the tight spaces: do you recommend spray foam even in the body cavities inside the tail light columns? I’m guessing this isn’t a fire hazard or creates other issues, but wanted to check with the expert first. Thanks!
RE: Closed Cell Spray Foam Insulation (SPF). I am an old architect, and I use this stuff in buildings all the time . It is a great insulation product if used correctly. One thing to note is that it does you absolutely no good to insulate the voids between the inner ribs and structure and the outer skin of the van , and it may do harm. Because the light gage metal of the skin and frame is an excellent heat transfer media, conductive heat flow from the inner face of the ribs to the skin will be super efficient. The heat will simply do an end run around your insulation in the voids, and via metal to metal conduction find a beautiful and nearly infinite heat sink in the exterior skin. IE: The cows will leave through the open barn door and not through the walls. So, think of your spray foam as a continuous blanket covering the INTERIOR metal surfaces of the van, including the ribs and bumps, and separating you from the cold, cold exterior metal. Conceptualize it as a sleeping bag. You would not cut long slots in your sleeping bag and sew in metal strips, would you?
Just a quick warning about what you call yellow foam… A few years back, having a can to finish I thought it’d be a great idea fo fill the inside of the sliding door of my Vanagon to kill that notorious dumpster lid sound. It took a couple of years for the outside of the door to rust bubble under the paint on every area where the foam was touching the metal. Condensation gets trapped between the foam and the metal and since the foam will not wick it away it will just stay there and feed on metal… Other example: On the classic Beetle, look at the area behind the gills located behind the back windows. Pretty much all of them rust heavily there and this is due to Volkswagen starting, in the late 60s early 70s, to use expansion foam, replacing the previous method of blocking engine noise. Previously they stuffed a little triangular “pillow” made with leftover headliner fabric filled with seat material, air could flow, condensation was not an issue and all was good, but it was time consuming meaning expensive to fabricate the pillows. Came the cheaper, faster spray, “better” foam… and rust. In the VW community it even has a name : Death Foam, look it up
Your article is valuable. Thanks for sharing your information!
Wow, Excellent Post, thanks for sharing