
Best RV Leveling Blocks and Ramps for your RV (Review)
Not all campsites are entirely level, which can result in some uncomfortable RV living in the long run. That’s why every RV owner must have a set of leveling blocks handy while out and about.
How many leveling blocks any particular RV requires depends on the size of the RV and the number of tires it has. But setting up and using RV leveling blocks is fairly consistent, no matter how large or how small your rig is. In this article, we’ll cover the different types of leveling blocks and how to use them.

- Can be used with a wide variety of RVs
- T-Handle for easy storage and carrying
- Supports up to 40,000 lbs.
- Affordable, stackable clocks
- Compatible with stabilizers and block caps
- Supports up to 40,000 lbs.
- Easy to balance on nearly any terrain
- 2-Pack lessens the need for multiple purchases
- Lightweight, only 4 lbs.
- Almost 2ft long and only 8 inches wide
- Capable of securing RV at one of three levels
Why Use Leveling Blocks?
Sleeping at a slight incline is the least of your worries if you’re an RV owner without a set of leveling blocks.
Larger RVs that are equipped with an absorption refrigerator need to be level to function properly. In fact, trying to operate a fridge while it’s at an odd angle can cause serious and expensive damage.
Also, setting down for the night at a bumpy campsite can result in things falling from cupboards, doors whacking open on their own, and passengers falling from their beds while sleeping. Basically, having an unleveled RV produces the same effects as a poltergeist. And no one wants that.
Spendthrifts often make their own leveling blocks with large planks of wood. However, unless thoroughly treated with a water-resistant coating and mold-resistant paint or oil, these levelers can quickly rot away. They also tend to be far heavier and more space-consuming than store-bought leveling blocks.
How to Use Leveling Blocks
At first, leveling may be an awkward experience. However, with practice, patience, and understanding, anyone can achieve a perfect balance on nearly any campground.
1. Pre-Exit Leveling
Unless you’re camping on a stony surface, you can actually begin leveling your campsite before you even exit the RV. Before parking the vehicle, drivers can slowly and carefully pull in and out of the camp space.
This motion will compact the dirt and vegetation in the area, providing a base level of sturdy support.
2. Use Your Level
Though many experienced RV enthusiasts swear by bubble levels, you are welcome to use any kind of level that you feel comfortable using — providing that it is accurate, of course. There are many excellent and affordable options available online.
No matter which level you use, it should be able to tell you how balanced the RV is. Place your level at different corners of the RV, including tables and counters. Observing a bubble level will allow users to quickly identify which part of the RV is too elevated or depressed.
3. Build a Platform
After you have identified which area or areas of the RV require leveling blocks, the next step is building a platform. Most leveling blocks are essentially gigantic building blocks. They snap together for ease of use. Place two or three in a line and join them together with one or two more blocks on top.
Repeat until you have built a sturdy platform of the appropriate height. Stand back and admire your work. Be sure that these well-built platforms are directly behind or in front of the RV tires.
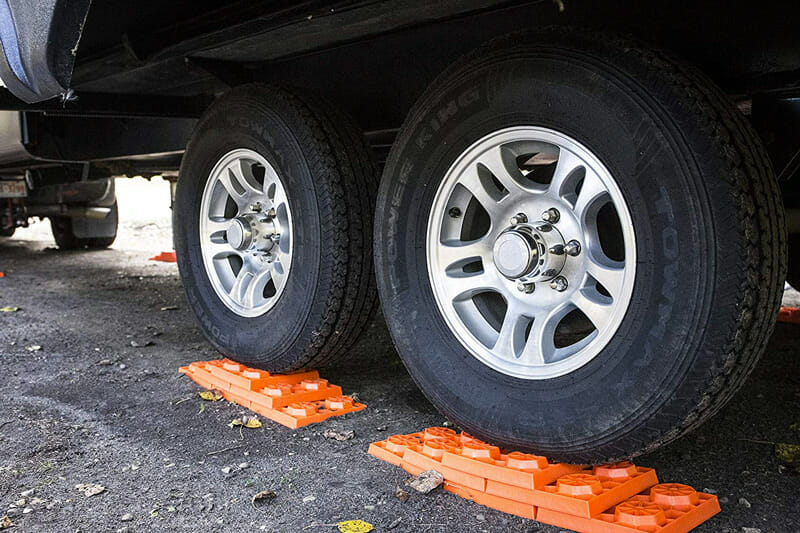
4. Maneuver Slowly And Center The Tires
Once the platforms are built and properly placed, the next step is to maneuver the vehicle onto those platforms carefully. This requires patience. It is helpful to have an adult friend, family member, or passenger outside to help guide the driver onto the RV leveling blocks.
It’s very important that your tires are centered on top of the leveling blocks. Any drooping to one side or the other can cause major damage in the long run. Even if your tires look fully inflated, having them hanging halfway off the blocks can put undue stress on the walls and lead to a future blowout.
5. Check That Level
High-five the person who helped you to maneuver onto the leveling blocks, and head inside to check that level. Once again, position the level at multiple points throughout the interior of the rig.
If the bubble/reading shows continual imbalance, simply drive off of the RV leveling blocks, adjust the platforms as necessary, and repeat steps 4 and 5.
Features to Look For
Purchasing leveling blocks may seem like a simple decision, but there are a few different types you’ll want to be aware of before pulling the trigger. Listed below are some of the top things to look for.
Type
Nearly all modern RV leveling blocks are made of some form of ABS plastic. This plastic is rigid, resistant to impact, stable, and abrasion-resistant.
However, RV levelers come in many forms. Some blocks are single solid pieces, and others are stackable. Some interlock, while others simply rely on shape and weight to remain in-place. Most single-piece levelers work like ramps, having multiple plateaus for drivers to position their vehicle.
DIY blocks are typically made of wood and can be a great stand-in for more expensive plastic levelers. However, they don’t tend to last as long as their counterparts.

Height
The height of your preferred camper leveling blocks determines how precisely you can balance your RV — especially on extremely rocky or uneven terrain. This is an important thing to think about when considering stackable leveling blocks, as you’ll need more blocks in order to achieve a greater height.
Weight Capacity
Not every rig weighs the same amount, and some may need sturdier, heavy-duty blocks that can withstand larger weights. Others, however, could make-do with lighter, smaller blocks. Being aware of this difference can save RV owners time, money, and excess frustration when choosing a set of RV leveling blocks.
How Many Leveling Blocks Do You Need?
The amount of leveling blocks you need depends on the number of tires on your RV or camper. It is wise to have one solid block or one set per tire. The only exception to this rule is extra-wide RV leveling blocks that are specifically built to withstand dual tires.
Best RV Leveling Blocks Reviewed
- Can be used with a wide variety of RVs
- T-Handle for easy storage and carrying
- Supports up to 40,000 lbs.
Top Choice: Camco Fasten Leveling Blocks 4X2 (10 Pack)
Camco is a leader in the RV accessory world, and these stackable interlocking leveling blocks are no exception. The blocks are a bright, warning yellow and capable of supporting up to 40,000 lbs. They stack neatly together with a T-Handle, fitting neatly away in nearly any empty space.
The hard, rigid plastic is resistant to mold, UV damage, and abrasion. Each block adds a full inch in height to the platform, reducing the need for excess blocks. This set is compatible with hydraulic jacks, stabilizer jacks, 5th wheel jacks, tandem axles, single wheels, double wheels, and even tongue jacks.
One set is enough for most RV owners, saving plenty of people time and money!
Features:
- Can be used with a wide variety of RVs
- T-Handle for easy storage and carrying
- Supports up to 40,000 lbs.
- Affordable, stackable clocks
- Compatible with stabilizers and block caps
- Supports up to 40,000 lbs.
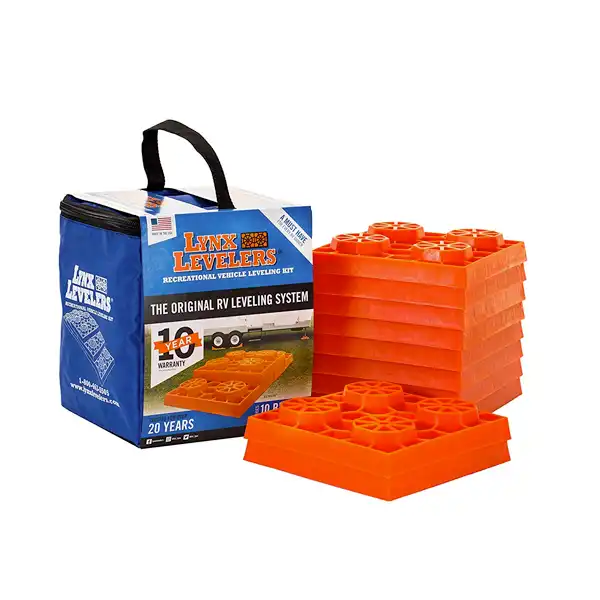
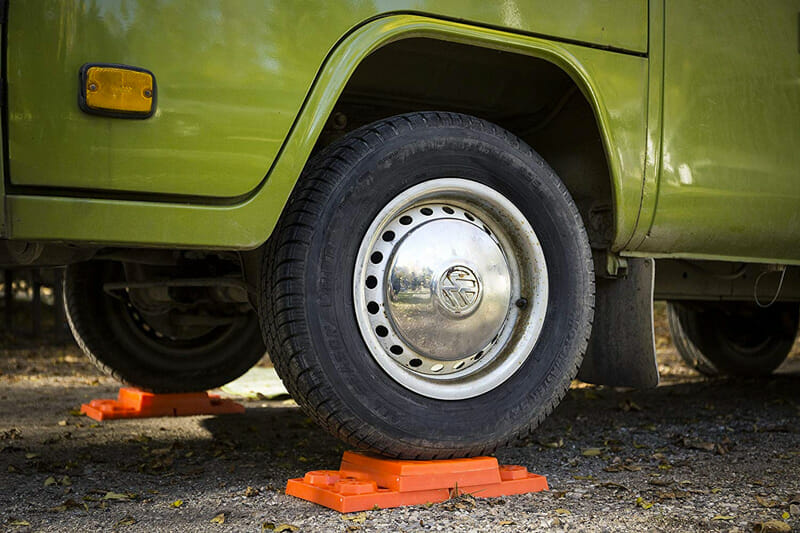
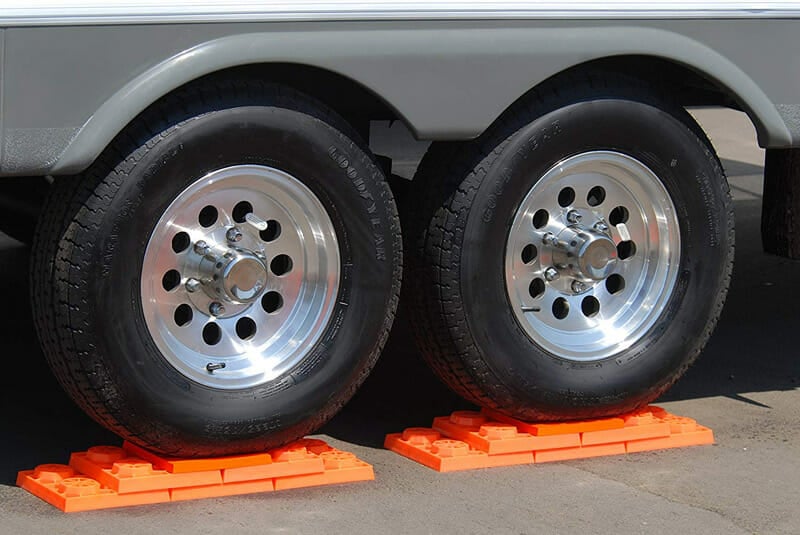
Best Value: Tri-Lynx Lynx Levelers (10 Pack)
If you’re traveling on a budget, our top choice is the Tri-Lynx Lynx Levelers. The bright orange squares are stackable interlocking pieces that easily and quickly stack to form stabilizing platforms.
They can work with rigs up to about 15,000 lbs in weight. Each set is covered by a 10-year warranty and comes with a custom-fit storage case for convenience.
What we like most about the Tri-Lynx levelers is that they’re extremely versatile and compatible with stabilizers and block caps which create a flat surface area for jacks.
Features:
- Affordable, stackable blocks
- Compatible with stabilizers and block caps
- Supports up to 40,000 lbs.
- Easy to balance on nearly any terrain
- 2-Pack lessens the need for multiple purchases
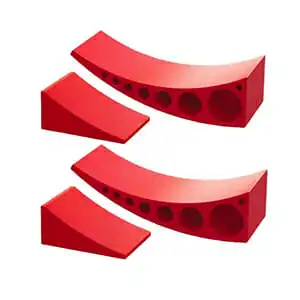
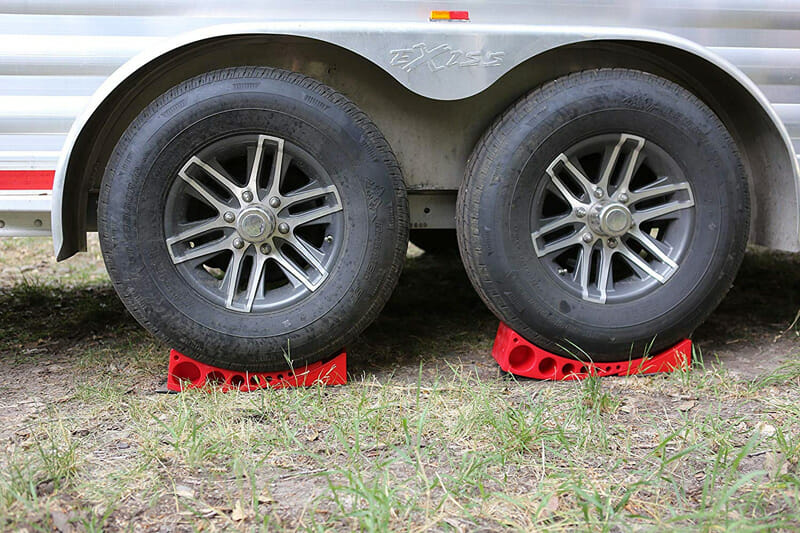
Most Durable: Andersen 2-Pack Camper Leveler
The Andersen 2-Pack Camper Leveler kit includes two rounded levelers and two wheel chocks. Though the set is more expensive than other models, it is also one of the most unique. The two levelers are designed to fit snug beneath wheels and roll with them to support their weight and provide absolute balance.
This remarkable design is fairly rare and incredibly smart. When paired with the included wheel chocks, it ensures that this kit can give balance and stability to nearly any type of RV. Using these levelers is easy and intuitive.
These can get expensive for owners of larger rigs, but most RV owners could be perfectly happy with just two of these sturdy levelers.
Features:
- Easy to balance on nearly any terrain
- 2-Pack lessens the need for multiple purchases
- Lightweight, only 4 lbs.
- Almost 2ft long and only 8 inches wide
- Capable of securing RV at one of three levels
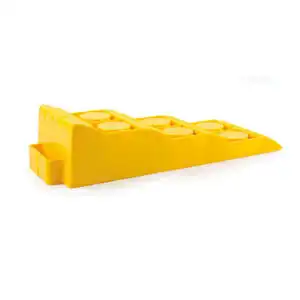
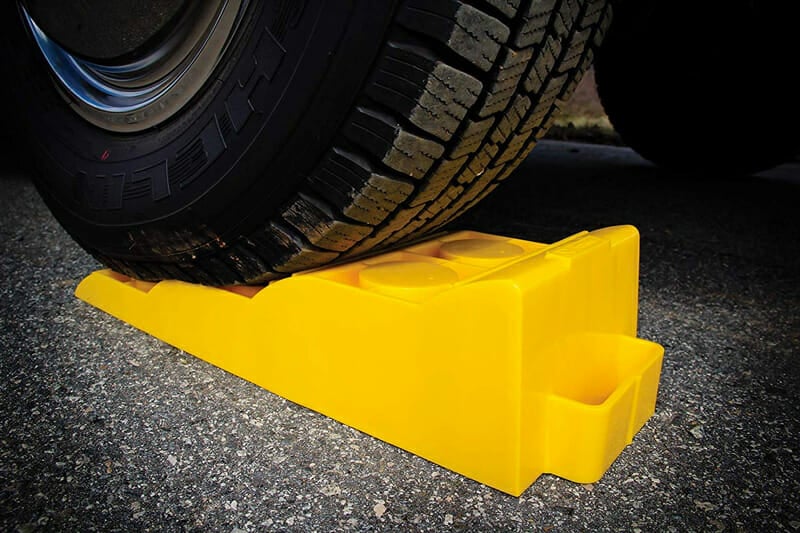
Best Single-Piece Riser: Camco Yellow Drive On Tri-Leveler
Those seeking to purchase a single leveler that is a solid piece, rather than a set of stackable bricks, should consider the Camco Drive On Tri-Leveler. These levelers are capable of hoisting RVs and campers nearly four full inches above the ground. They’re also lightweight and easy to use.
Though this leveler is made of rigid plastic, it is not slippery. The resin surface grips onto tires easily and it also provides three various incline levels.
However, it can only withstand 3500 lbs of weight, making it one of the weakest levelers on this list. This makes it a poor choice for owners of larger, heavier rigs.
Features:
- Lightweight, only 4 lbs.
- Almost 2ft long and only 8 inches wide
- Capable of securing RV at one of three levels
Final Thoughts
It is vital to keep an RV level to keep the interior comfortable–and more importantly–your refrigerator running efficiently.
The Camco Yellow Fasten Leveling Blocks are our top choice due to their reliability, customization, and space-saving design. Travelers seeking an affordable option should take a look at the Tri-Lynx Levelers. And those who can afford to spend a little more can feel confident with a pair of Andersen Camper Levelers.
I love Tri-lynx leveling blocks. They last forever. They will lose their color over time if exposed to the sun constantly, but don’t ever lose their strength. I have a set that’s easily 15-20 years old. They work well and are VERY strong and durable. If your rig is a big one with lots of front end weight and you’re going to use them under the front jacks, I recommend the flat “cap”, or using a small square of thin wood, or at least turning them upside down so the steel jack plates don’t cause the four “linking nipples” to get mashed out of shape and making them difficult to stack back in the bag. Excellent product.
We also used OxGord through 6 Western states in our Thor Model 23TR RV. It is a dual rear wheel 23.5′ diesel-powered RV built on a Ford 350HD Van Chassis. In prior years with a Lance trailer and truck camper have used 2×6 planks and/or the orange leggo-like levelers. I have found these levelers easy to use and sturdy. I carry the orange leggos but didn’t have to use them on our 3200-mile tour, using them in most of the places we camped. I recommend these for vehicles within the weight rating listed for the product.
Perfect for a travel trailer! I’ve bought two sets of RV leveling blocks from Camco so I can put them under my leveling jacks all the way around when on grass. They hold up to my 9,000 lb trailer when driving. In addition, I love that it has an interlocking design and doesn’t slip like other levelers.