
How To Make Camping Coffee: 8 Ways Without An Electric Coffee Maker
Even when camping, you don’t have to go without your daily caffeine fix. In fact, there are multiple ways to brew your favorite drink without an electric coffee pot. In this article we’re going to cover: How to make camping coffee 8 ways; without an electric coffee maker.
Choosing one of these methods is the best way to make coffee while camping, living in an RV, or during van life. These options are quick, portable and you’ll save yourself the hassle of dealing with electricity.
French Press Camping Coffee
Things you’ll need to make camping french press coffee:
- French press
- Ground coffee
- Boiled water
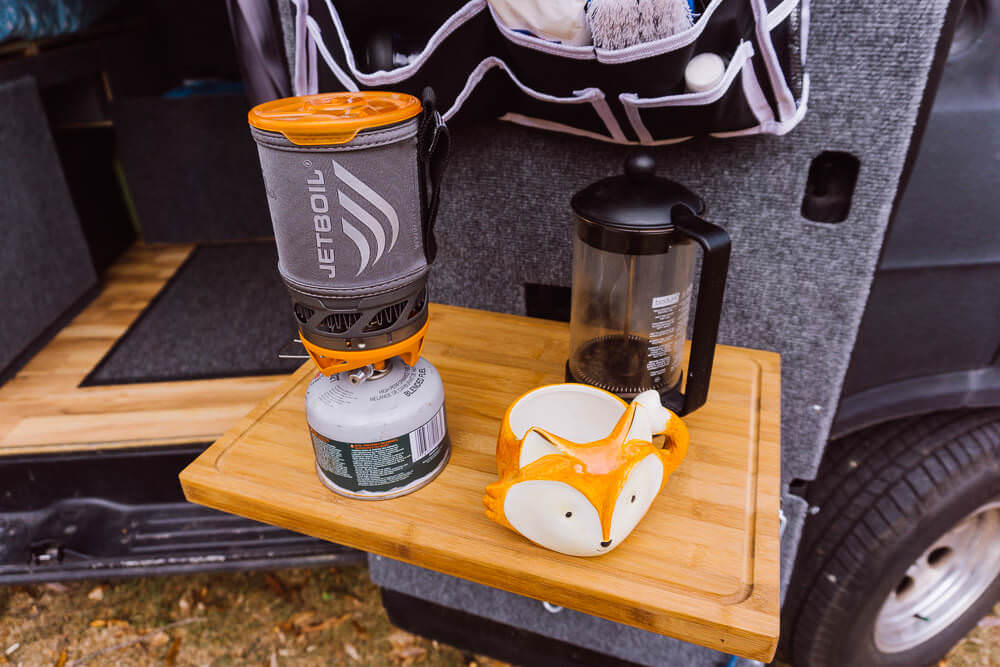
French press has been our go-to method of brewing coffee for the past four years. Start by boiling water in a pot or kettle. We prefer to use a Jetboil because we’ve found it to be one of the fastest ways to boil water and it’s very fuel efficient. Alternatively, you can use a camping stove or campfire!
You’ll need one cup of water for each scoop of coffee.
After the water has reached a boil, let it cool for 30 seconds. Then, put your ground coffee into the bottom of the french press. How much to use depends on how many people will be drinking. If it’s just you, one scoop and one cup of water will do.
Pour the hot water into the coffee press and allow it to steep for 2-4 minutes, depending on how strong you want it to be.
Once the coffee has reached the desired strength, gently press the plunger down to the bottom and pour out the coffee into a cup. Settle back and enjoy some of the best coffee you’ve ever tasted on a camping trip.
Camping Coffee Press Attachments
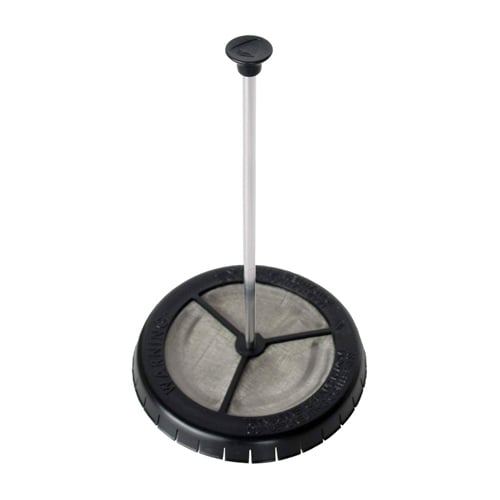
An especially useful item that we discovered through our travels is a camping coffee press attachment. This coffee press fits directly into your Jetboil eliminating the need to carry along a separate french press.
To brew coffee with this: boil water in the Jetboil, allow it to cool for 30 seconds, pour the coffee grounds on top of the hot water and give it a stir. Then, let the coffee steep for 3-4 minutes. Finally, use the press to slowly push the coffee grounds down and pour.
The camping coffee press can disassemble into multiple parts afterward making it easier to store.
Pour Over Camp Coffee
Things you’ll need to make pour over camping coffee:
- Pour over cone
- Coffee filter
- Ground coffee
- Boiled water
If you enjoy drip coffee, you’ll love pour over coffee. While there are special cones you can purchase in order to make your drip coffee, you can use a metal or heat resistant funnel for the filter as well. Get creative! Try this method once at home, and if you enjoy the brew, invest in proper pour over equipment.
To start, bring water to a boil in the using the pot of your choice. Meanwhile, fold the filter so that it fits into a funnel or cone. Next, pour a little hot water through the filter to soak it. Place the cone over your coffee cup and add the ground coffee to the filter.
Pour about twice the amount of boiling water as coffee, swirling it over the grounds. Let them sit for 30 seconds to prep the coffee.
Finally, pour the remaining water (just over a cup) over the grounds, using a spiral motion so all the coffee is soaked. You should do this very slowly, so it takes around two minutes to completely pour the water. It will slowly drip through the filter and into your cup.
Remove the cone once all the coffee has dripped through and enjoy your cup of hot deliciousness.
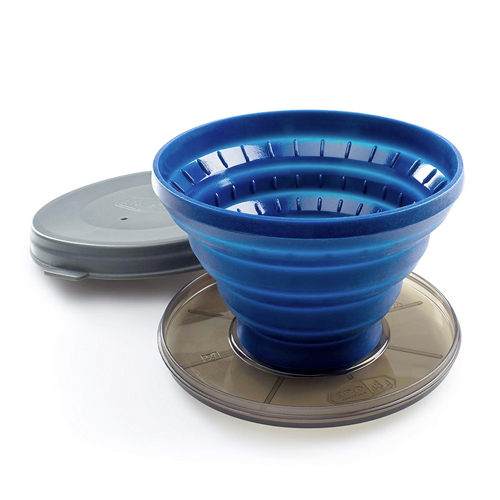
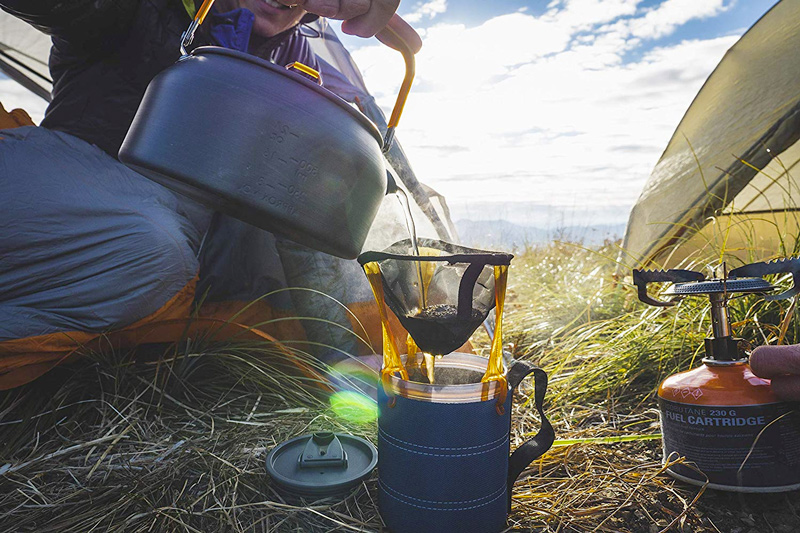
Backpacking pour over coffee
If you’re limited on space, pour over coffee is one of the best ways make a delicious brew without bulky equipment. Collapsible java drip coffee makers (aka pour over) were made specifically for hiking and backpacking.
They collapse into a small, disk shape and fit over one coffee mug. All you have to do is pack a filter and a small bag of grounds then boil water over a morning campfire.
Eco-friendly pour over coffee
One of the downsides to pour over coffee is having to pack filters in and out. To avoid the extra mess, consider packing a reusable pour over coffee filter cone. These are made of stainless steel mesh so you can re-use the cone and skip the filter. These will take up a little more space so it’s probably not an item you would take backpacking. But it is environmentally friendly and relatively easy to clean.

Aeropress Coffee
Things you’ll need to make Aeropress camping coffee:
- AeroPress
- Ground coffee
- Boiled water
Aeropress coffee makers have the most parts on our list. So we recommend this type of coffee if you have a little more space–like in an RV, or if you want a lot of options. With an Aeropress you can choose to enjoy an American coffee, or espresso, depending on how you make it. The device is kind of a combo pour over and press coffee maker, so it is often the choice of those who really value their caffeine.
To make your coffee, put two scoops of ground coffee in the big tube and add just enough water to soak the grounds. Let sit for 30 seconds, then fill the chamber with hot water. You will need to stir up the coffee ground and then push the plunger down, causing the water to press through the grounds. If you want to make stronger coffee, use less water. You can also add more water after you’ve made it, adjusting the coffee to the perfect strength.
The AeroPress may look complicated, but it’s actually fairly simple to use and will give you excellent coffee. Just make sure you bring along top quality coffee grounds!
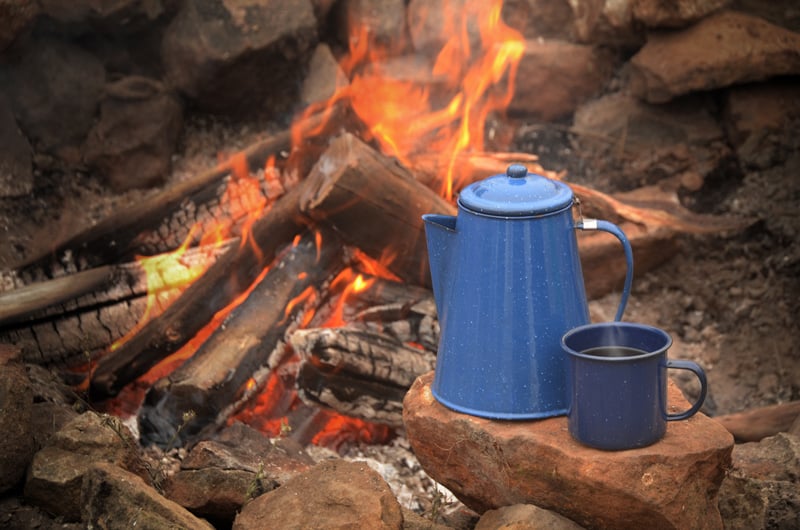
Campsite Percolator Coffee
Things you’ll need to make percolator camping coffee:
- Percolator
- Ground coffee
- Water
Percolator coffee is best for family camping trips where coffee and smores are on the menu. Most people choose to purchase 8 or 12 cup percolators; plenty to get through the entire morning.
Percolators work by passing hot water through the coffee grounds over and over–heating everything inside until the coffee reaches the desired strength. It might sound complex, but this is a surprisingly simple way to brew coffee.
Start by filling the main chamber of the percolator with water. Be careful to fill it only to the fill line so it won’t bubble over once boiling.
A smaller piece that looks like a round chamber with holes in it, rests inside. This is where you put all of the coffee grounds. It’s recommended that you use about 2 tablespoons of coffee for every 6 ounces of water.
Once you have everything in place, set the entire percolator, with its lid, over a flame and let it boil. As the water heats, it bubbles into the top chamber, steeping the coffee and producing a strong, delicious brew.
As soon as the water boils, you need to move the percolator off the flame so it just simmers. You can let it simmer for 10-15 minutes or until the coffee is the desired darkness.
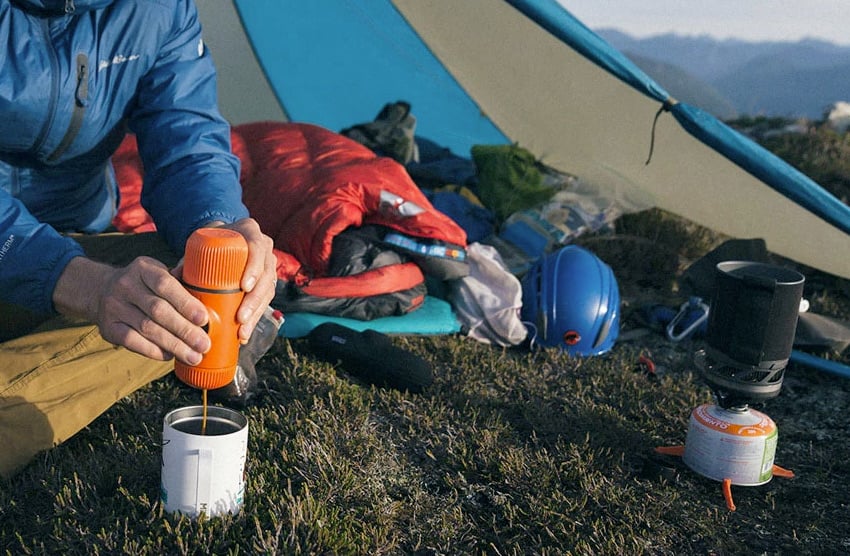
Portable Espresso Maker
Things you’ll need to make camping espresso:
- Portable espresso maker
- Ground coffee
- Boiled water
Need that super shot of espresso in the morning before you can function? Even espresso is available in the wild, if you have the right equipment. A portable espresso maker, when used correctly, is as close as you can get to a coffee shop while camping.
You’ll need to boil the water first and then pour it into the espresso maker. Leave it for 30-60 seconds to warm up the coffee maker, then add in the ground coffee and put the lid on. The lid will tamp the coffee.
Next, you need to pump the espresso. You should wait until the coffee has settled a bit, about 5 minutes, before you start to pump. The lever will force liquid through the coffee grounds and pour it out as a frothy brown liquid, perfect for starting your day off right.
[vc_video link=”https://youtu.be/xx2pLngzSKU?t=53″]Backpacking portable espresso maker
Adventure portable espresso makers are designed to be taken backpacking, hiking, biking–or anywhere really. You can add hot water and coffee grounds at the campsite; then travel with the coffee maker as it brews. When it’s time for a rest, just pump the coffee into one of its end caps and enjoy an espresso right on the trail.
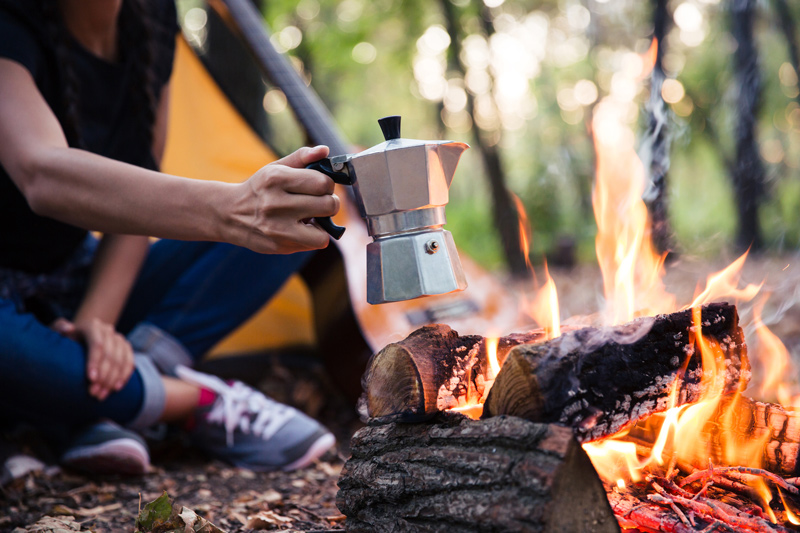
Stovetop Moka Pot Camp Coffee
Things you’ll need to make camping coffee with a moka pot:
- Moka pot
- Ground coffee
- Water
For those who need really strong coffee in the morning, but don’t want to deal with a manual espresso maker, the Moka pot will do the trick. This device is made up of three compartments. Put the water in the lower chamber, filling it up. Then add coffee grounds to the middle compartment. The whole thing is then set over heat to boil the water.
The water boils and bubbles up, steeping the coffee and pushing it into the top compartment, where you’ll serve from. The coffee grounds are kept in the middle compartment, so you don’t need to worry about too many grounds ending up in your final drink.
When the coffee has bubbled up and filled the upper container, it’s ready to pour. This will give you a very hot, strong cup of coffee that is similar to espresso, so one serving is usually fine for two people, unless you need more zing to your day.
Moka pots are durable, and we like them because they don’t require a filter. It’s also another one of those coffee makers that will boil the water and steep the coffee all-in-one so you don’t have to worry about traveling with extra components.
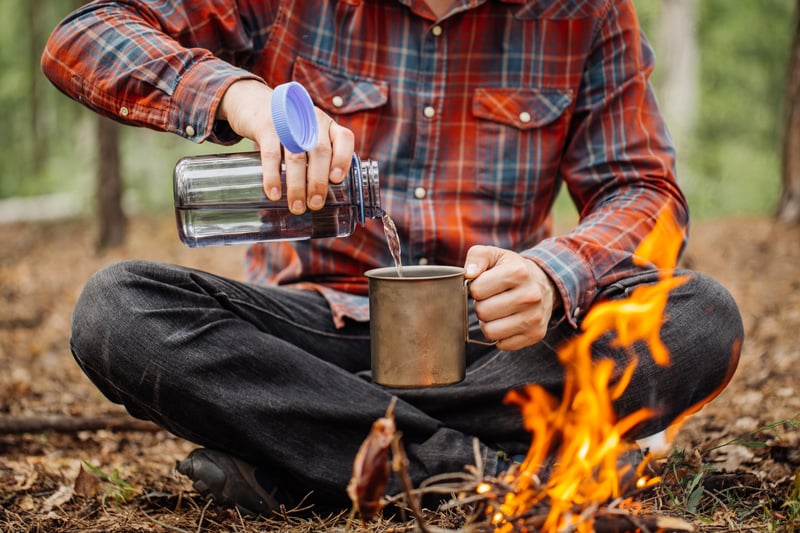
Instant Coffee
Things you’ll need to make instant camping coffee:
- Instant coffee
- Hot water
By far the easiest way to make coffee when you’re out and about is with instant coffee. Not everyone is a fan of this method, because the quality tends to be lower than properly brewed coffee. However, there are many varieties of instant coffee, so if you love a cappuccino or a mocha latte each morning, this is the way to go. Just pick your favorite flavor of coffee and you can enjoy gourmet drinks every morning.
Most instant coffees are available in containers where you scoop out how much you want and also in single serving packets. While they produce more trash, the single serving options are easiest for when you’re backpacking, since you never need worry about a lid coming off and all your coffee spilling.
To prepare instant coffee, you just pour hot water into a cup and dump in your desired powder. Stir and drink! One of the biggest advantages to this particular method is that the water doesn’t have to boil. This means you can keep hot water in a thermos and enjoy a nice cup of joe whenever you want, even if you don’t have a campfire.
Cowboy Camping Coffee–3 Ways
Things you’ll need to make cowboy coffee:
- Pot
- ¾ cup Coffee grounds
- 3 quarts Water to boil
- ¾ cup Cold water
Cowboy coffee is a classic for those who don’t have any equipment but still need to get their fix. The recipe is simple: Heat up your water to a simmer in a pot over an open campfire flame. Just before boil, pour in your coffee grounds. We like to use ¼ cup of grounds for every quart of water. Let the grounds roll in the hot water for 2-3 minutes.
Then, take the pot off the flame and let it settle for about a minute.
Finally, add the cold water into the mix. Just like the grounds, we use ¼ cup of cold for every quart of coffee.
The cold water will help the grounds settle to the bottom of the pot within a minute or two; leaving you with an energizing cup of coffee!
Cowboy Coffee Recipe Variations
Cowboy coffee with an egg:
- Pot
- ¾ cup Coffee grounds
- 3 quarts Water to boil
- Eggshells
Cowboy coffee has a number of variations. One of the most famous alternatives is brewing the coffee with eggshells. To do this, crush up any eggshells you have left over from breakfast. Then, mix the shells in with the coffee grounds.
Bring the water to a simmer, and add the mixture of grounds and eggshells. Once the water comes to a boil, take the pot off the stove and let the coffee steep for few minutes.
The eggshells will help your grounds stick together and sink to the bottom of the pot. Once this happens, the coffee is ready to serve. As a bonus, eggshells are alkaline so they add a bit of acidic flavor to the coffee. Lots of campers prefer this method because if you’re cooking eggs in the morning for breakfast you can use the shells that would otherwise be discarded.
Cowboy coffee with a sock (or cheesecloth):
- Pot
- ¾ cup Coffee grounds
- 3 quarts Water to boil
- Sock (or cheesecloth)
The third form of cowboy coffee involves a sock. To do this, you’ll fill a clean sock (or cheesecloth) with the coffee grounds. This will act as a filter. Then, heat water to a simmer in a pot over a campfire. Just before boil, add the sock. Keep the grounds submersed in hot water for 2-3 minutes.
Then, take the pot off the flame and let it settle for about a minute.
Pour yourself a cup of coffee and enjoy!

Camping Coffee Accessories
We’ve given you 8 ways to enjoy a hot cup of camping coffee. Our favorite method is the french press brew using a Jetboil and coffee press attachment. We like this because you can use the cooking system for so many things other than coffee. A few other items you may want to add to your list of kitchen accessories are:
This is a very useful post. Love your step by step instructions to brew the coffee. I will keep it in my mind.
Hey, Thanks for sharing this post This is a very useful post. I want to read more reviews about latte like how to make the perfect latte at home. If You have Please let me know. I’m very interesting to read about the latte.