
Hiking Half Dome At Yosemite National Park
Half Dome is a bucket-list hike, or climb, deserving a category all its own, attracting outdoor enthusiasts from across the globe. Just looking at it is sure to take your breath away, noted by renowned naturalist John Muir as “the most beautiful and most sublime of all the wonderful Yosemite rocks.”
The most popular hike in the park, the granite crest soars 4,737 feet above the valley floor with its summit once believed to be inaccessible, at least until iron eye bolts were drilled into the rock.
Eventually, cables were installed on the final 400 feet, allowing trekkers to pull themselves up the astoundingly steep grade of smooth granite to get to the top.
The half dome hike is 14-16 miles long, strenuous, and has a 4,800 foot elevation gain.

Getting Started: The Half Dome Permit Process
The hike is so popular that the park restricts permits to just 300 per day: 75 for backpackers and 225 for day hikers.
For the best chance to snag a permit, you’ll want to plan ahead and enter the permit lottery. Applications are accepted by the national park service during the month of March, no matter when you plan to hike, whether it’s June or September, with winners notified in April. To increase your odds of success, choose a weekday. September and October will also give you the highest chances of getting a permit to hike Half Dome.
If you miss the application deadline, there are additional permits handed out each morning to 50 lucky hikers. Don’t bank on snagging a same-day permit though. In 2017 there was a success rate of just 19% each morning.

The permit system was implemented for safety reasons in 2010. Before that, overcrowding on the cables made it rather dangerous, with as many as 1,200 people attempting the hike and two dying while climbing the cables the previous year.
Getting to the top is worth the nerves. You’ll end up with a spectacular view of the valley; and one that only few people ever experience.
Half Dome Backpacking Permits
If you plan to hike partway, spend the night and continue up the half dome cables you’ll need a backpackers wilderness permit. 75 of these are issued per day. The permit to will be valid for the entire length of your wilderness reservation. Day hiking with a backpacking permit up half dome is not allowed.

Safety On The Half Dome Trail
While thousands of people manage to safely summit the peak every year, it is not for those with a fear of heights or those who are out of shape. It can take 11 hours or even more, with nearly 5,000 feet of elevation gain over the course of the hike.
You’ll need to go after Memorial Day, which is when the park rangers place the steel cables covering those last 400 feet – they typically come down the day after Columbus Day in October.

What To Pack When Hiking Half Dome
Be prepared by bringing appropriate clothing and gear, wearing sturdy hiking boots with plenty of grip, as most ordinary running or tennis shoes will slip. Gloves are important for gripping the cables and preventing blisters.
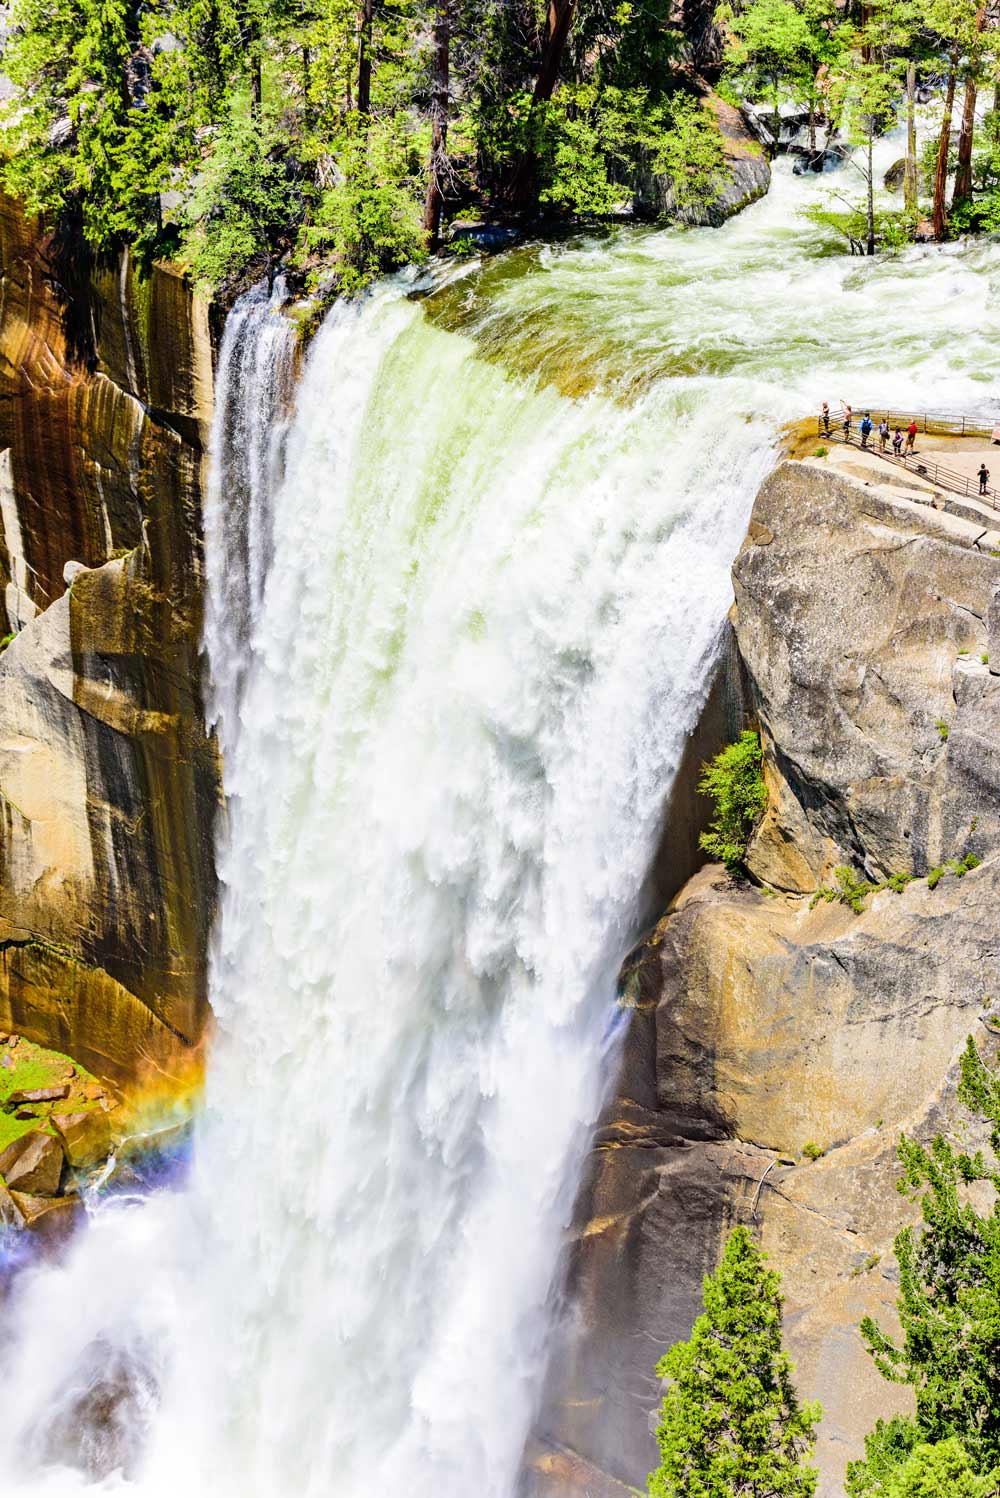
Clothing should be worn in layers as it will be cool in the early morning hours but as the hike progresses and the sun begins to peak, it’s likely to be quite warm or even hot, especially during the middle of summer. If you’re hiking half dome via the mist trail as most people do, you will get wet! Bring a waterproof jacket for the portion as you pass by Vernal Fall.

A hat, sunglasses and sunscreen are all necessary for protection too.
It is recommended that you bring about a half liter of water for every hour of hiking. The trip up half dome and back can typically last 10-12 hours for a reasonably fit person. That means you should pack at least 5-6 liters of water.
A robust day pack will be the best choice for carrying a lot of water and storing extra layers of clothing. You’ll want to pack a few snacks as well to keep the fuel up. Protein, granola bars, sandwiches, trail mix and beef jerky are all good choices.
What It’s Like Hiking Half Dome
There are two main routes to get to the Half Dome hike: via the Mist trail and by way of the John Muir Trail. The John Muir Trail will be less crowded and less steep; but it will also add an additional 1.5 miles to your trek. These two trails converge at Nevada Fall.
The most common route up Half Dome:
- Take the Mist Trail towards Vernal Falls (~1.5 miles)
- Pass the Vernal Falls Footbridge and head toward Nevada Fall (~2 miles)
- Enter Little Yosemite Valley (~1.5 miles)
- Climb the switchbacks and Subdome (~ 2.9 miles)
- Climb The Half Dome Cables (400 feet)
- Summit
Start this hike early in the morning, around sunrise. You’ll be able to take in a glorious view of the sun as it peaks over the granite bluffs. The shuttle system starts at 7am so you’ll either want to spend the night nearby or drive your own vehicle into the valley to avoid the crowds.
The hike to half dome begins on the popular Mist Trail and heads towards Vernal and Nevada Falls.
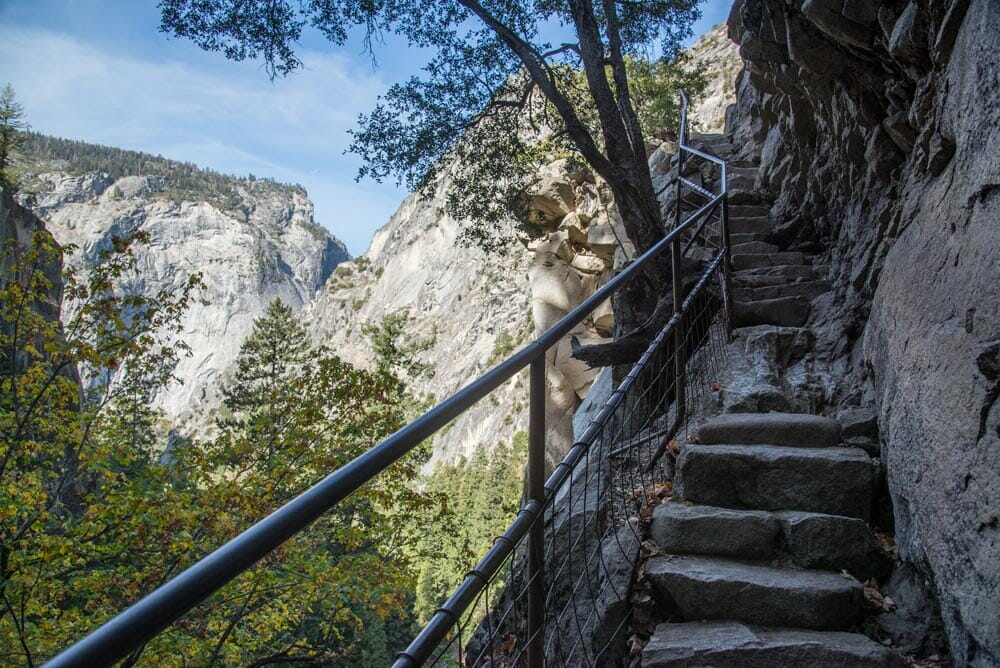
Climbing steps to the top of the Mist Trail, Yosemite National ParkThe Mist trail starts out smooth and flat but quickly graduates to a wet and slippery staircase. As you climb up along Vernal Fall, you will get a wet! Mist from the waterfall will spray over you and soak your clothes and backpack.
The Vernal Fall overlook is a fantastic view to take a break and snap some photos. The footbridge at the top is a turnaround point for many day hikers doing short trips around Yosemite Valley.
This is the last point to use flush toilets and fill up your bottles with potable water. Once you pass the footbridge, the crowds will disperse significantly and you’ll be left with those headed up half dome, and backpackers on their way to little Yosemite Valley.
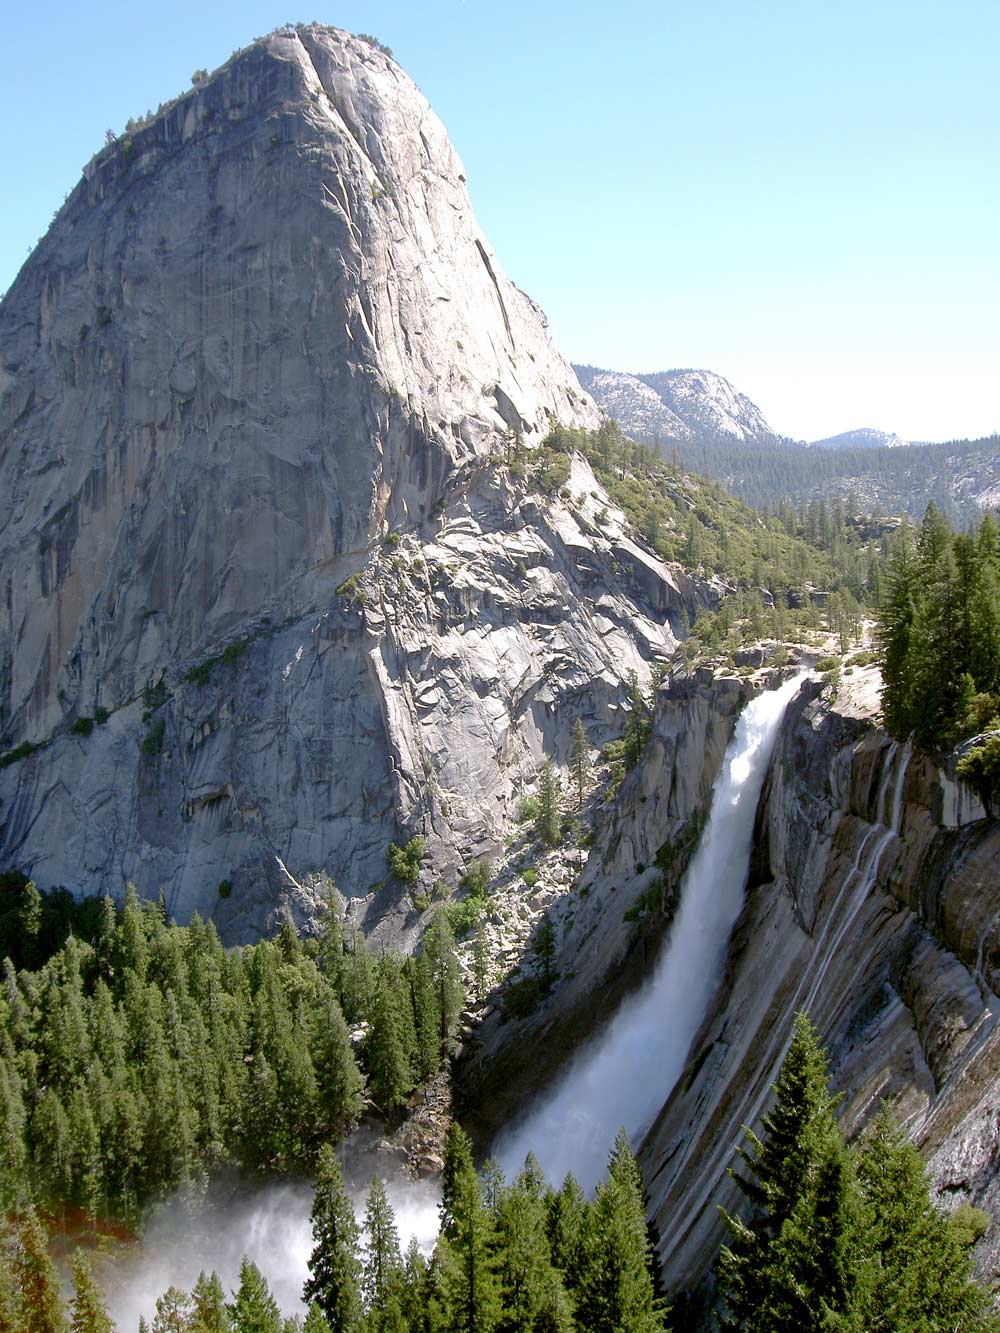
Continue past Vernal Fall up the switchbacks to Nevada Fall, stopping to catch your breath and take in the view. Just 0.2 miles off this trail to the right you can grab a spectacular view of Nevada Fall itself. It makes a great detour weather on the way up or on the way down.

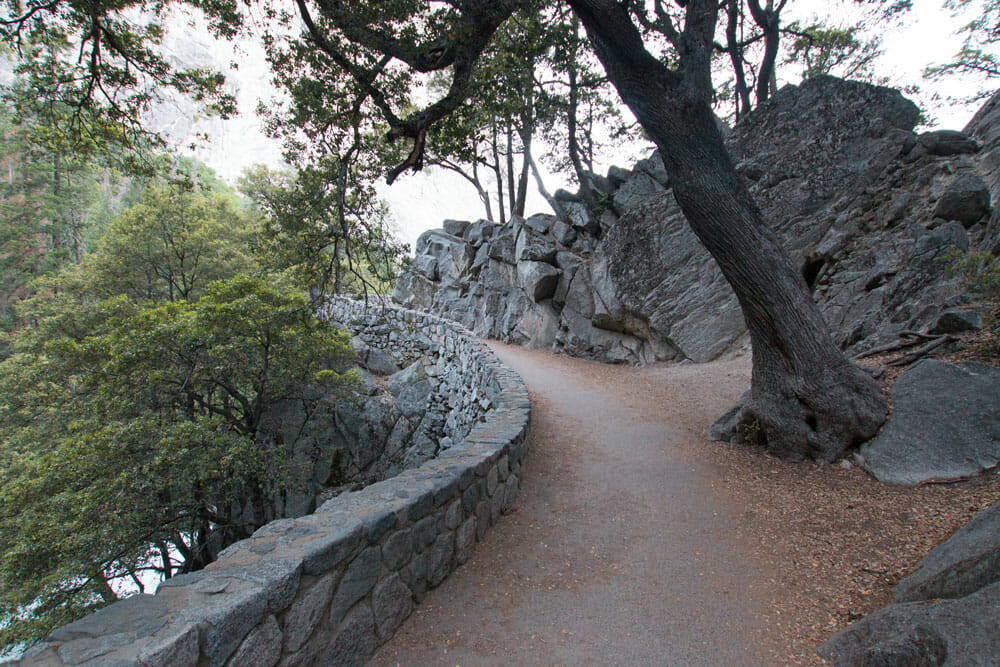
Next comes Little Yosemite Valley, a flat 1.5 mile section leading up to the subdome. The forested path will be a welcome break for your legs and is a popular resting place for backpackers making a multi-day climb to the summit. You’ll find composting toilets and two fire rings located there. Don’t forget to pick up a wilderness permit if you plan to camp!
After passing Little Yosemite Valley, the path the to subdome is a forested 1.5 mile climb up switchbacks. Take advantage of the shade, because the trees will eventually disappear behind you exposing an uphill scramble. Rangers will be around the base of subdome to check permits before continuing your hike.
Over the last mile you’re faced with rocky stairs and high elevation. Peaking the subdome, the cables will inch closer and closer as you climb, displaying a good view of what’s to come.
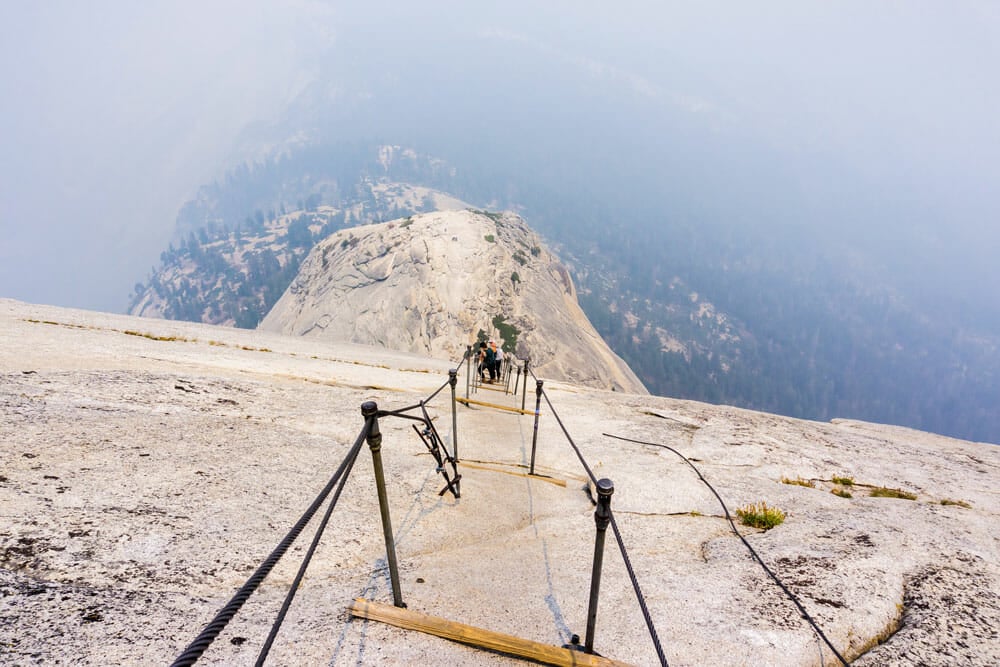
The Cables
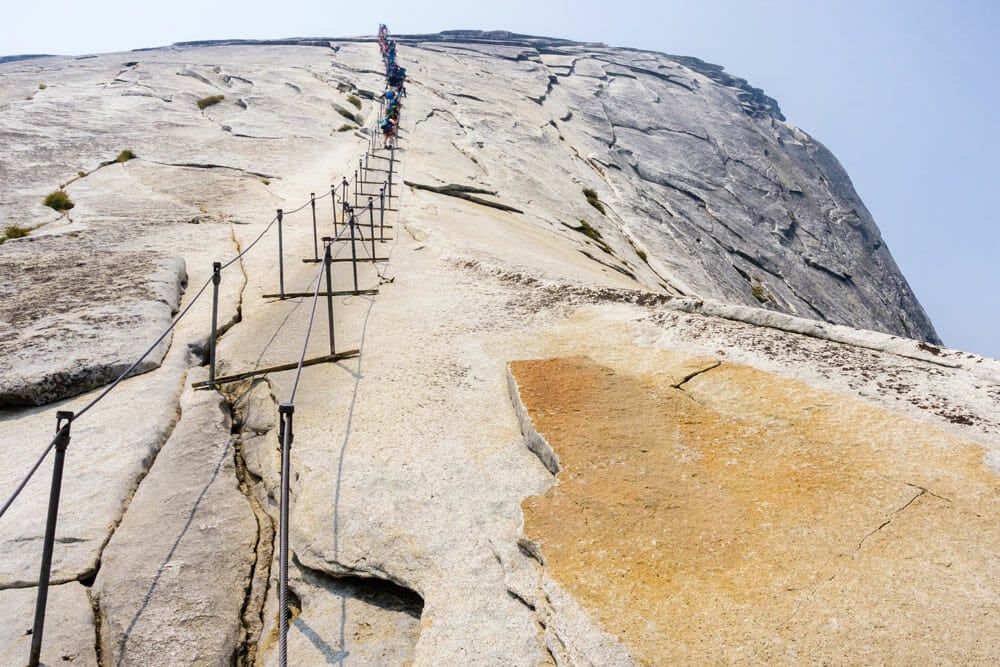
Give yourself a rest as you arrive at the base of the cables. You’ll want to get hydrated and put on a pair of gloves. The climb up Half Dome gets steeper as you move along. So while you may not need your hands at first, arm strength will become an asset near the top.
The granite path up Half Dome slopes as much as 70% in some areas. This is a long, 400 foot climb and can take 20-45 minutes depending on your fitness level.
Along the way, wooden slabs have been drilled into the rock face about every ten feet. The cables are wide enough that you can, and probably will pass slower hikers on the way up; especially on a crowded summer day. Take the hike slow and watch your footing. The rocks can get slippery and the path has been worn down overtime from previous hikers.
The Half Dome Summit
Once at the summit, you’ll be greeted with a bird’s-eye panoramic vista of the High Sierra and Yosemite Valley below. The height and scenery is indescribable. Grab a snack, drink some water, and bask in the sunlight.
Hiking Down Half Dome
The way down Half Dome can sometimes be more dangerous than the way up. You’ll be fatigued and if you left early in the morning, the cables will be crowded with more hikers later in the afternoon.
Take your time before starting the decent. Regain some energy at the summit and move slow on the way down.
The hike back is just as gorgeous as the way up. You’ll get a different perspective of the valley and can take a quick detour to Nevada Fall if you didn’t on the way up. If you have the energy, we recommend hiking up the Mist Trail, and going down the John Muir Trail. That will give you a different angle of the area as well as a great view of Nevada Fall.
What’s Next?
Make sure to plan on a few days of rest and recovery afterward. Unless you’re hiker who does this on a regular basis, you’re going to be sore. You’ll also have quite the story to tell friends having conquered one of the world’s most beautiful and famous overlooks. A great way to finish out the trip of a lifetime is to head back to the valley, check out the gift shops and galleries, and spend the night.
Yosemite has numerous campgrounds in and around the park. We recommend spending a few days exploring the area and taking short trips to lesser known portions of the park like Hetch Hetchy and Tuolumne Meadows.
Comments (0)