
Best RV Roof Sealant For Leaks And Cracks (Review)
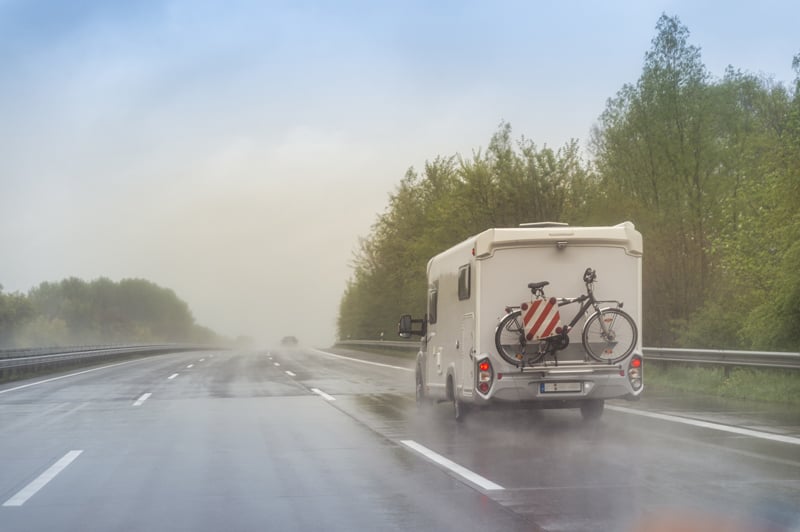
Water damage is one of the biggest concerns of an RV owner. Aside from problems with your plumbing system, roof leaks are the biggest culprit. Campers require constant maintenance and that includes preventing roof leaks.
Luckily, leaking roofs are relatively easy to repair. And if you stay on top of a yearly maintenance schedule, leaks can be prevented from happening in the first place.
High-quality RV roof sealants are an easy, and long-lasting solution to keeping rain out of your motorhome. In this article we’re going to cover the basics of what RV roof sealer is, how to use it, and our top choices for the best RV roof sealant.
- Read our related post: How to prevent condensation and moisture in your RV
- Read our related post: Best RV roof vent fans
- Easy application
- Minimal cleaning and prep work required
- Works well in hot weather

- Works well in nooks and crannies
- Single-step application
- Great value for money
- Compatible with multiple roofing materials
- EPDM and TPO compatible
- UV reflective for maximum sun protection
- Full surface coverage
- EPDM and TPO compatible
- Highly resistant to all weather
- Years of UV protection
What is an RV Roof Sealant?
RV roof sealant is a material designed to seal cracks, junctions and imperfections around your camper’s roof to keep it watertight. It’s frequently used on motorhomes, camper vans, and boats. This material is typically made of extremely durable synthetic rubber roofing membrane (EPDM) or Thermoplastic Polyolefin (TPO).
Using a roof sealant will help prevent interior water damage; saving you money and costly repairs down the line. All of this will increase the lifespan of your RV.
Roof sealers also prevent drafts and air leaks. Overall, they’ll make your camper more insulated against the elements.
Roof Maintenance
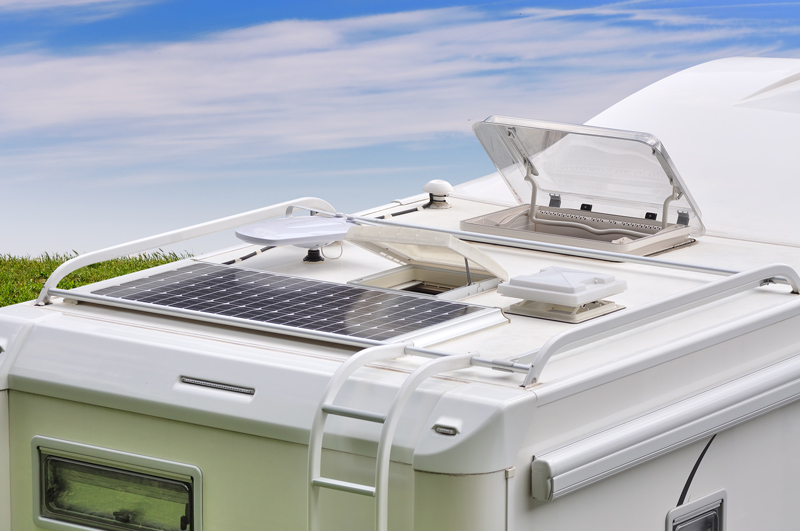
You should already be performing a yearly maintenance check on your RV to keep on top of any needed repairs. As part of that check, it’s important to take a look at the roof. Search for any signs of cracks or damage. Pay special attention to the area around roof vents, air conditioners, wiring, or exhaust vents that arise from inside the vehicle.
It’s common for sealants around those areas to dry out and split because of high heat, vibrations on the road, and perpetual travel.
If you start to see any sign of wear, apply a fresh layer of roof sealer to the area. This is an inexpensive repair that can save a lot of time and money later on.
Where To Use Roof Caulk:
- Apply to any noticeable cracks
- Anywhere wiring enters the roof
- Around Vent fans
- Exhaust vents
- Antennas
- On top of any bolts or screws
- Any unsealed corners or edges
What Type Of Roof Sealant And RV Caulk To Use
Liquid Roof Sealant vs. Adhesive Tape
There are two main choices when it comes to camper roof sealants: adhesive tape or liquid roof sealant. There are also full coverage roof coatings which can be applied to the entire surface area of your roof to protect against years of wear.
Adhesive Tape
This type of sealant comes in a continuous roll, making for a smooth and effortless application. You won’t have to worry about cleaning up a mess afterward, and you can start painting the tape surface immediately.
Adhesive tape is particularly easy to apply. You can cut it to length using a regular pair of scissors. Then just peel off the sticky backing, and gently apply it over the crack.
Liquid Roof Sealant
Liquid sealants also offer a long-lasting, watertight seal. They can however, be a bit more of a challenge to apply than tape. Liquid sealers require a steady hand and potentially a bit of practice before using. Fortunately, this type of sealant is also more forgiving during applications. If you make a mistake, it’s easy to wipe away the material before it dries and start over.
Liquid sealants work especially well in corners, on extremely uneven surfaces, or for dolloping over nuts and bolts.
- For maximum coverage, some people choose to apply both liquid sealer and adhesive tape to their campers. An example of this is when installing a vent fan.
Features To Look For In RV Roof Sealants And Caulks
UV Resistance
Always look for a sealant that offers UV resistance. The sun can dry out, crack, discolor, and damage certain materials if they aren’t adequately protected.
A UV resistant sealant resists premature deterioration due to the sun’s radiation, helping your camper’s roof to last for longer. They actively work to bounce radiation away from the roof, helping to keep it looking its best while also helping to cool the interior of your RV.
Tear and Vibration Resistance
The weather isn’t the only thing that can cause costly, long-term damage to your camper’s roof. Vibrations from moving on the road can also cause destruction over time, including cracks and tears.
Many top RV roof sealant brands are resistant to vibrations and tearing thanks to their rubbery nature. This can help to keep your roof intact even on rough terrain. Your sealant won’t fail due to bumps in the road, changes in weather, or even weight on the roof.
It’s a good idea always to carry some extra roof sealant during road trips. If you experience a tear in your roof, you can quickly patch it up without having to worry about causing further damage.
How Do I Apply RV Roof Sealant?
It isn’t always easy to apply roof sealant, especially if you’re new to RVs and campers. It requires precision, patience, and basic knowledge of RV anatomy. If you’re concerned that you won’t be able to apply a sealant, try to look for one that’s specially designed for easy application.
For touch ups, it’s best to avoid multi-step products that require an activator or primer. These are often sold separately, and add more room for error to the application process.
When it comes to the application itself, always make sure to prepare the surface first. This involves cleaning the surface and removing any dust or debris. Be sure the area is completely dry before applying sealant.
Afterward, carefully follow the instructions provided on your sealant. Generally, you apply the product, wait for it to dry, and then apply paint to match the rest of your roof. Here’s a helpful video on how the application process works.
How Do I Remove RV Roof Sealant?
If you make a mistake or need to re-apply sealant, don’t worry. For most RV roof sealer options, it’s easy to remove the material even once it’s dried and set.
You can usually find instructions on how to remove a sealant as well as how to apply it in the manual. Often, a putty knife is all you need to get rid of the majority of dry sealer. If you need to soften the material, you can use a heat gun to do so.
What Sealant Or Caulk is Best for My Roof?
It’s vital that you know the material your RV roof is made of before deciding which sealant to buy. Not all sealants are compatible with all camper roof types.
The majority of RV roofs are made of rubber, and as such, do well with rubber-based sealants. EPDM sealers are a good choice in this case.
Alternatively, TPO is even more resilient than EPDM. This material is increasingly becoming a more popular choice for its aesthetics. It does a great job of weatherproofing as well as adding shine to the roofing.
Best RV Roof Sealants Reviewed
There are numerous options available when it comes to sealants. The biggest decision is choosing between an adhesive tape and a liquid sealer. Once you’ve decided on that, think about the coverage area and your budget.
Tape sealers tend to be less expensive, but they’re not great for a large surface area. Buckets of paint on liquid sealer are the best choice for full coverage application.
- Easy application
- Minimal cleaning and prep work required
- Works well in hot weather
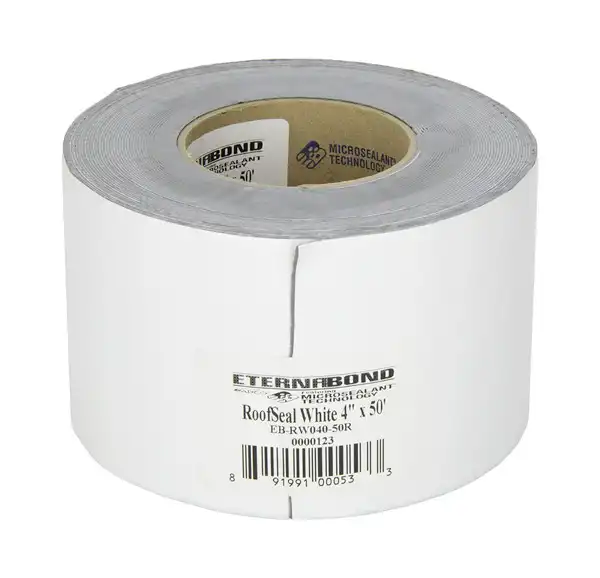
Best Adhesive Seal: Eternabond Tape
While the Eternabond Tape sealant is pricier than other adhesive tape sealants, it’s also one of the best sealers available on the market. When applying, Eternabond tape needs only minimal preparation. You don’t need to break out the rubbing alcohol, simply wipe the surface down thoroughly.
Eternabond tape is fairly malleable, making it ideal for changing weather conditions. It can elongate easily, thanks to its chemical composition which allows it to expand and contract alongside your camper van. Along the adhesive side of the tape, a silicone liner helps to prevent sticking to unwanted surfaces before application. This not only makes for an easier application but helps prevent material from adhering to other surfaces.
This sealant works especially well in warm climates. It’s designed to cope with hot weather, surviving conditions that leave other sealants dried and cracked.
It’s also designed to work on nearly any surface including rubber, all metals, tile, stone, brick, concrete, and wood.
- Works well in nooks and crannies
- Single-step application
- Great value for money
Best Value: Dicor Seal Tape
On a budget? Dicor butyl seal is a cost effective tape, yet still high quality. This sealant is quite a bit skinnier than eternabond (3/4 inches wide vs 4 inches) which is helpful for RV owners who need to deal with small or awkward joints around the roof area.
As a butyl sealant, this tape requires no pre-mixing or secondary ingredients. It’s easy to apply, even for novice RV owners.
Like eternabond, this tape doesn’t need to cure. So you can apply paint to the area almost immediately. What’s more, the sealant doesn’t create any reactive byproducts. This helps to ensure that you don’t experience any irritation when breathing or around exposed skin.
Tape sealers have a long shelf life making it an excellent addition to an RV repair kit. Just make sure that you store it in a cool, dry, and safe location, as the tape is prone to warping.
- Compatible with multiple roofing materials
- EPDM and TPO compatible
- UV reflective for maximum sun protection
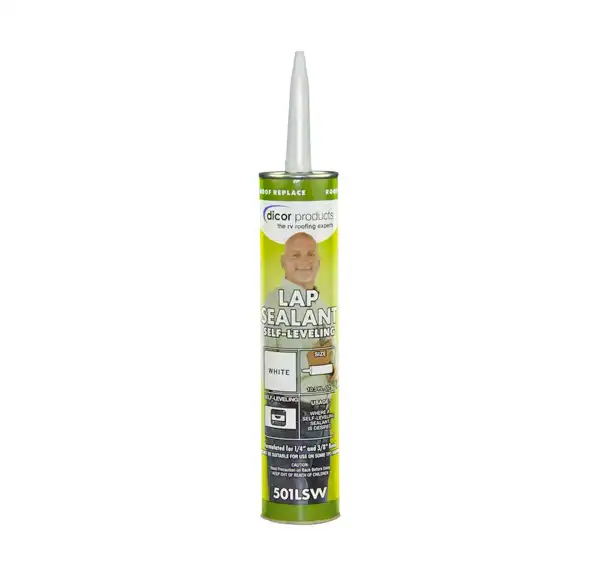
Best Liquid Seal: Dicor Lap Sealant
If your rooftop has a lot of awkward angles, Dicor liquid lap sealant is a good choice. This sealer works with just about any common RV roofing material. That includes aluminum, mortar, wood, vinyl, galvanized metal, fiberglass, and concrete. Dicor lap sealant is also both EPDM and TPO compatible.
Dicor is a single-step application so that you don’t have to worry about mixing in an activator, primer, or other secondary material.
Lap sealant is easy to apply straight from the bottle. As a self-leveling product however, you can only apply it with the bottle tilted at a horizontal angle. It won’t work vertically, which can complicate some applications.
When applying this sealant, make sure to wear proper protection, including gloves and a face mask. It may irritate the skin and mucous membranes.
- Full surface coverage
- EPDM and TPO compatible
- Highly resistant to all weather
- Years of UV protection
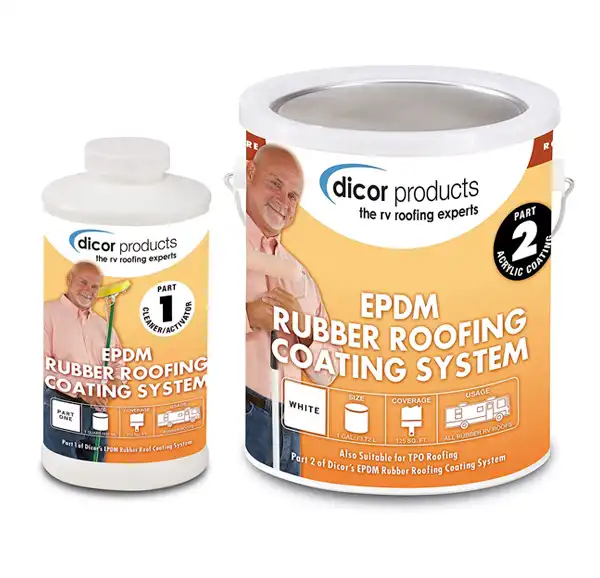
Best Full Coverage: Dicor Rubber Roof Acrylic & Cleaner/Activator
For large surface areas and full cover applications, Dicor Rubber Roof Acrylic and the Dicor Cleaner Activator is our top choice for RVs. This is a two-part RV sealant that comes in large, 1 gallon buckets designed to cover 125 square feet of surface area.
This is not a system designed for touch ups. You’ll want to set aside a full day to coat the entire roof which will protect against multiple years of travel. It adds years of life to your rooftop protecting against UV radiation and cracks.
The material is flexible and designed specifically for rubber roofs that are found on most RVs. You would not want to apply it to a fiberglass or aluminum surface.
How To Apply Dicor Full Coverage Rubber Roof Coating:
Multiple coats are recommended when applying the Dicor roof sealer, so you’ll want to purchase a few gallons of the acrylic, and enough cleaner/activator for one layer of surface coverage. At least two weeks prior to the coating job, apply liquid sealant to any large cracks or gaps to even the surface.
- Start by masking off the sides of your RV and any surfaces or vents you do not want covered.
- Dust off any large pieces of dirt or debris. It’s not necessary to wash the roof with water beforehand.
- Using an agricultural sprayer filled with the Dicor Cleaner Activator, apply a thin layer over the entire roof until the surface looks damp. Do no over-apply, there shouldn’t be any large drips or drops forming. Make sure to wear gloves and a protective mask during this process.
- Let the cleaner stand for 15 minutes.
- Rinse the cleaner off using the sprayer and water.
- Mix the Dicor Rubber Roof Acrylic.
- Paint over the entire surface area using either a brush or roller.
- Allow the first coat to dry to the touch.
- Then apply a second coat.
- You should use a minimum of two coats, then allow them to dry overnight.
That’s A Wrap!
The best roof sealant brands can help to extend the life of your camper by preventing damage from the sun, rain, and other factors. If you’re looking for the easiest application, consider Eternabond tape. On a budget? Take a look at the Dicor Butyl tape.
The Dicor Liquid Seal is best for awkward cracks and corners. And the Dicor Acrylic Roof Coating System is best for full coverage application which will extend the life of your RV roof for years.
The benefits of using an RV roof sealant are undeniable and a major reason why the RV owner needs to ensure their roof is sealed properly. Getting a high-quality sealant is the best way to get the results needed to seal a leaky roof. One of the best available RV roof sealant on the market is RV Roof Magic. There are plenty of unique chemical qualities to RV Roof Magic that makes it ideal as a RV roof sealant.
Make sure you prep with Dicor RPCRPQ EPDM Rubber Roofing Coating System roof Cleaner/Activator . A 2600psi preasure washer at a 30 deg angle works good . Apply when not too hot and under cover when sunny because it can dry fast . If you have a feel for house painting this product will work out fine . Prep work takes the most time to having a goog end product .
I used Dicor 501LSW-1 Epdm Self-Leveling Lap Sealant in my rv roof. It works great, easy to use and levelled off very nicely. Installed a new vent cap on the top of my trailer and couldn’t have been simpler.
One common issue of a low-quality sealant for RVs is durability. Thankfully, that is not the case with Dicor RV sealant. It does not crack, and its quick-drying nature ensures you will not spend a lot of time waiting for the solution to work its ‘magic.
On the downside, I did find Dicor sealant to be slightly ‘runny’ during applications. Thus, the solution tends to slide down during vertical operations.
Dicor is a great sealant. If you have never used this type of caulk/sealant its a bit different to use. Forget making a nice fillet. this stuff is made to flow. Slowly but it does flow or as they say self leveling. Use it on my Travel trailer roof to place a Max air roof fan. No leaks. Check your roof yearly and have a tube of this stuff on hand.
Pro-Tec Pro-Strength is another outstanding, high-quality product worthy of your consideration. It gives me confidence that this product will do what it’s made to do. This product comes with the inclusion of both a cleaner and a protectant, which is a feature I love. This product protects the roof from those UV rays that can cause so much damage. Also, it does a great job getting rid of the substances that often end up on top of your roof: tree sap, grime, bird droppings, etc..
Thanks for very informative post! Choosing the best sealant products requires an in-depth familiarity of their application method, elasticity, and compatibility factors. Again thanks!
4 packs of Dicor were enough to replace 3 vent stacks, the refrigerator vent, shower skylight and exhaust fan on my rubber RV roof. This stuff is easy to use for doing any repairs to your RV roof. It is not a flow and settle out like water but is sort of like a runny putty. After the first day of putting this on it looked like it was making my rubber RV roof bubble up.
Same experience for me as well. My personal experience with flex seal is that it is more asphalt based than rubber and cracks easily.
Most excellent product!!! Used this Proguard F99911 Liquid Roof on some EPDM sheeting that was showing a lot of black color through the material. I have used many products over the years that made claims but this is truly a product that meets its claims. I used the systems that most suggested of brushing around the edges and roof protrusions then pouring out the product in an area then squeegee then roll with a low nap roller, it works 100% as an EPDM rubber coating which is capable of covering an area of around 42 to 45 square feet. In addition, it is capable of withstanding a wide range of temperatures – from 6o degrees to 300 degrees Fahrenheit.
Take note that how the roof coating will work will depend on what material is used in producing the topmost part of your RV roof. For instance, if it is plastic then a rubber coating might be the ideal solution for it. If the roof is constructed out of a metallic material then both liquid and rubber roof coatings can work for it.
In my experience, Dicor sealant developed temporary bubbling/rippling during curing and was always messy to apply. The best sealant for leak damage, in my experience, is RV Roof Magic, which is a cost-effective way to get a new, leak-free roof for a fraction of the cost of roof replacement. It’s the only liquid butyl rubber in the world that is solvent based, having unique features that fix leaks the first time and flaking or future peeling. The difference between this coating and the other on the market is that the others simply dry to the surface. RV Roof Magic chemically bonds to the Roof. So, it becomes part of the existing Roof. “Liquid RV roof” (RV Roof Magic) coating is the world’s number one Liquid rubber roof sealant having ozone and UV ray resistivity.