
How To Install A Battery Isolator In Your Conversion Van
What Is A Battery Isolator?
Battery isolator systems allow you to charge the secondary batteries in your van when the motor is running.
There are many variations of hooking a system up, but they all share one common goal: to “isolate” your secondary battery so that when you’re running all of your electronics you don’t drain the starter battery.
Why You Should Have A Battery Isolator?
First off, battery isolators are relatively cheap to install. For less than $150, you can tap into as much power as you would get from $1000 of solar.
Secondly, they compliment solar systems really well. If it’s cloudy for a few days and you need some juice to charge your laptop, all it takes is a drive to the grocery store or your next campsite to get a little boost in power.
In a van, you’ll likely be traveling around, and it’s great to make use of the already running motor and vehicle electrical system.
If you’re on a strict budget and just need a small battery for cell phones and some lights, an Isolator and battery might be the only thing you need to get you started, and you can add solar when you get some more cash.
How To Pair An Isolator With Solar
The good news is that you don’t need to do anything special here! You can install this system right alongside your solar system.
Both the alternator in your vehicle and your solar charge controller are smart devices that monitor battery voltage and adjust their current to make sure that your battery doesn’t get overcharged.
What A Battery Isolator Cannot Do
A battery isolator only transfers power from the alternator to a secondary battery. The van’s alternator is designed to keep a float charge (13.8V) on a starter battery as well as provide enough power to keep all of the van’s equipment running, such as lights and a stereo.
It’s a great, simple device for this, but it’s not meant to charge up a secondary battery from deep discharge.
This means that the 13.8V charge is enough to get your secondary battery charged most of the way, but because it will never see a full multi-stage charge cycle (at points needing to be in the 14.5V range), it will never completely charge your secondary battery.
For many van dwellers, this isn’t a huge issue. All it means is that your batteries will wear out quicker and lose capacity over time. You may need to replace an AGM or FLA battery after 2 years rather than 4-5 years.
For smaller systems, this is a relatively small cost. The cost of a proper B2B charger might be more than you’re willing to spend on a small campervan battery that you only plan on using for a summer or two.
Also note that most MPPT charge controllers do use a multi-stage charge, so if you’re getting a lot of sun, you may not need a full charge cycle from your alternator and you can just use it to boost the system while you’re driving.
For those camping for long periods of time without driving, this may be an optimum approach.
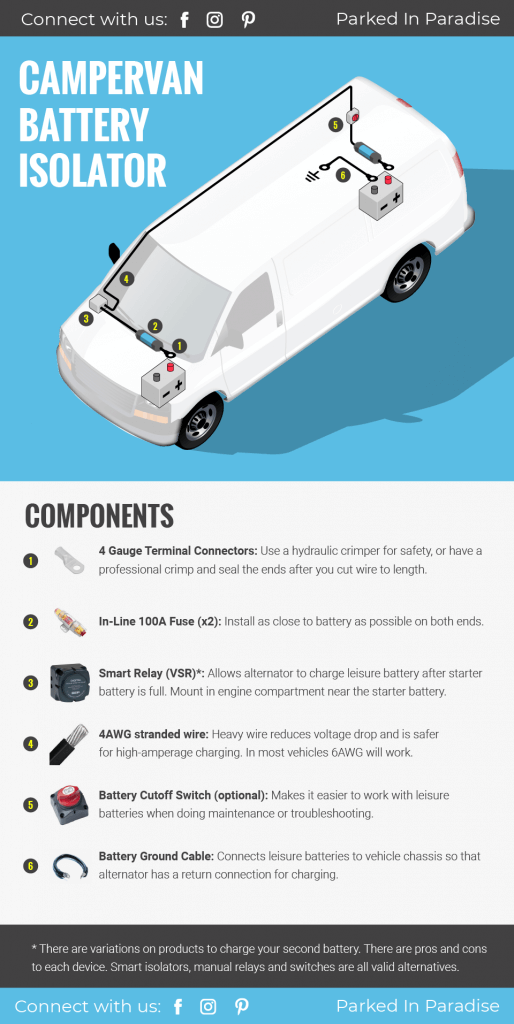
How To Install A Battery Isolator
As we said, there are a couple of different ways of hooking up your secondary battery. The general setup is similar for each option.
First check out the infographic below for the basic install layout, and then read on about the different ways isolate your batteries.
The install is one of the more basic things you can do for your electrical system. You need to find a space in your engine bay near the batteries to install the isolator and make sure you properly crimp the terminals because you’re dealing with heavy gauge wire.
| Parts Needed To Install A Battery Isolator | Notes | Quantity | |
|---|---|---|---|
| Ring Terminals | Use a 4 AWG and pick out a ring eye size for the isolator you buy. | 4-6 | |
| Heat Shrink | Useful for all wiring installs | 1 | |
| 4 AWG Fuse Holder | Install on both ends close to the battery to protect as much wiring as possible | 2 | |
| Isolator | See below for options | 1 | |
| 4AWG Stranded Battery Wire | Use stranded wire for better routing and stronger connections | 25-50 ft (varies per van) | |
| Manual Cutoff Switch | (Optional) | 1 | |
| Secondary Battery Ground Cable | Completes circuit for alternator charging | 1 |
Battery Isolator Wiring Diagram
Which Type Of Battery Isolator To Install:
There are four basic ways to make a connection to the secondary batteries. Each have their pros and cons, so pick one that fits your needs.
- Manual Switch
- Basic Relay
- Voltage Sensitive Relay (VSR)
- Diode Based Isolator
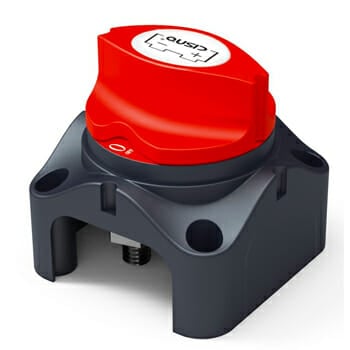
Manual Switch
A manual switch can be paired with the other systems so that you have a hard disconnect as an extra step of safety for working on the leisure batteries.
Manual switches are the most “risky” because you have to remember to turn them off when you stop the van. You only need to forget once and you can accidentally drain your starter battery to strand yourself.
Best Use: if you are on a severely limited budget and want the simplest way to charge your batteries but plan on upgrading later.
| Pros | Cons |
|---|---|
| Inexpensive | Not automatic; you can drain your starter battery if you forget to turn it off. |
| Simple; fewer parts to break | |
| Can use secondary batteries to start the car if the starter battery is dead | |
| No voltage drop |
Basic Relay
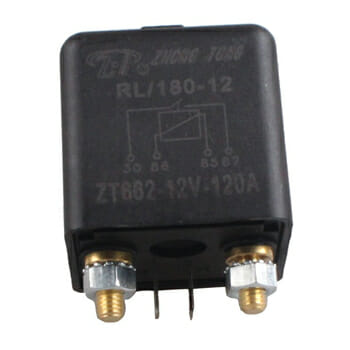
Relays are mechanical switches that use an electrical “signal” to turn on. They use a little bit of electricity – in this case a 5A wire- to make a connection that much more amperage can travel through- such as a 120A alternator.
The relay signal wire physically moves a piece of metal in the relay to connect the large wire going in to a wire going out. Because it’s a physical connection, there is no voltage drop as a result.
There are moving pieces in a relay, and they can fail. Because of the high amperage connection, the connection can “arc”, which welds the contacts together.
This permanently connects your starter battery with your secondary battery without you knowing. If you happen to drain your batteries, it can leave you stranded. This doesn’t happen often, but it’s good to be aware of.
This is the most complicated of the options to install because you have to wire in a signal to the relay.

For battery isolation, you want your relay to activate when the van is running. The best way to do this is to find the “accessory” wire in your fuse box and tap into that wire.
Many times this takes some trial and error with a digital multi-meter to see which wires read 12V when the van is on, but 0V when it’s off.
Optionally: you can add a toggle switch to the cab area so that you can turn the relay off in the even that you want to. At the least it adds to the cool factor!
*With this system as long as your starter battery has a little charge to activate the signal wire, you can use your leisure batteries to help jump start the van if it dies. This doesn’t happen often, but is a nice backup for those people who plan on being far away from civilization.
Best Use: You have some experience with electronics and don’t mind troubleshooting complexity if it would arise. It is a more budget-conscious option while still protecting your starter battery from accidentally draining.
| Pros | Cons |
|---|---|
| Relatively inexpensive | More complicated to install |
| Replacement can usually be found at automotive stores | Relay has moving parts; more things to break from use / vibration |
| Can be used to start the van if the starter battery is dead | If the event you leave your ignition key “on” with the van not running, you can drain the starter battery. Unlikely, but it’s possible! |
| No voltage drop |
VSR (Voltage Sensitive Relay)
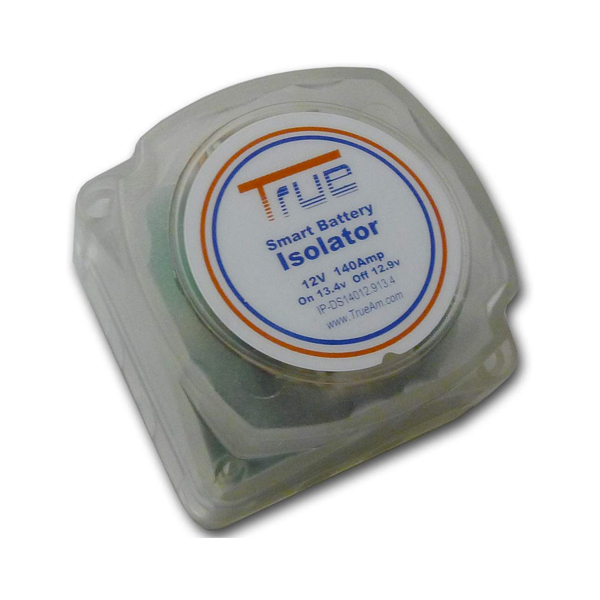
A Voltage Sensitive Relay (VSR) is an automatic component that activates when it sees that higher voltage from alternator charging and then turns off when the voltage drops.
This is a clever way to not need any external signal wiring so it is easy to set up.
Because it is relay based, it has the same downfalls as the simple relay above. One of the failure modes can leave your batteries permanently connected, which leaves you unable to start your vehicle if you drain the batteries all the way.
The only way to know that this has happened before it causes problems is to have a voltage reading of your starter battery and secondary battery and keep track of them. If the starter batterie’s voltage stays the same as your secondary battery, the two are connected.
Because the alternator needs to be running for a VSR to work, if your starter battery is dead, there is no direct way to use the leisure batteries to help start the van. There is a relatively small risk of needing to do this anyway if your starter battery is healthy.
Best Use: You want the easiest way to get alternator power in a set-and-forget system. With no voltage drop, this will be the go-to option for most camper vans.
| Pros | Cons |
|---|---|
| Easy to install | Relay has moving parts; more things to break from use/vibration |
| Set and forget | Can’t use the secondary batteries to start the van if the starter battery is dead |
| No voltage drop | Can't disconnect when the motor is running |
| More expensive |
Diode Based Isolator
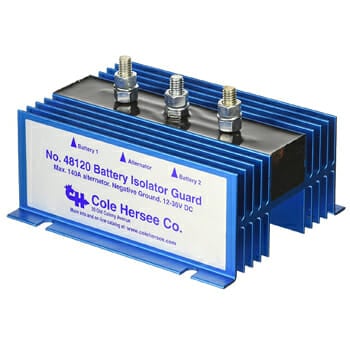
Diode based isolators are the tried-and-true system for electricians. They use electrical magic to charge starter battery and after it is fully charged they divert power to the leisure batteries.
There is no way for power to flow between your two battery systems so you can’t accidentally drain the starter battery.
This type of Isolator installation is slightly different from the other options. The Isolator is wired in between the alternator and the starter battery. For some newer vehicles, a simple isolator creates problems with the electrical system. In this case, a 4-post isolator can be used although they are about twice as expensive. See the install instructions on Littlefuse.com for more info.
The linked isolator is fully sealed in epoxy with large cooling fins to reduce the strain on the electronics. There are no moving parts to break and because it is fully sealed it is water and dust resistant.
Best Use: You want the most robust option available and are willing to trade a little voltage drop in exchange. This is our favorite system, and while diodes can wear out, they are the best combination of simplicity and durability if you’re willing to install it properly.
| Pros | Cons |
|---|---|
| Easy to install | Diodes system has a voltage drop |
| Set and forget | Can’t use the secondary batteries to start the van if the starter battery is dead |
| No moving parts: most durable option | Can't disconnect when the motor is running |
| Separated battery banks is ideal for avoiding potential balancing issues | More expensive |
Hi, love your website, I have recently purchased the True brand vsr as it is featured in another web site,
reading the product info on Amazon it states that this unit will engage the starting battery / house battery if the house battery is being charged by solar/battery charger and the start battery is low, am I wrong?.
Nope-not wrong: that’s the way it should work. The VSR will connect the two batteries (house and starting) once the system voltage gets high enough to indicate that they’re charging. This can happen from the charge controller end or the alternator end. It will then disconnect the two batteries once charging voltage drops. Most of the time your starter battery will be fully charged after a short drive so it doesn’t usually need charge, but in certain circumstances it can.
I am pretty much pleased with your good work. You put really very helpful information. Keep it up.
What is most confusing is the cutoff switch. If I run the wire from the isolator to one of the lugs on the cutoff switch, then to the aux battery, what do I do with the other lug on the cut off switch? Does it get grounded or does it get connected to the negative side of the battery?
I believe you’d run the wire from the isolator to one of the lugs on the cutoff switch, then run a wire from the other lug on the switch to the aux battery. Leaving the switch open, or on, will allow the alternator to charge the aux battery through the isolator. Closing it will shut this function off. I can’t imagine a situation where you’d need to turn this switch off, as the isolator will keep the two batteries, well, isolated. It’s more of a secondary, backup cutoff. I’m about to run this setup and I’m electing not to use a manual cutoff switch, as it is not necessary IMO.
Is it possible to use VSR with GEL batteries? Since the chemical content of GEL batteries very sensitive to the sudden&high current I really suspected to use it..
If you’re using the Basic Relay – would it matter that there are two different type of batteries? For example, we have a Lithium house battery and a lead acid car battery – is it okay to use the basic relay between the two? Are there any downsides?
Hi, and thank you for this forum. I want to run a small fridge off my second battery, which is going to be charged by a smart battery isolator. So the solar controller and the isolator can both be delivering charge to the second battery while that second battery is running the fridge? What is the best way to do the connections at the battery? Do I simply “stack” the connectors on the battery posts? Thanks.
The 4 Gauge wire that you have posted above has many 1 star reviews claiming that it is actually 6.5 gauge wire. You might want to update that link so that people using your links will purchase the right size wire.
First, great site! Thanks for all the insight. I just installed my battery isolator. I’m noticing my wires are getting hot near the inline fuses. Let me know if you have any suggestions as to why.
I don’t know if you got the problem fixed. If not let me know and I can explain why the wires are getting hot. It is a simple fix. Or look up the big 3 upgrade it will also tell you.
Thanks for the very informative post! Space is very tight in my engine bay (2010 Odyssey), and there really isn’t anywhere to install my battery isolator. I’m wondering if there’s any reason that the isolator has to be physically near the starting battery-could I install it near the house battery in the rear of the van instead? The isolator is a Key lime Iso-Pro140, if that’s important.
It’s a *Keyline* isolator. Damn you, autocorrect!
Can this work for 2 or 3 secondary batteries or just the one battery?
Hey I have the same question.
Just wondering were you able to find an answer for your question ?
Hey, looking to install a simple manual set up – looking at the wiring diagram – would i not need an inverter between the manual switch and leisure battery ? What side would the fuse go if this was the case ? – how would i add a battery level indicator to read the 12v lesuire battery ? Thanks – best website ive found regarding battery install
The VSR isolator kit I bought came with 20 feet of 7AWG wiring. I will probably need to use at least 10 feet of that. Will there be a significant voltage drop if I use the 7 AWG? Should I just go ahead and buy some bigger wire?
I’ve got a problem you might understand.
I want to use the VSR solution as shown above. Given its labeling, it outputs 12V up to 140A.
My battery has a maximum input current of 50A. What do I do to make sure that the current coming from the battery stays underneath 50A? I understand the circuit breaker will activate if the rated amps are exceeded, but I don’t want to plan on that happening! Is there a way to limit the amps coming from the VSR?
Hi, did you ever figure out an answer to your question? I’m wondering the same thing. Thank you very much!
hi, I wanna connect an inverter to charge my laptop, a coffe maker and have an extra plug, how many “A” has to be the leisure battery? do you recommend any brand of battery?
Thanks
What about newer van? with smart-alternator? i understand the VSR and the basic relay wont work with the smart-alternator.
Is there are other option then manual switch (cheap, uncomfortable) and DC-DC charger (300$+ too expensive)?
Thanks
Hi! My current van set up is with one 12V Renogy deep cycle 100ah battery to the alternator. My question is, can I install an additional battery next to the current battery to get double the power? Can the alternator system handle that and what is best practice for that? Thank you
hey there! thanks for this great post! do you have an estimated time it took to install this?
Ive been told I need to run another ground from my secondary back to my starting battery. Is this correct or should I be fine with grounding it directly to the chassis? Also, can I position my Smart Isolator in the rear of the van rather than under the hood? Thanks!