Best Solar Panels For A Camper Van
Solar panels provide clean, quiet energy to your camper van. It’s the perfect way to charge batteries while camping off-grid.
Camper solar panels come in many different types and sizes. Some are lightweight and flexible to contour your van, and others are rigid for high performance.
Solar panel kits are plug-in-play systems that are easy to connect alongside batteries and other components.
In this article, we’re going to discuss the different types of solar panels available, the best place to put them, and how many you will need.
- Looking for a larger system? Consider these RV solar panel kits
The Best Solar Panels For Your Camper Van
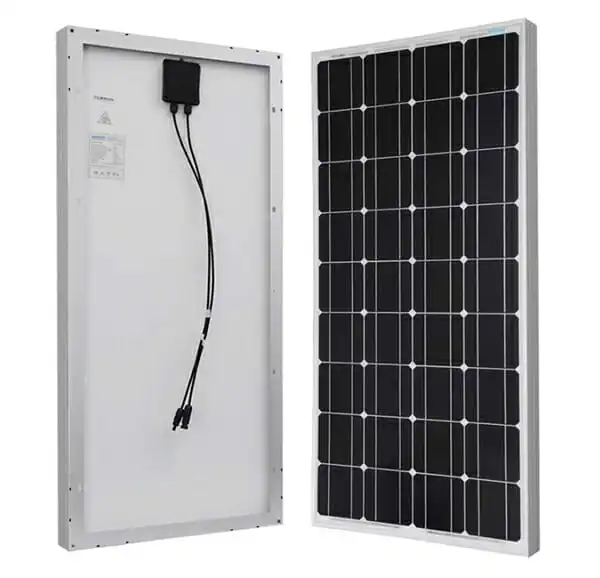
- 100W Monocrystalline Solar Panel
- Includes waterproof junction box and MC4 connectors
- Pre-drilled holes for grounding
- Low profile
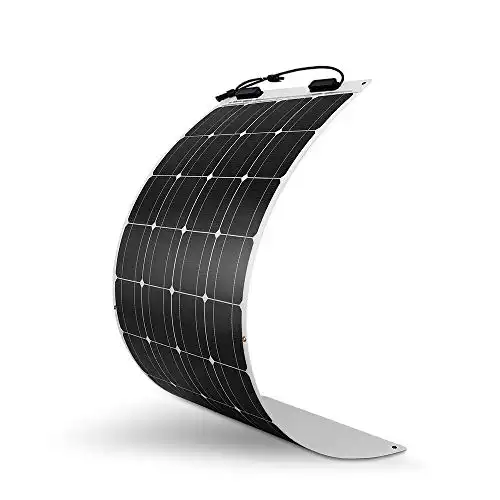
- Bendable up to 248 degrees
- Weighs only 4lbs. (70% lighter than standard panels)
- Corrosion-resistant aluminum stand
- Foldable + carrying case
- Waterproof
- 20A Charge Controller
- 10ft. Solar Cable
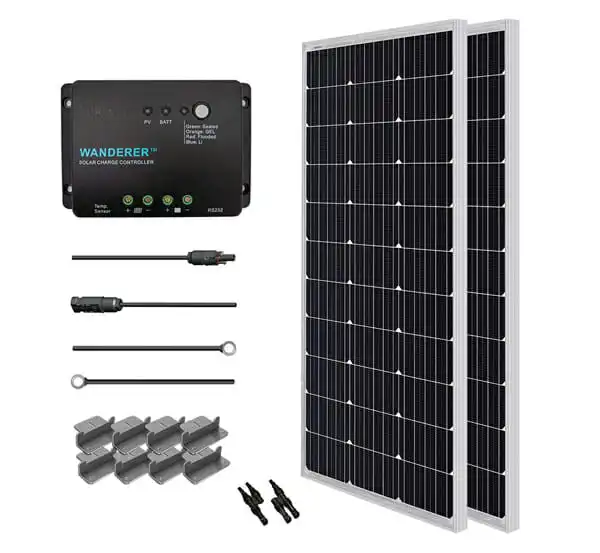
- 100W (x2) Monocrystalline Panels
- 30A PWM Charge Controller
- 20ft. Solar cable, MC4 connectors, mounting brackets
- Optional MPPT upgrade
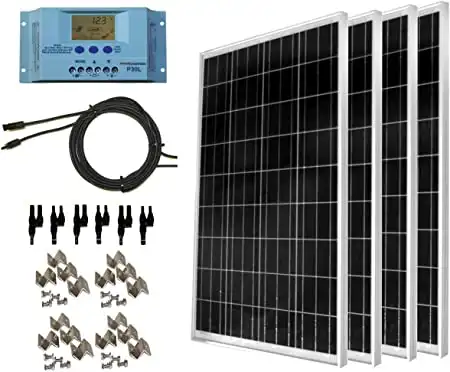
- 100W (x4) Polycrystalline Panels
- 30A PWM Charge Controller
- 20ft. Solar cable, MC4 connectors, mounting brackets
- Optional battery add-on
- The Best Solar Panels For Your Camper Van
- Rigid VS Flexible Solar Panels
- Solar Panel Placement
- Solar Panel Cell Type
- How Many Camper Van Solar Panels Do You Need?
- How To Make Your Solar Panels More Efficient
- How To Wire Your Solar Panels: Series Vs Parallel
- Solar Panel Buying Guide
- Best Rigid Solar Panels For A Camper
- Best Flexible Solar Panels For A Camper
- Best Portable Solar Suitcases
- Solar Generators
There are a few key differences to keep in mind when choosing camper solar panels:
- Rigid vs. Flexible solar panels
- Fixed vs. Portable solar panels
- Cell type: monocrystalline vs polycrystalline vs amorphous
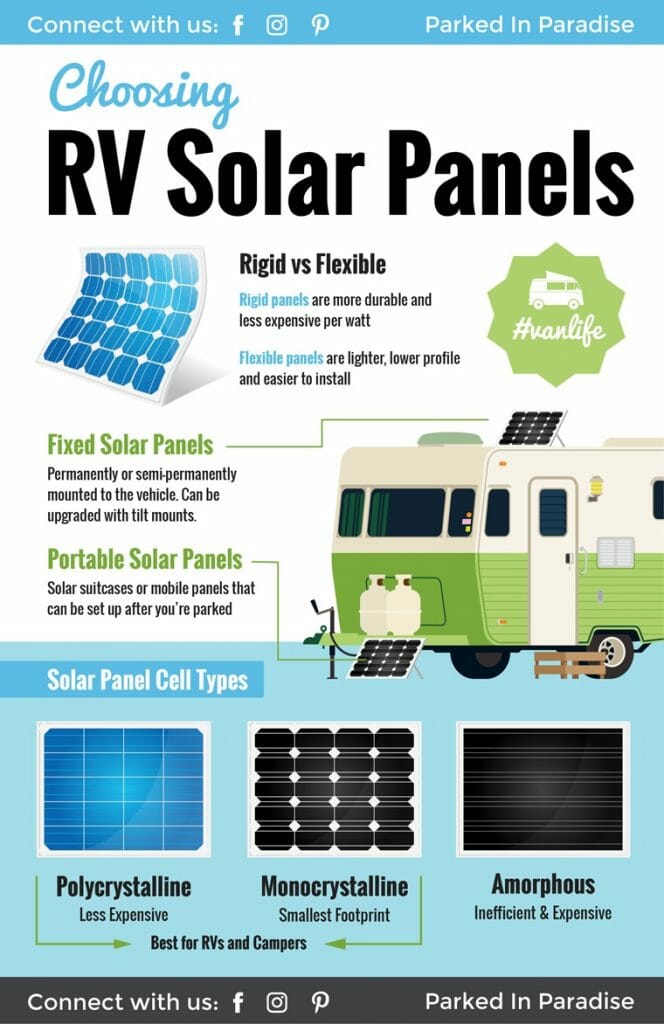
Rigid VS Flexible Solar Panels
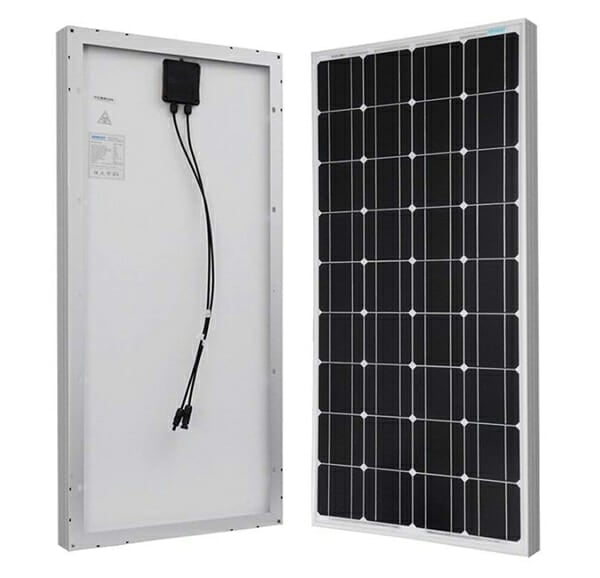
Rigid Solar Panels
Rigid panels are solar cells mounted under tempered glass. They range in sizes from huge residential panels to small 50W device chargers.
Most panels are mounted in an aluminum frame and designed for extended outdoor use.
- Wide range of sizes
- Durable: Built to withstand hail, sand and wind. The glass is also resistant to scratches which is best for long term light efficiency.
- Efficient: The sturdy frame allows you to aim panels towards the sun.
- Easy to clean: they can withstand abrasive objects like an ice scraper.
- Cheaper per watt: They generally come with a long warranty (10+ years)
Rigid Solar Panels are the best bang for your buck when it comes to performance and durability.
Flexible Solar Panels
Flexible solar panels are made flat cells that are molded with a layer of protective plastic on top.
Because they don’t have a frame, they are low-profile and can bend to shallow curves such as a DIY camper van roof. It also makes them lightweight.
The softer plastic on these panels is more prone to getting scratches on the surface. However, due to this flexible nature, they are less likely to crack from a large impact.
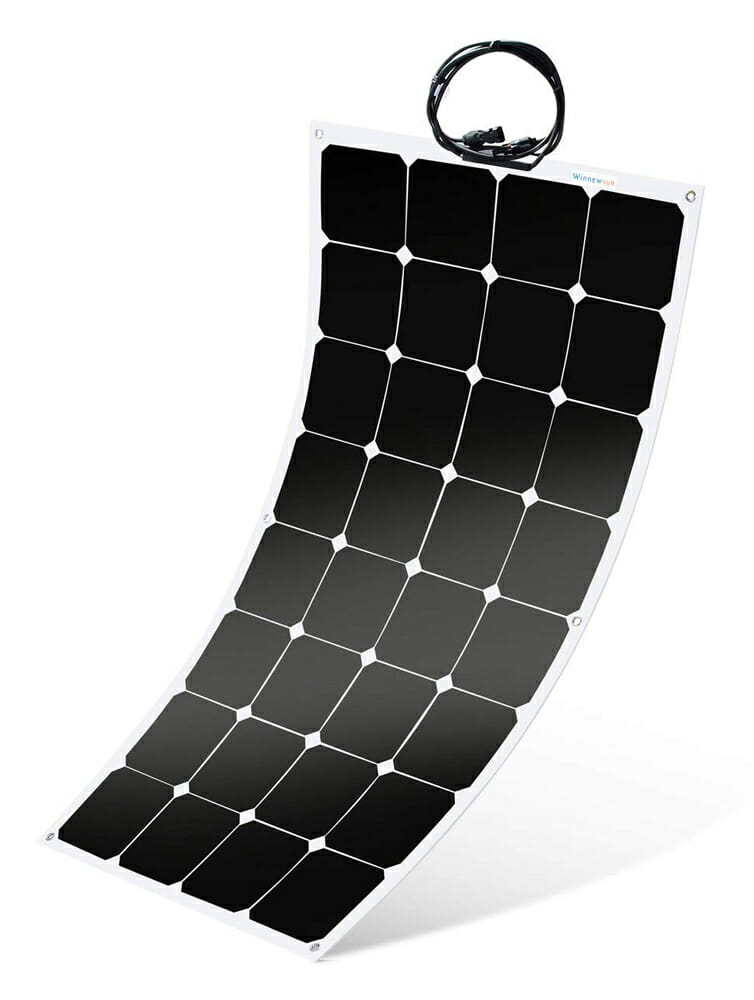
Bending the panels too much tends to cause issues with internal connections and even shorting out between the cells.
However this has been improving on a yearly basis in the industry. Because of these issues, the warranty on flexible solar panels tends to be significantly shorter than rigid panels.
Flexible panels in general are more limited to sun exposure because they’re not free standing. Their positioning is determined by the surface that they’re attached to.
- Low profile
- Bendable up to 30 degrees
- Lighter
- Prone to scratches
- Shorter lifespan
Solar panels work best when the whole panel is getting consistent light. With flexible panels, the more you bend the panel, the less efficient it will be because part of the solar panel will be getting less direct light.
Flexible solar panels are best for:
- Someone trying to go stealth camping
- When the only available surface area is significantly curved (like a teardrop trailer or boat)
- Someone who does not want to do a lot of construction or drill holes in the roof
Using Flexible Solar Panels On A Stealth Camper Van
If you’re trying to build a stealth camper van, any panels mounted to your roof are going to be a giveaway that someone is living in a van.
There are various ways disguise this with roof racks and flush-mounted flexible panels.
When you’re living in a van, hiding yourself has as much to do with your location as it does how your van looks. In neighborhoods that are wary of the homeless, just having a vehicle above a certain height will get the cops called on you.
Other areas of cities have full Class C RV’s parked in broad daylight and no one blinks an eye.
This is all to say that we don’t think that it’s worth sacrificing a lot of effort and resources trying to hide your solar as you may be thinking. If you have solar panels, hiding them helps in only a small percentage of situations.
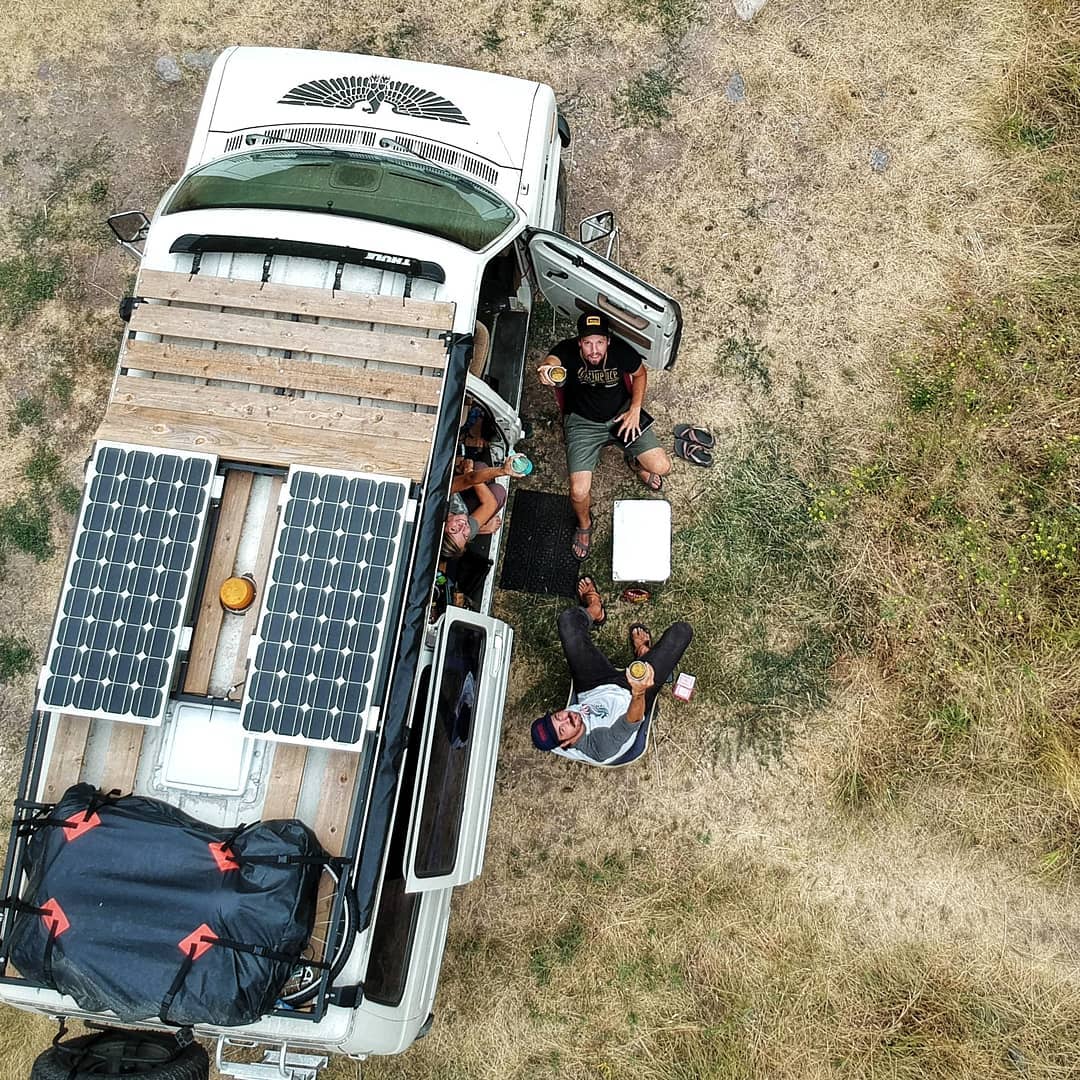
Solar Panel Placement
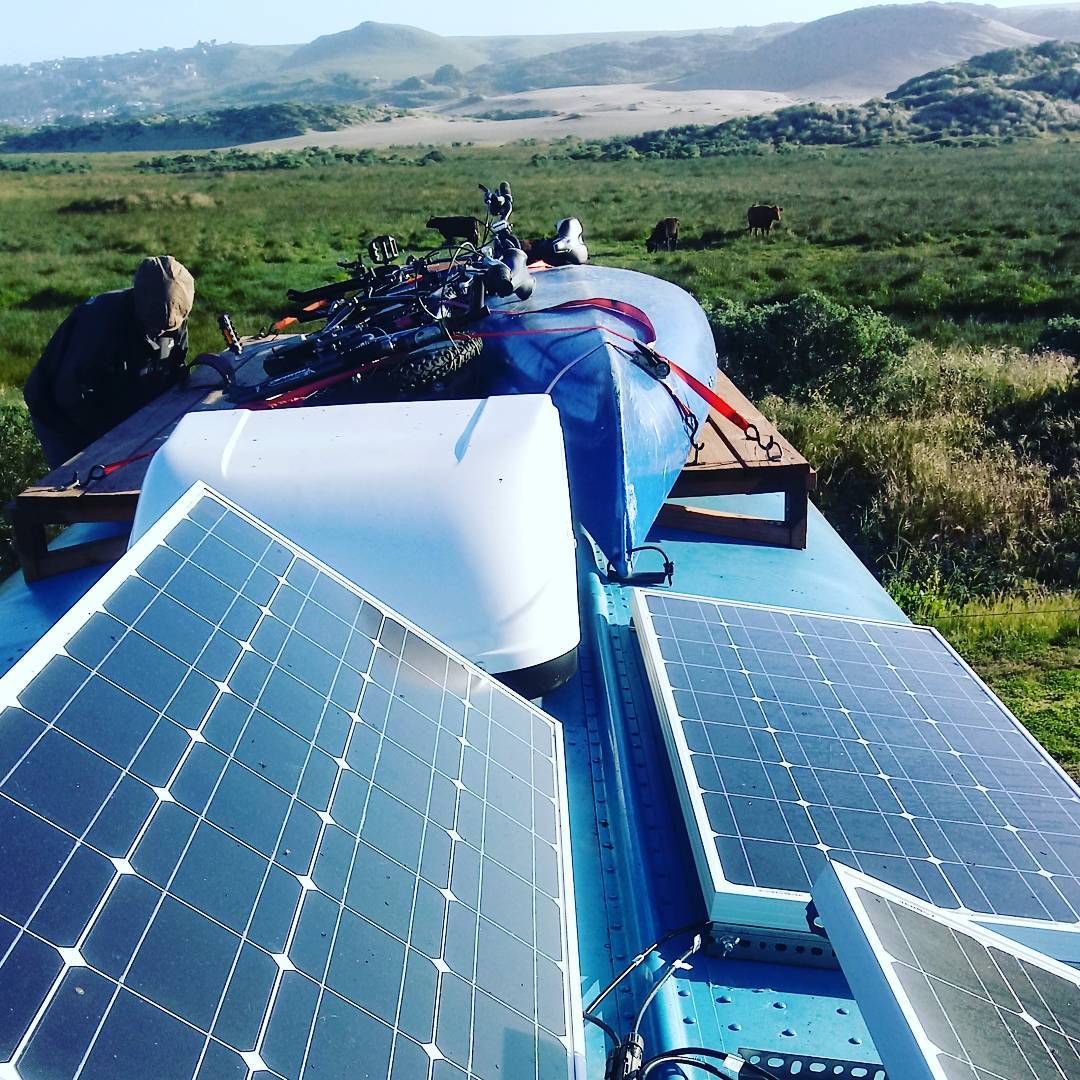
If you’re driving a large camper van or RV, chances are you solar panels will be permanently fixed to the roof of the vehicle.
While this is certainly the easiest way to travel, there are circumstances in which you would want portable panels that you can pull out less frequently.
You can use portable solar panels or solar suitcases for extra power or to charge small electronics when you’re on the go.
Fixed Solar Panels
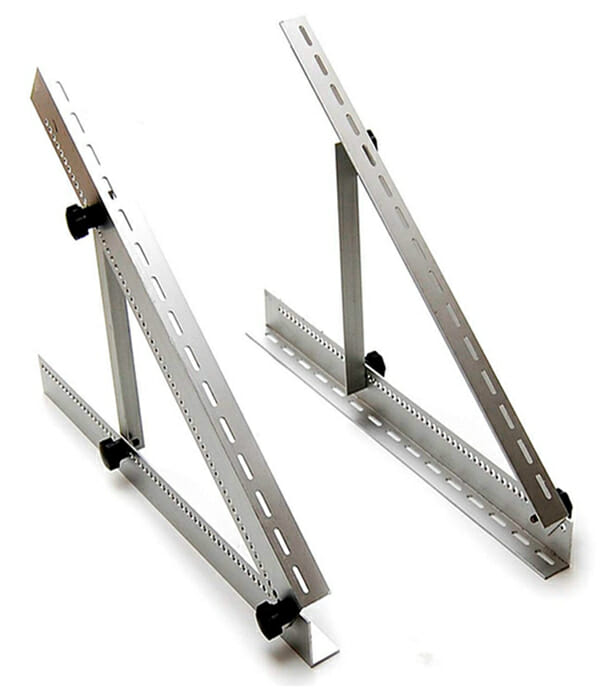
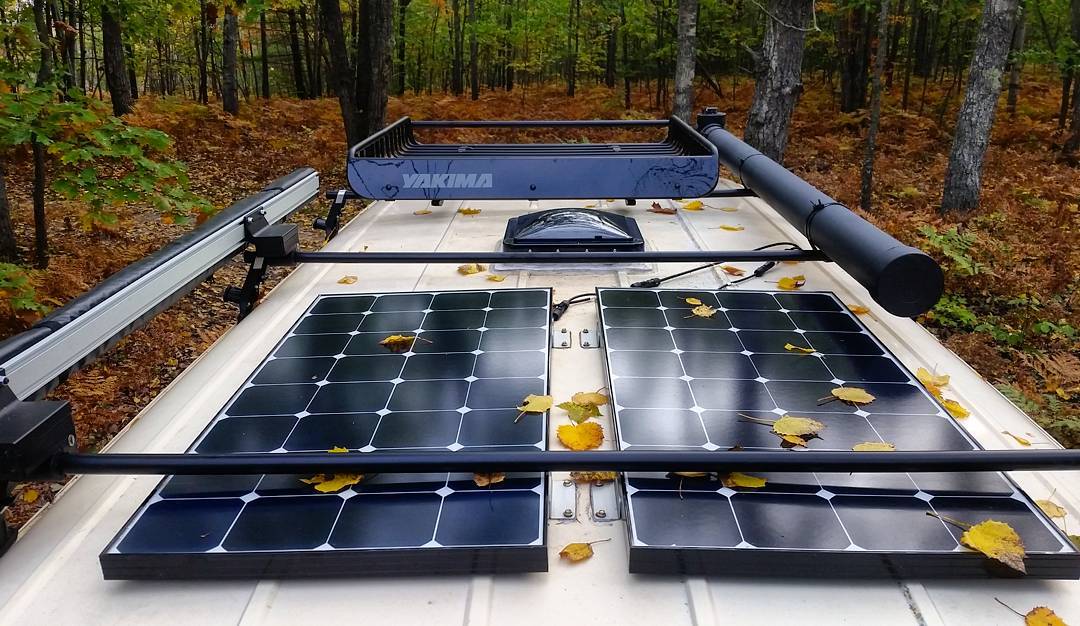
Fixed solar panels are permanently mounted as on top of the camper van. You can add tilt mounts to manually adjust the angle and get the most direct sunlight.
When planning your solar, be aware that solar panels perform best when cool.
Therefore, it is a good idea to design a gap between the panel and the roof for air movement.
Mounting or gluing panels directly to the roof loses important cooling airflow from the underside.
This is another reason rigid panels have an advantage over the flexible kind. Most rigid solar panels come with a bit of clearance built within the frame. That should be a sufficient amount of space to keep your solar panels from getting too hot.
Pros of fixed solar panels:
- They are always collecting energy as long as the sun is out; whether you’re camping or at a laundromat
- They don’t take up valuable interior real estate
- They are less easy to steal
- Better accommodates those who are power hungry and need more than 200W of solar.
- Can double as a shade on your van to help with reducing heat
Cons of fixed panels:
- They are harder to position to get optimum light. Mounts that you can angle help this.
- More involved to plan an install
- Raise your roofline
- Most panels reduce “stealth” to varying degrees
- Reduces your roof layout options (goodbye sunroof!)
- Must park your vehicle in the sun to get power (harder to avoid summer heat)
Portable Solar Panels & Solar Suitcases
Portable solar panels are used as either standalone units or a portable solar briefcase that you store in your vehicle and then pull out while you’re at camp.
These are an excellent choice if your are looking to get a small amount of power like charging phones or a laptop at a campsite.
Pros of Portable Panels:
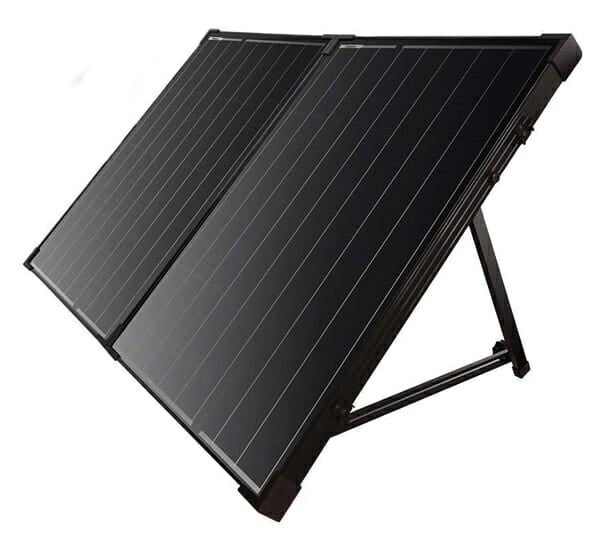
- Portable Solar SuitcaseEasier and cheaper for those who don’t have the means to do more custom work.
- Can position to get the best lighting, opening up options for where you park your van as well.
- Less evidence of living in your vehicle when they are put away
- Easier for a wide range of vehicles (small cars, VW bus, etc.)
- Can harvest sun while your vehicle is parked in the shade
Cons of Portable Panels:
- Need to set up each time you’re at camp
- Takes up space inside the van when traveling, especially anything above 200W
- Won’t be able to charge with solar when running errands
- Not great for city dwelling
Cons of Portable Panels:
- Need to set up each time you’re at camp
- Takes up space inside the van when traveling, especially anything above 200W
- Won’t be able to charge with solar when running errands
- Not great for city dwelling
Solar Panel Cell Type
Monocrystalline vs. Polycrystalline vs Amorphous Solar Panels
This is what the solar gathering cells of the panel are actually made of.
You will hear that one type is more “efficient” than another, but that mostly determines the size of the panel.
Once it is in your hands, 100W panel is 100W no matter the technology. Look at the dimensions of the specific panel make sure it will fit and forget about the efficiency.
Monocrystalline panels are the most efficient. They take up less space, but are usually a little more expensive.
Polycrystalline panels are cheaper and bigger per watt. They share the same longevity and durability attributes as monocrystalline panels. You really can’t go wrong with either option as long as you take measurements and make sure everything fits.
Amorphous panels are quite a bit different from the other two. They are significantly less efficient- taking up more weight and space- and are more expensive per watt.
Amorphous panels are the best in cloudy weather and not as severely affected by partial shade as the other types.
These panels are also quite durable, even when flexible, so you can often see them sewn into backpacks and cloth items.
The best solar panels for a camper are Monocrystalline or Polycrystalline
How Many Camper Van Solar Panels Do You Need?
To determine this, first you need to find out how much power your electronics use. We built a camper van solar calculator to help you size your system.
Use the calculator to input each of your electronic devices. It will then give you an estimate of your solar system size, battery requirements, inverter size and charge controller size.
You might find that your solar panel needs are too big or too expensive once you run the numbers. This is much better to know in the planning stage than when you’re on the road! You can make adjustments to your expectations or usage until it fits within your goals.
How To Make Your Solar Panels More Efficient
Weather conditions
Once you have installed a solar panel, weather is going to be the biggest concern (and major headache) when it comes to collecting power.
Cleaning your panels is important. Snow and dust can greatly reduce the amount of power that you gather. Be sure to check weekly that your panels are free of dirt and debris.
Angle of solar panels
A tilt mount will allow you to adjust rigid solar panels to face the sun directly during sunrise, sundown, and when the winter sun is low in the sky. If you have the budget and space, tilt mounts can increase your solar power capacity by as much as 25%, as long as you adjust them properly. Portable solar panels are already tilt-mount by design!
Flexible solar panels cannot really be individually tilted unless you mount them to a frame- effectively making them a rigid panel.
Shade
Another big thing to know about panels is that most solar tech is very sensitive to shade. Each of the little squares on your panels are wired in a way that if one of them is shaded, the whole row can’t produce energy.
Because of this, you can reduce your energy produced by up to 90% if a certain 10% of the panel is covered.
This is important when placing the panels and critical when planning the roof layout of the van. If you have a roof rack, chimney or storage box shading your panels you are likely significantly reducing your energy.
How To Wire Your Solar Panels: Series Vs Parallel
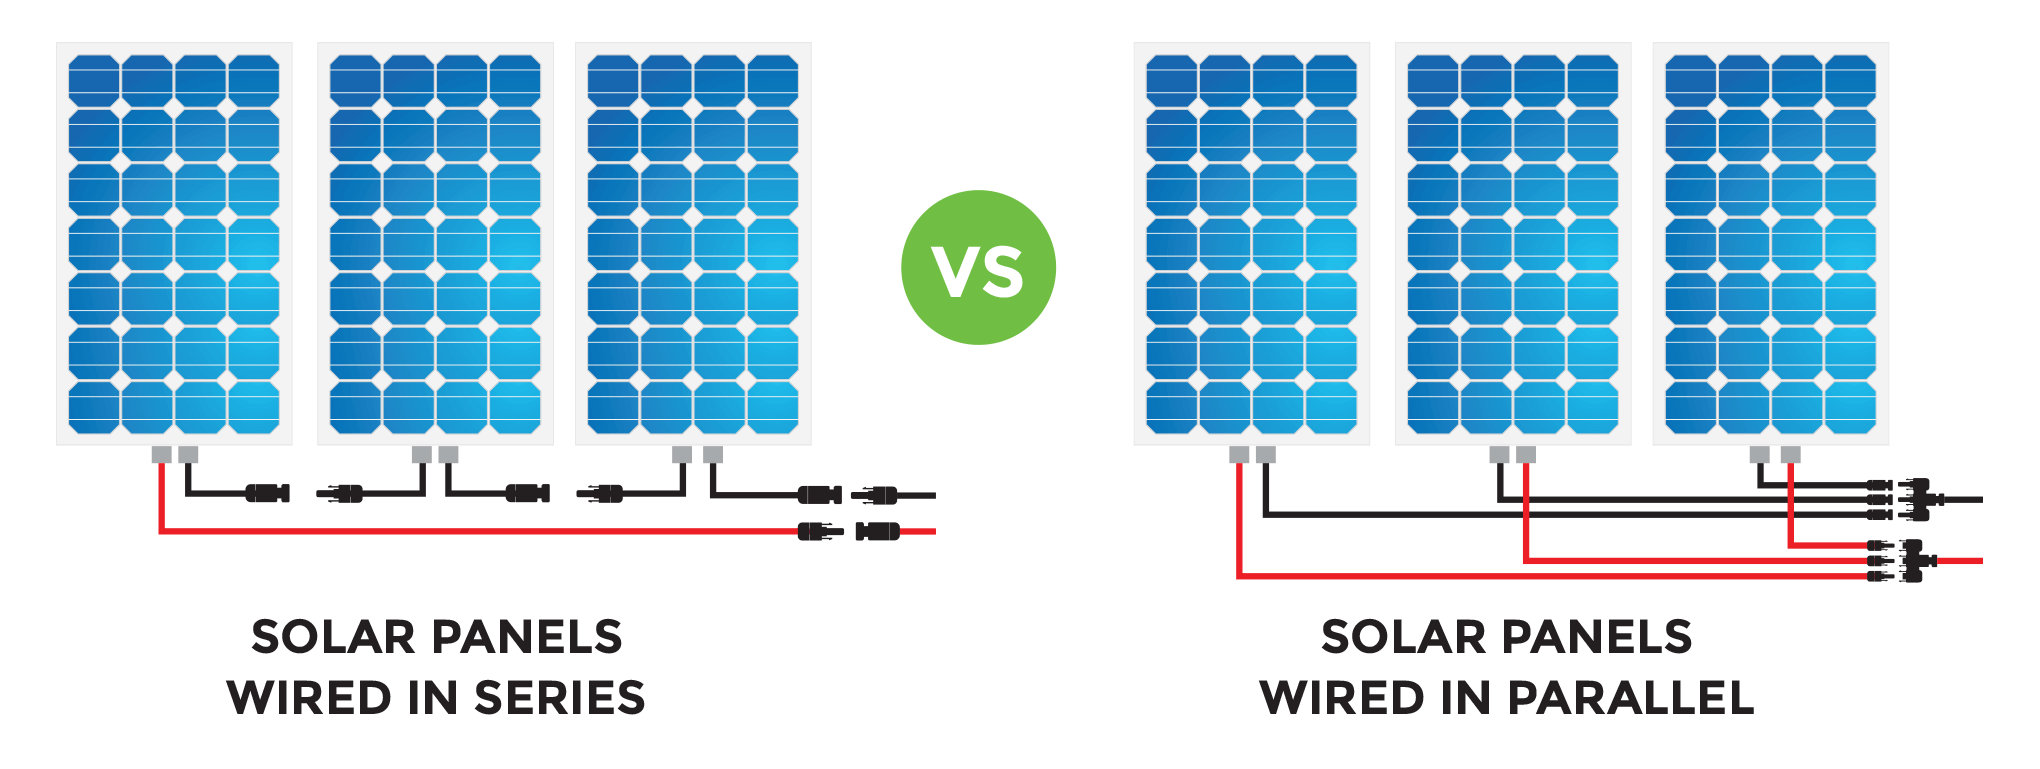
Solar panels can be wired in parallel or series.
Parallel keeps the voltage the same but increases the amperage going into the charge controller. Series increases the voltage but keeps the amperage the same. So which way is better?
In our opinion, wiring in series should be the go-to setup due to less complexity and higher efficiency. If you’ve got a small system and PWM controller, then wiring in parallel is better – just make sure you fuse everything properly.
- Read the pros and cons: Series vs Parallel wiring for solar panels
How To Install Solar Panels on Your Camper Van
To install a full DIY solar panel system you need a few components: solar panels, a battery bank, charge controller, and an optional inverter. Our electricity main page has tips on where to find these items and how to size your system.
Solar Panel Installation Wiring Diagrams
We’ve put together a few solar panel wiring diagrams to help you get started with your system. Use these wiring diagrams for reference on how to lay out each component.
- 100W solar panel wiring diagram
- 200W solar panel wiring diagram
- 300W solar panel wiring diagram
- 400W+ solar panel wiring diagram
Solar Panel Buying Guide
Best Rigid Solar Panels For A Camper
Solar panels are relatively simple devices, so the variation in quality is minimal.
Renogy is one of the most well-known manufacturers of solar panels for small applications. One of the best things about their panels is the long warranty. They offer a 5 year warranty on material damage and a 25 year warranty on solar output. They also have excellent customer service compared to other brands in their price-point.
| Renogy Mono | Renogy Poly | Renogy - 160P |
|---|---|---|
| 100W | 100W | 160W |
| Monocrystalline | Polycrystalline | Polycrystalline |
| 47.3 x 21.3 x 1.4in | 39.7 x 26.7 x 1.4in | 58.3 x 26.5 x 1.4in |
| 16.5lbs. | 16.5lbs. | 25.4lbs. |
| Check Price | Check Price | Check Price |
Renogy panels are designed specifically for campers and boats. They are lightweight and have pre-drilled holes for mounting.
These panels have a sturdy aluminum base that allows you to use them as either portable panels, or mounted on the roof.
One of the benefits of the aluminum framing is that it keeps the solar cells themselves raised off the roof just enough to get a proper air flow. This will keep the panels cooler and increase both their efficiency and lifespan.
All of the components that come with these panels – from the junction box to the MC4 connectors – are waterproof. That means you can travel in all weather conditions without fear of system failure.
Renogy sells panels in a variety of sizes so you can find a configuration that fits best with your roof. Monocrystalline panels have a smaller footprint than polycrystalline panels.
Alternative brands
With all of that said, most small panels have pretty similar features and hardware. Each of the following brands have reasonable products that we wouldn’t hesitate to use on our own system:
Installing solar panels on your camper
Installing rigid solar panels on your camper van will require a few pieces of mounting hardware and a handful of holes. Fortunately, the process is relatively simple and won’t do a lot of damage to your rooftop.
Z-Bracket Mounts are one of the easiest ways to hold your panels in place. You can attach them to roof rack rails or directly on top of the roof.
To get a proper seal, place a strip of Eternabond tape beneath the bracket and fill the mounting holes with a dollop of lap sealant before tightening the hardware down.
If you’re installing panels on a fiberglass roof: substitute the included small washers with larger ones (known as fender washers) on both sides of the fiberglass to spread the load and prevent cracking.
Adjustable tilt mounts can get you better efficiency on the roof, or work as a stand if you are using portable panels. With an adjustable tilt mount, you can install solar panels with or without a z-bracket.
Solar cable glands bridge the gap between the roof and the interior of your van. They are small, weatherproof covers that you can run solar cables or other wires through. They can be attached with glue, sealant or screws.
Lap Sealant should be used to weatherproof your install. Seal any remaining gaps or holes in your rooftop with this to prevent future leaks.
Best Flexible Solar Panels For A Camper
There are a number of brands that make flexible solar panels specifically for campers. Commonly, these panels can bend up to 30 degrees making them a good choice for curved surfaces like teardrop trailers or boats.
They are also lightweight and are much easier to install than rigid panels.
For the best flexible panels, we recommend ALLPOWERS, Renogy and Suaoki brands. They share many of the same features including a decent warranty, high efficiency, and resistance to extreme weather.
| Renogy | ALLPOWERS | ECO-WORTHY |
|---|---|---|
| 100W | 100W | 160W |
| 248 degree bend | 30 degree bend | 30 degree bend |
| 47.3 x 21.3 x 1.4in | 21.375 x 41.375 x .09in | 52.56 x 26.38 x .08in |
| 4lbs. | 4.7lbs. | 5.07lbs. |
| Check Price | Check Price | Check Price |
Installing Flexible Solar Panels On A Camper
With the right materials, flexible panels are quick and easy to install on your camper. They will only require one hole in the roof to run the wires through to the charge controller.
To install flexible panels, we recommend using a high strength adhesive like Eternabond tape. Eternabond roof tape is waterproof and weatherproof down to -20°F. This roof seal is made for campers and sticks to metal, roof flashing and EPDM.
Eternabond tape is sticky on one side, so you can run it along all four edges of the flexible solar panel to anchor it down.
Alternatively, 3M VHB tape is a weatherproof, double-sided sticky tape that can be placed right on the back of the flexible panels to mount them to the roof.
Before mounting, make sure the rooftop is fully cleaned. Remove and debris, wipe it off with rubbing alcohol and let the surface dry completely.
The roof tape can be cut to size with a regular pair of scissors. Simply peel and stick. Be aware that these are strong adhesives and will be extremely difficult to remove after its been bonded. Work through the process slowly and carefully.
Do not try to cut costs with mounting materials. We have seen horror stories of DIY builders attaching their flexible panels with Velcro only to see them fall off and crack on the first drive.
The last step is running the wires to the charge controller inside. This may require drilling a hole in the roof. After running the wires through, cover the opening with lap sealant for a watertight seal.
Best Portable Solar Suitcases
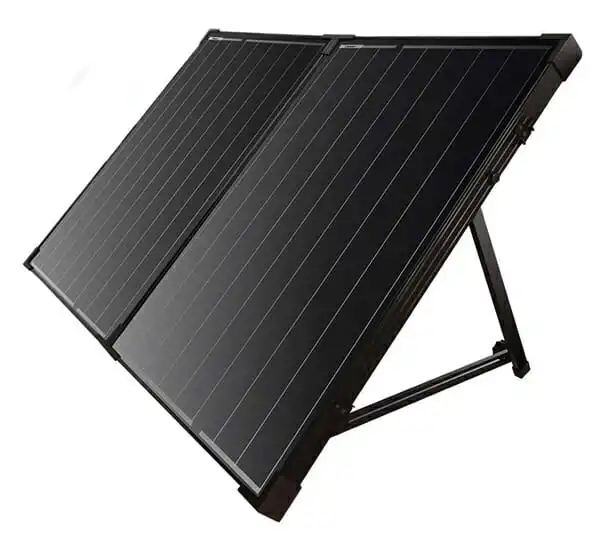
Solar suitcases are an easy way to charge electronics when you’re camping. They often come with their own charge controller and you can hook them into an existing solar set up.
Portable solar suitcases typically fold open like a book and have handles making them easy to carry. They often come with their own stand built in which allows you to angle them towards the sun.
| Renogy | HQST | ACOPOWER |
|---|---|---|
| 100W | 100W | 100W |
| Monocrystalline | Polycrystalline | Monocrystalline |
| 19.9 x 27.2 x 2.8in | 20 x 27.3 x 3.1in | 19.69 x 25.6 x 2.9in |
| 20A Charge Controller | 20A Charge Controller | 10A Charge Controller |
| Waterproof | Not waterproof | Not waterproof |
| Connectors + clips sold separately | Connectors + clips sold separately | Connectors + clips included |
| Tilt stand included | Tilt stand included | Tilt stand included |
| Foldable + Carrying case | Handles / No case | Foldable + Carrying case |
| 10ft. solar cable | 10ft. solar cable | 15ft. solar cable |
| Check Price | Check Price | Check Price |
When choosing which solar suitcase to buy, you should consider the following:
- What is the solar output?
- Is it waterproof?
- Does it come with its own stand?
- Is a charge controller is included?
- Does it have a carrying or protective case?
The number one thing you should consider is the solar output. Aside from this, a protective case, stand and weatherproofing will likely come down to personal preference and price point.
Not all solar suitcases come with charge controllers but most do. With a solar panel and charge controller, all you need is a pair of MC4 connectors and alligator clips to connect them to your battery.

Depending on your setup, you can purchase cable extenders which are relatively inexpensive. When planning, remember that there is a voltage drop relative to distance, so more isn’t better.
Portable solar suitcases can be installed and connected just like regular rigid solar panels.
There are a number of reputable companies that make portable solar suitcases for camping. Our top choices are Renogy, HQST and ACOPOWER.
Solar Generators
Before closing out, we’d like to give a quick mention to solar generators.
Generators like the Bluetti or Jackery are essentially a solar system in a box. They come with all of the components necessary to build a solar system including a charge controller, inverter and battery. All you need to install are the panels.
Solar generators are the perfect solution for someone who doesn’t want to get deep into wiring and system sizing. They are plug-n-play boxes that are safe and require little to no DIY solar power knowledge.
While solar generators do cost more than building a system on your own, they are nearly impossible to mess up and are fully portable for camping and travel.
If you don’t want to worry about wiring, we recommend reading this post on solar generators.

This is fantastic. It sums everything up, and answers all my current questions about solar. Thank you!
Thank you so much! Let us know if you have any unanswered questions! We’re hoping to add even more info in the future 🙂
Just a question. If you are driving down the road, do you need Solar Panels on top? I have a Class C and my alternator is charging the batteries when I’m driving down the road… I think
Charging with alternator will give you more power than most solar setups. So, no, definitely not needed. When solar is great is if you’re stationary for a few days!
Just a heads up, I think the last line of the first bullet point under “Wiring in Parallel” should be parallel not series, as you covered wiring in series prior.
Thank you for the very informative article! Keep up the great work.
Mark- we certainly worded that in a weird way. Thanks for the heads up!
Thank you so much to share with us so many interesting infos about solar cells on a camping car roof. Now I have to calculate how many watts are needed on my motorhome…not easy…
Hi Kate & Ian, is this correct??? >> I saw a video where a solar guy said if you’re running 2 or 3 x 100 watt panels for example, and add one more smaller, say only a 50 watt panel, then ALL of the panels would only be able to output the lower amount (in this example they all become 50 W each). Is he correct and why? Or would that depend on whether they’re wired in series or parallel? Super article thanks!!
Ryan,
The youtube guy is partially correct for exactly the reason you suspected. If you’re wiring panels in parallel, then to get the maximum output they should all be the same voltage. If you’re wiring in series, then to get the maximum output they should all be the same amperage. So, if you have a whole bunch of different panels, but all at 12V, then you won’t get reduced output as long as you wire them in parallel. For instance, if you have a 60W, 12V panel and a 100W, 12V panel, you end up with a 160W, 12V input by wiring them in parallel. If you were to wire them in series, you’d end up with a 120W, 24V panel (because the 100W can only output 60W due to the reduced amperage from the 60W panel)
Here is a more lengthy article on the topic:
http://solarpanelsvenue.com/mixing-solar-panels/
Such an informative write up. Solar energy/panels are appreciated more by many people nowadays because of its benefits and usage variety. Thank you for sharing this.
Thanks for writing this detailed guide. My partner and I used to travel in a camper van in the US for three months and then in New Zealand for a month. I would have loved to have a solar panel installed back then. Hopefully, we can on our next trip! Will be saving this as a reference.
Great to hear! Let us know if there are any subjects that you want to know more about and we’ll put them on the calendar.
Thanks for the write up. Do you think it is feasible to charge a 150ah AGM battery on just solar alone? We have a 2018 Mercedes Metris with a “smart alternator” and are having a tough time finding the best battery to battery charger. I was thinking in the meantime to just go with a larger battery and see if solar would suffice on its own. We are weekend warriors so we would only run the electric for a day or two and then let it sit for the rest of the week. Let me know what you think… Thanks
Yes, if it has all week to charge solar should be plenty to charge your battery for the weekend. You might also want to look into the Cole Hersee battery isolator because they have options that work with the new smart alternators.
Thanks for these instructions! We are using eternabond cut to 2.5” width and the 3M VHB tape in your link on a Renogy flexible 160 W panel. I noticed you mentioned using one or the other. Have you found Eternabond to be sufficient alone? Thanks again! Love your whole site, many helpful tips!
JUST BEGINNING TO RESEARCH SOLAR PANELS FOR MY CONVERSION VAN. YOUR ARTICLE HELPS GREATLY. STILL NEED TO LEARN MUCH MORE ABOUT WHAT I CAN USE THE STORED ELECTRICITY FOR…..WORTH THE EFFORT OR WILL MY CADMIUM BATTERIES WORK AS WELL???? THANX, BILL
Man, I would really love some of these solar panels for our DIY conversion van. Would really add a whole new dimension to it. Thanks for the guide!
Great write up as usual. There are so many solar panels on the market these days for RV / camping use but many options are not waterproof. In my opinion this is a must have for that unsuspecting rain shower that could otherwise cause hundreds of dollars of damage to the solar system.
Flexible panels are trash, they get extremely hot, lose efficiency and have very short lives. The silicon can’t cool down when it’s encased in a transparent polymer, it may as well be inside a greenhouse and as they are fixed to the van roof, no air flow for cooling under the panels.
Hey ya’ll, I had a quick question. Just recently bought a ford transit cargo and am building it out from scratch. Would you recommend installing the solar and ventilation first before the insulation and walls/ceiling? Or is that something you all would do after in order to have the anchors of the solar panel mounts accessible through the ceiling? I’ve been trying to look it what people have done but google isn’t giving me any straight answers haha.
Thanks!
Huge thanks for this article that pretty much summed everything I needed to know about the subject so far. Respect!
These links in the page above are broken:
100W solar panel wiring diagram
200W solar panel wiring diagram
450W solar panel wiring diagram
Hey Chris, thanks for pointing that out. I’ve got the links updated now!
I never knew that electricity prices are maximized during daylight hours! My husband and I have been considering installing solar panels to help us be more efficient with our energy consumption. Especially since we live in a sunny climate, we think it could be a great investment. Hopefully we could find some great panels and a dependable installation company. Thanks for the info!
What a fantastic post! This is full of useful information. I liked your article. You have explained everything in detail. I will keep track of your new posts. Keep doing it. Thanks!
I have chosen Renogy 100 Watts 12 Volts Monocrystalline. The good news is that they work very well. Looking forward to the next helpful posts. Thank you!
Excellent write-up!
However, is this possible to cover my entire house with solar panels?
I think Renogy is the best one. By the way thanks for the informative post.
As always amazing read, lots of useful information about solar panel and a lot of work put in from your side. Thank you for the great blog! It’s a big help and will increase awareness of solar power to everyone..
Thanks for the tutorial.Renogy is the best in my opinion on the matter.
Excellent information, aside from the Renogy recommendation. Based on experiences of others I know, the electronic hardware is subpar quality, and several have been left in very dangerous weather situations when the system shut down and low battery voltage would not allow it to restart, even though power was being produced…causing hours of no power at all. I will pass. There are far better products at the same price.
I understand your point, but I have to say that I’ve used Renogy for more than 3 years now and haven’t met any issue until now.
Hi there, Very informative post, thank you for taking the time to write this all out! I think it is important to properly maintained to extend their lifespan. Regularly monitor your solar panel and gently clean them when they have accumulated a layer of dust, dirt, and residues.
I purchased two Renogy 100 watt Flexible panels on the roof of my Road Trek Van. The 100 watt unit was more than adequate to keep our battery charged. We used an electric water pump, fan, lights and gas heater with a fan, and never saw our voltage drop over the week.
Amazing and in-depth article. I just have one query, if I choose to flexible solar panels which are more relatively fragile than rigid ones, are there solar panel accents or supplementary materials that I can use to protect them from potential damage? Or it is really an non-bargainable trade-off to these types of panels. Thanks!
I am very happy with this Renogy 100W Extremely Flexible Monocrystalline Solar Panel. I use it to charge my Webetop 155Wh 42000mAh Portable Generator Power Inverter Battery 100W. I love it because it has unbeatable flexibility, capable of producing a 248-degree arc. It is exceptionally lightweight at about four pounds, which helps me easily carry it around and install it by myself. It is also 95% thinner than traditional solar panels, giving it a stealthy appearance on my RV. While it is lightweight, it can resist 5400 Pa of snow and 2400 Pa of strong winds. Its junction box is also IP68-rated. It makes me feel more comfortable about the product’s safety and performance.
Great article. These flexible solar panels have everything I could ask for in a high-quality panel. It’s durable, makes installation easy with holes, and is super light and flexible. It’s basic yet fuss-free and gets the job done.
I bought several of these Renogy panels in the hopes of building my own camper van solar system, but I found that the power output of the panels was inconsistent. Some of the panels didn’t provide 100 watts as promised, but a bit lower than that at around 80 watts.
Great article. I’ll read more later, but I’ve 99 ram vam van. 19 foot long and live in it in Motana. Year Round. And am always looking for improvements or new ideas. Thanks. Van On!