
Best Solar Charge Controllers For Camper Vans and RVs
Solar panels cannot directly charge a battery. To get chaotic energy from the sun into usable energy for your batteries you need to use a solar charge controller.
Most ’12 Volt’ solar panels produce around 16-20 Volts when in direct sunlight. Batteries are finicky, and if they get too much voltage they get stressed and damaged.
A solar charge controller regulates this. Charge controllers can also keep track of roughly how much power is currently in the battery for smart charging cycles.
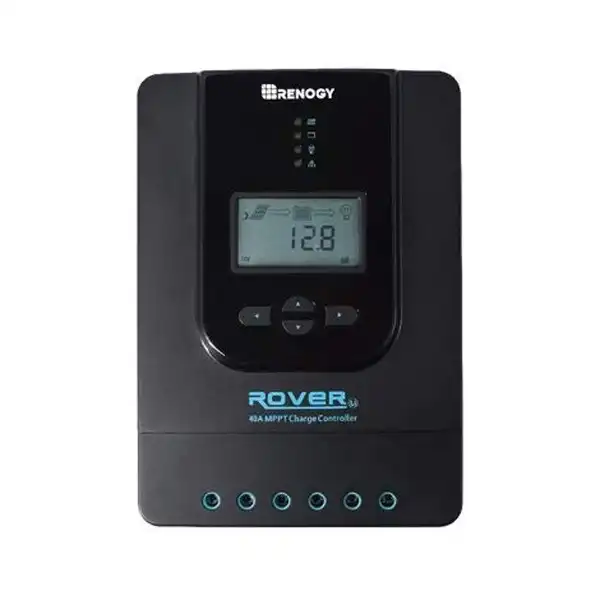
Premium 30A MPPT Charge Controller. Comes in addtional sizes from 10A-100A.
Why Do You Need A Solar Charge Controller?
- Allows solar panels to charge a battery bank
- Produces a safe amount of power to protect your batteries
- Keeps track of how much power is in the battery bank
Types of Charge Controllers
There are two types of solar charge controllers: Standard (PWM) and MPPT.
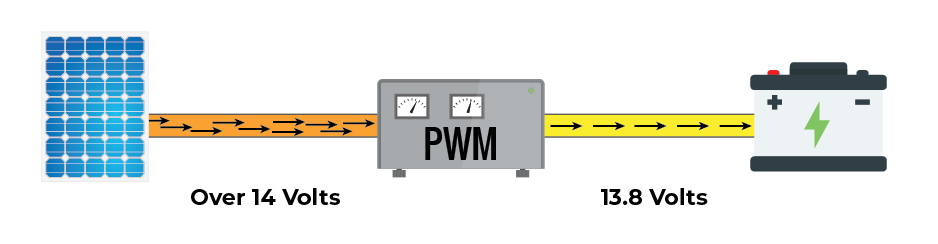
Pulse Width Modulation (PWM): PWM technology is simple and has been used for decades in solar system installs. This set up is cheaper and there are fewer internal parts to break.
When a solar panel produces 18v of electricity, the charge controller has to convert that to a safe 13.8V that is healthy for the batteries. Standard charge controllers will effectively throw away any voltage above 13.8V so you lose some of the energy produced.
Note: If you ever come across an inexpensive charge controller that says something like “MPPT simulating”, it’s just a PWM in disguise. There’s no way to make the internal electronics cheap.
Maximum Power Point Tracking (MPPT): An MPPT solar charge controller is more complex. It changes input Volts from the solar panels to match the output volts needed for your batteries without having to throw much energy away.
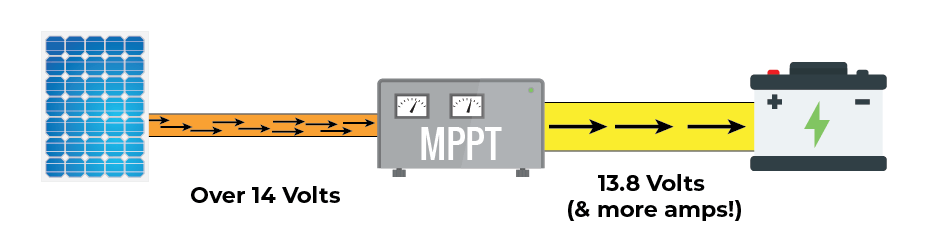
For example, if your panels are producing 18V at 6 Amps, the charge controller will adjust this by dropping the Volts to 13.8 and increasing the Amps to something like 7. Your batteries get the most available power from increasing the amps this way.
Because MPPT controllers can accept higher voltage input, they offer additional benefits when wiring multiple panels together
- Standard charge controllers cost significantly less than MPPT charge controllers, but they are also less efficient.
How To Wire Solar Panels With A Charge Controller
There are two ways to wire solar panels together: series and parallel.
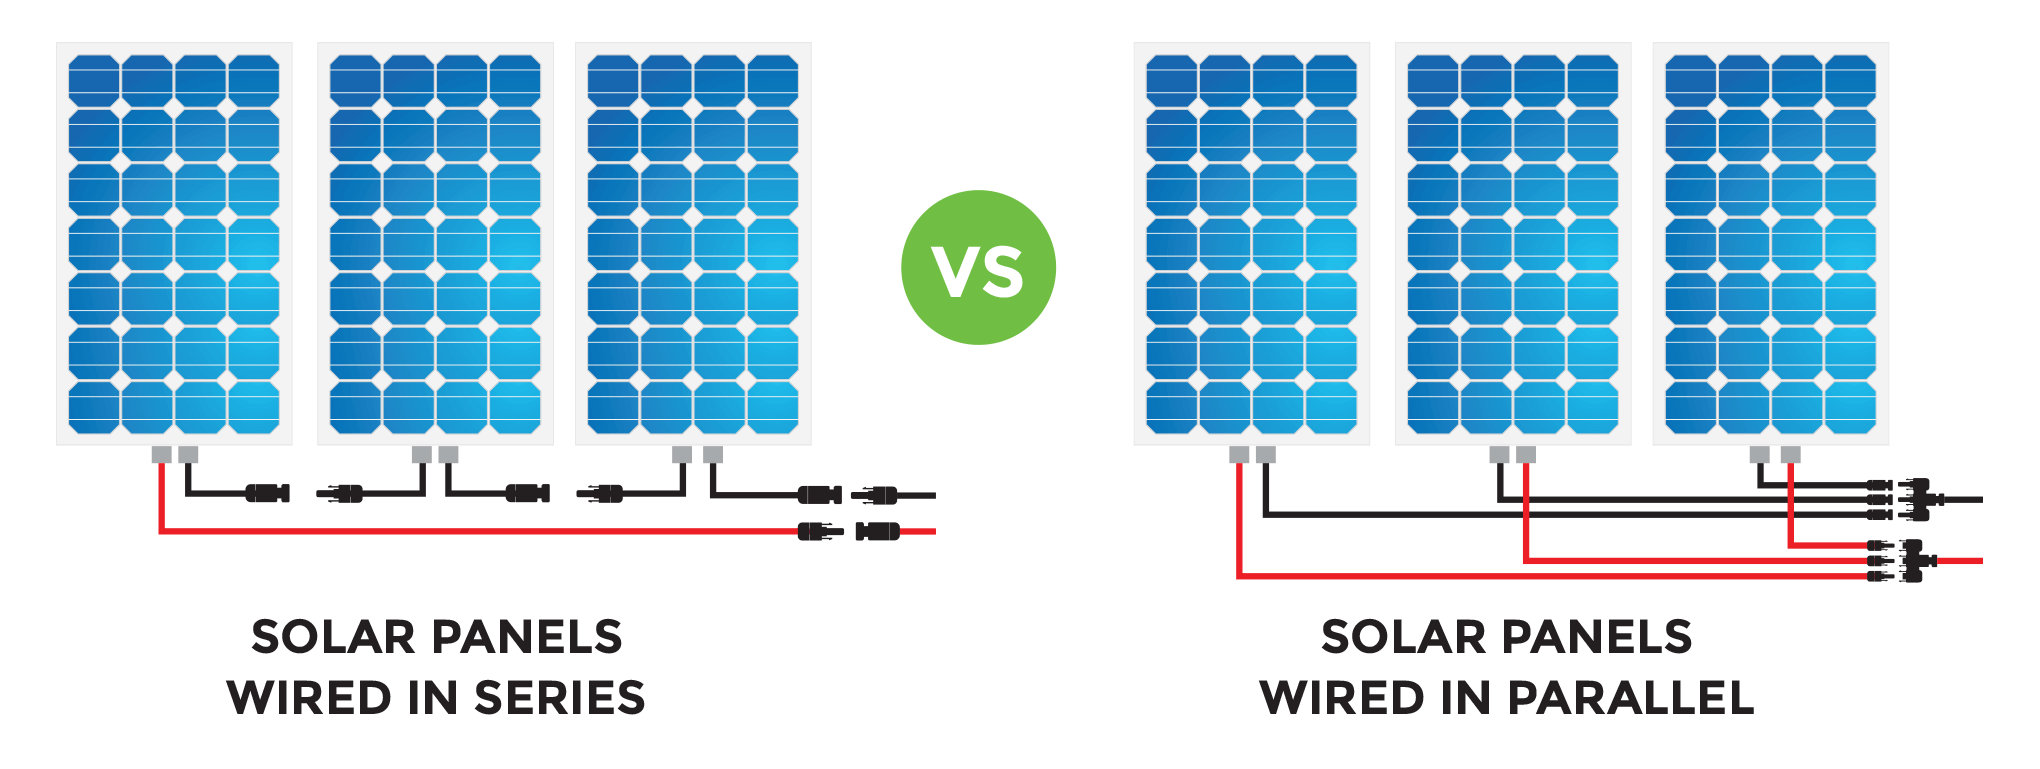
Wire solar panels in parallel if you have a PWM controller; this way you will get more Amps. Keep in mind, panels wired in parallel need combiners, fuses, and bigger wires. All of these things cost more money and time to install.
Wire solar panels in series if you have an MPPT controller. This leads to an input higher voltage and allows the charge controller to figure out the most efficient way to distribute power. No fuses, combiners, or oversized wires are necessary.
There are still plenty of cases where a PWM controller is more economical than an MPPT controller. If you get a 120W panel and a PWM charger, it will be cheaper and produce more energy than a 100W panel an MPPT. This is usually only true for about 600W and less of solar, which makes it quite relevant to van dwellers who only need a small system.
- Learn more about wiring solar panels with these diagrams
- For some further reading and cool graphs, check out this article by mozaw.com
How To Size Your Solar Charge Controller:
As a general rule of thumb, we recommend at least 7.5 Amps for every 100W of solar.
This is our recommendation if you have a 12v battery bank. Getting a larger solar charge controller will have no negative effects other than price. And it will allow you to add more panels later if your setup proves to not be enough.
For example, if you have a 300W panel setup, you need at least a 22.5A charge controller. There is no reason to cut it close, so get the common 30A charge controller size. This is big enough to add another 100W if you find you’re not getting as much sun as you were expecting later.
Tips For Installing A DIY Solar Charge Controller
First and foremost, always connect the solar panels last. You don’t want current running into the controller with nowhere to go! Read the instructions for your specific controller, but here is what to generally expect:
- Install the controller as close to the batteries as possible with enough of a gap for heat ventilation. This reduces current loss. It also helps with controllers that have an internal temperature sensor to have an accurate estimate of battery temp for proper charging.
- Don’t install a charge controller above the batteries. You don’t want any off-gassing to disturb the controller’s electronics.
- Make sure to fuse the (+) wire close to the battery so any system short doesn’t start a fire.
- If the charge controller has an external ground (chassis ground) terminal on it, you should run a separate wire from this directly to the vehicle chassis. This subject gets really complicated to understand as a vehicle is different from most other types of electrical systems. Follow your instruction manual, which will most likely say to do it this way. The basic reasoning for this is that if there is an internal fault (broken bit inside the controller) then electricity still has a path back to the battery to properly pop the fuse.
What Is Load Output (LVD)?
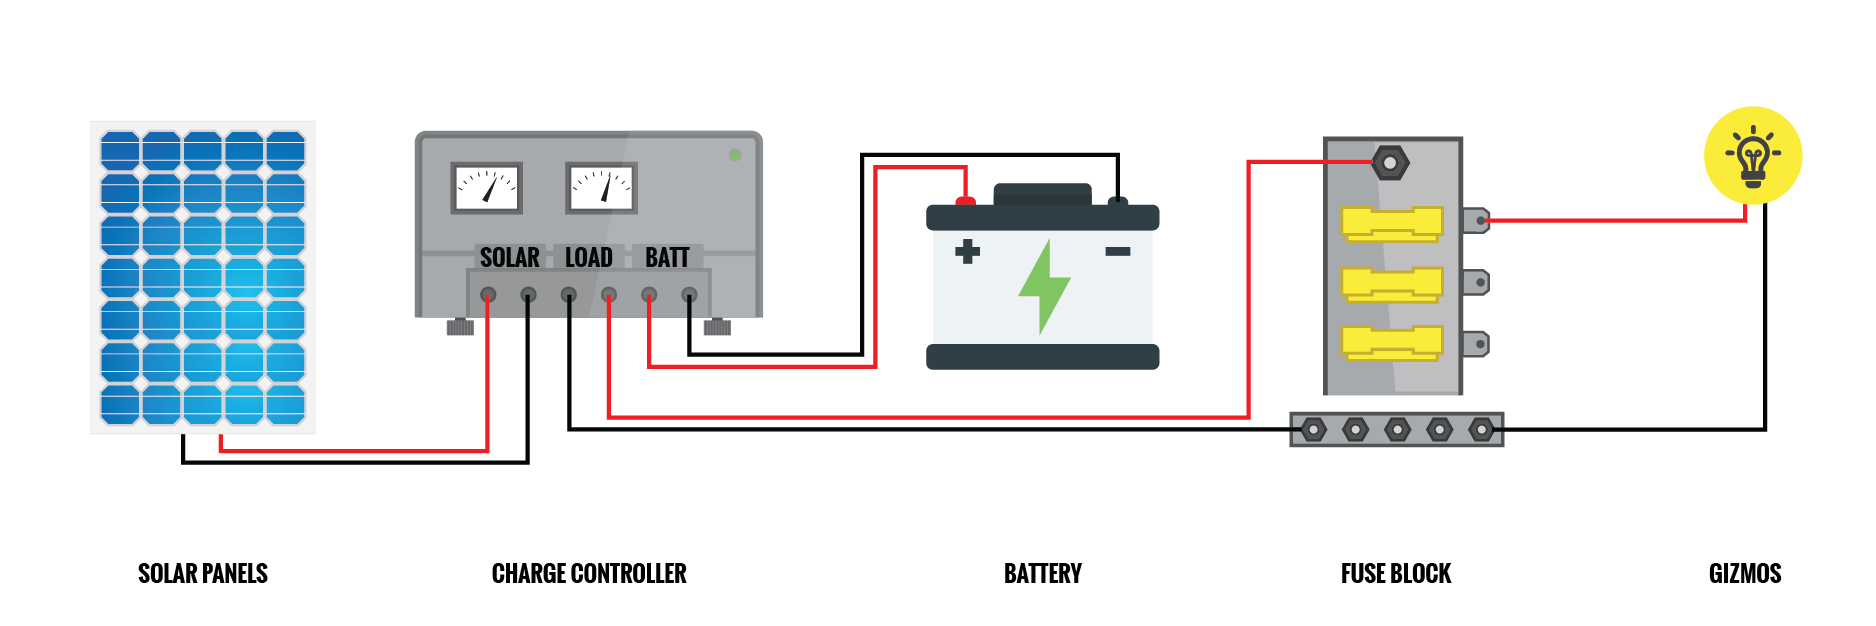
Most charge controllers have three sets of terminals. One set goes to the battery. One set goes to the solar panels. That’s pretty self-explanatory.
The third set usually says LOAD or LVD. This output is designed to be a level of battery protection and there are two schools of thought on this. But first, where do these wires go?
The load output is meant to power all of your small electronics through the charge controller. So you’d have the (+) wire run to a DC fuse box that is connected to your lights, refrigerator, usb chargers, etc. And the (-) wire connects to a bus bar for the return wires of all these electronics.
If the batteries drop below a certain voltage, the solar charge controller will cut power to the fuse box to protect your batteries from being drained further.
Some smart charge controllers will adjust this voltage cutoff if your batteries aren’t getting full charge daily. This is how wiring to the load terminals looks (fuses omitted):
 We don’t find the benefits of this feature all that helpful. Instead, you can wire your fuse box directly off of the batteries, as shown below (fuses omitted):
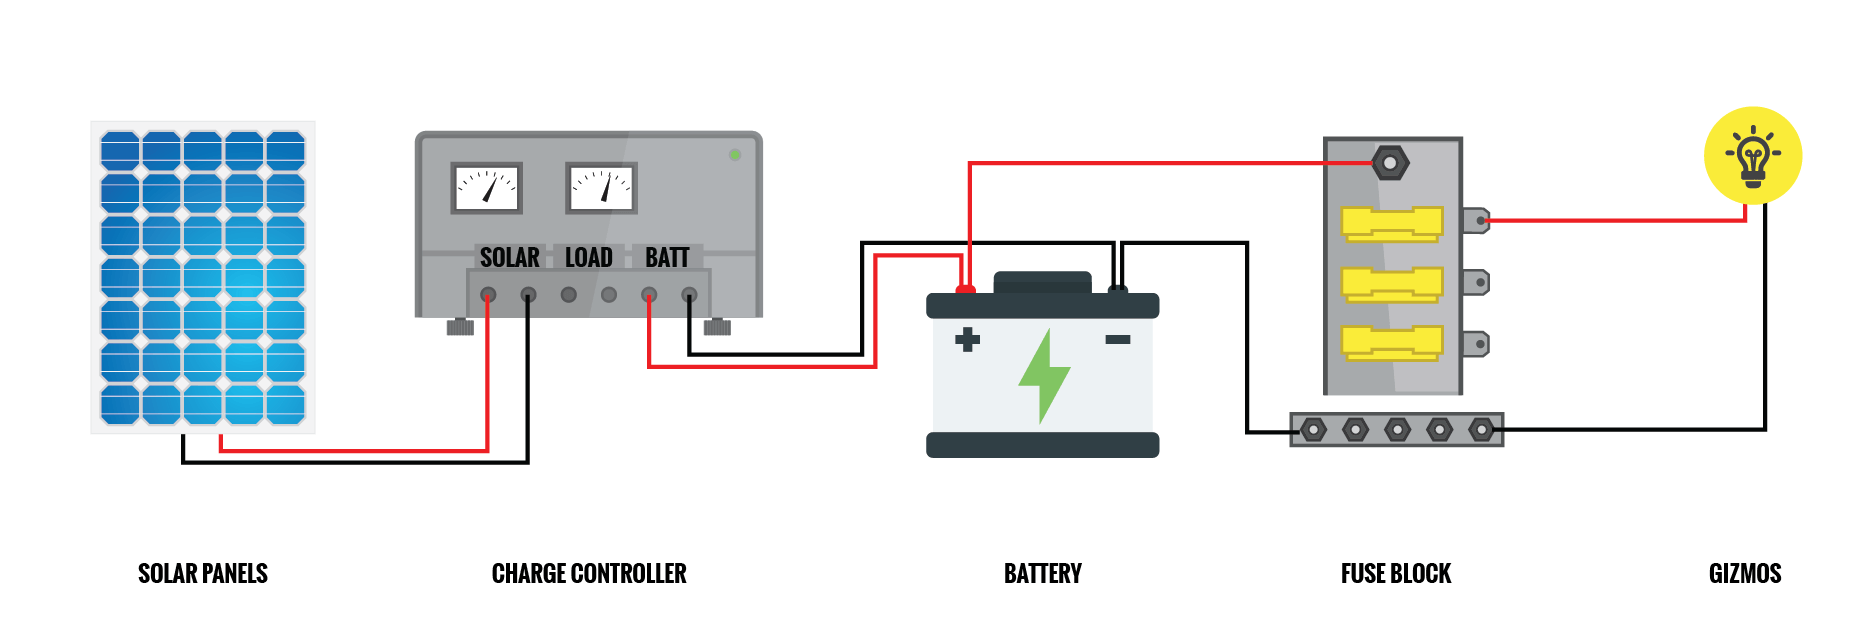
Both ways are just as safe and easy to wire, so you can choose to do it however you wish. Here are the reasons we like it better without the load terminals:
- The charge controller load terminals only work for small powered items. You will not be able to run an inverter through them. So you will usually have things that can drain the battery even if the charge controller cuts them off, which makes the battery cutoff less effective.
- Having power cut to certain items is inconvenient. We have used the load terminals before and having your lights switch off as you’re cooking dinner is alarming and annoying. Because the cutoff is at a 50% battery level, we would have preferred to run the batteries to 45% and get extra power the next day to make up for it. Plus, it feels weird to not have your fridge running when it should be.
- You will always be nearby your solar system, so a simple voltage display in the van will allow you to monitor the battery charge yourself and adjust your electrical usage. It puts you a bit more in charge and you can often predict and adjust well in advance of needing a battery cutoff.
- Larger electronics such as inverters and fridges usually have their own low power cutoff for when the batteries get really low, so you won’t likely kill them without using the charge controller load terminals.
What Is A Solar Ready RV?
Many RV salesman will claim their motorhome is “solar ready.” This can mean any number of things, most commonly:
- Wires connected directly to the battery bank. The charge controller may not be included.
- A small, 10A port connected to a 10A solar charge controller.
In either case, solar panels are not included and the charge controller is undersized or non-existant. Solar-ready RVs are not worth the added expense. If you want to do a lot of boondocking off-grid, you should invest in an RV solar panel kit with an appropriately sized charge controller.
The Best Solar Charge Controllers
There are a number of reputable brands that produce both solar panels and charge controllers. If you purchase a solar panel kit, these often come with charge controllers included that are already compatible.
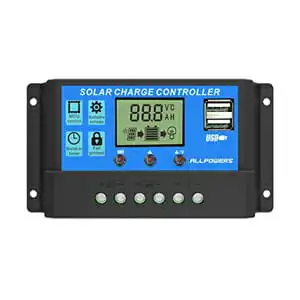
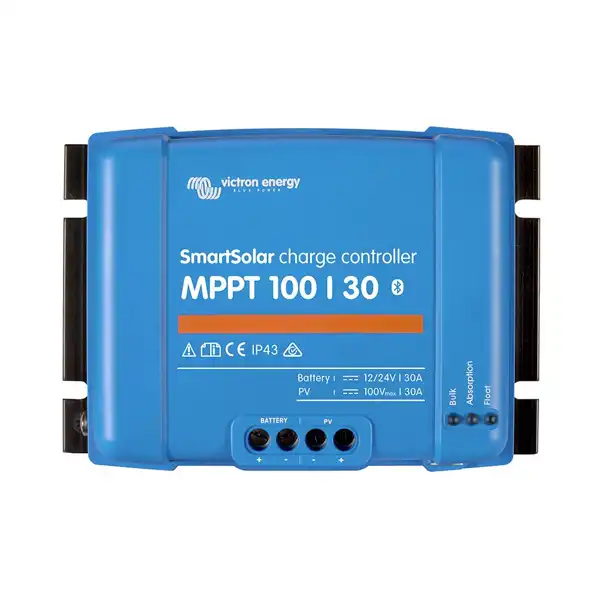
Some of our favorite charge controller brands are Renogy, Victron, WindyNation, HQST, GoPower! and ALLPOWERS.
Very useful info, thanks! I have installed a 200 watt 12 volt solar system myself using a Renogy MPPT 20 and I tend to agree with everything you’re saying here, plus you explained a few concepts that I haven’t understood as well from all the other sources.
Haha, hey man, the Amazon link for the Renogy 30A MPPT controller at the top of this page actually takes you to the Battle Born 100Ah. Just fyi!
Thanks for the tip! We’ve just updated this.
The all powers mppt link takes you to a pwm controller
In your controller diagram you show the BATT as being the far right terminals of the PMW controller. In 97% of the 10-20 amp PMW controllers I have seen, the BATT is the center set and the LOAD is the far right. You should label your ports on the controller diagram so someone doesn’t put the battery in the LOAD port on the common chinese controller. (IMO)
You have explained nicely every thing .Sooper .can you briefly reply me in my email a little doubt regarding solar installation?
In my home I am having one 1.5kw solar inverter with 8amp charge controller.and a 165 ah battery system.I want to put 3 solar panels of 24v 330watts capacity and a 60amp charge controller along with one more 180 ah solar battery.what other things I have to purchase .kindly respond.
Thanks for information. But I think in PWM, considering the controller directly connects the solar panel and battery, this results in certain flaws. To begin with, it reduces the voltage generated by the solar panel, thereby lowering the availability power.
I have 800 wats in parallel
What size of fuse and power controller I have to install?
Hi, please tell me what battery to have for a 380w solar panel, I have a refrigerator that consumes 55-60w / H, the refrigerator is like a compressor. Thank you
Thanks for the article!
I really like the automatic charging off and on of the cell over periods of time of these solar charge controllers. After trickle charges are insinuated in the final stages, charging automatically ceases and stops the battery module functions, altogether. This eases my burden as a consumer from continually looking out for my setup to save the battery health.
Renogy sent me the RS232 protocol data after I asked. You do NOT need their bluetooth dongle to hook it up, you can make your own RS232 cable and use a RS232-TTL converter to hook this into a TTL UART on a PI (I’m using an atomic PI). Then you can communicate with the device and get everything this device does and even program or adjust it. I created a program to relay the data to an MQTT service so I can remotely monitor the battery and panel data. For the price of these units, that’s a really great deal for an Off-the grid but connected (wifi, in my case) shed or chicken coop.